Complete Indoor Snake Plant Care Guide: From Placement to Maintenance
Published on: December 3, 2025 | Last Updated: December 3, 2025
Written By: Lena Greenfield
Are you wondering how to keep your snake plant thriving without constant fuss? You might be worried about common mistakes like overwatering or picking the wrong spot that could harm its growth.
Having nurtured snake plants for years in my own home, I’ll guide you through every step in this article, covering ideal placement, proper watering, light needs, soil choices, repotting, and easy maintenance routines.
Finding the Perfect Spot for Your Snake Plant
Decoding Light for Your Sansevieria
I’ve tested snake plants in nearly every corner of my home, from a dark north-facing bathroom to a blazing south window. Snake plants are champions of low light, but they truly thrive in bright, indirect light. Think of the spot a few feet back from a sunny window where the sunbeams don’t directly touch the leaves.
If your only option is a dim room, your snake plant will survive, but its growth will slow to a crawl. On the flip side, too much harsh, direct sun can actually scorch the leaves, leaving unsightly brown or yellow patches. Quick tip: If you see bleached, crispy spots on the leaves, it’s getting too much direct sun.
- Bright, Indirect Light (The Sweet Spot): Near an east or west-facing window is ideal. The plant will grow steadily and maintain vibrant color.
- Low Light (The Survivor Mode): A north-facing room or a spot far from any window. The plant will live but won’t grow much.
- Direct Sun (The Danger Zone): Right in a south-facing window. This can lead to sunburn, especially during hot afternoons.
Ideal Temperature and Humidity
Your home’s normal comfort zone is a paradise for a snake plant. These plants prefer the same temperatures you do, ideally between 70°F and 90°F (21°C and 32°C). I keep mine in my living room and home office with no issues.
The real enemy is the cold. Anything below 50°F (10°C) can cause serious damage, so keep them away from drafty windows and doors in the winter. As for humidity, here’s the best part: they don’t care. Snake plants handle the dry air of heated homes in winter and the mugginess of summer with equal ease. You never need to mist them. For more, check our complete guide on how often to water snake plants indoors. It explains the proper watering schedule and how to gauge soil moisture to decide when to water.
- Perfect daytime temperature: 70-90°F (21-32°C)
- Keep away from temperatures below 50°F (10°C)
- Average household humidity is perfect; no adjustments needed
Watering Your Snake Plant the Right Way
This is the step where most people go wrong, but it’s simple once you get the feel for it. Overwatering is the number one killer of snake plants, as it leads to root rot. I learned this the hard way with my first snake plant years ago. The soil must dry out completely between waterings.
Forget the calendar. Your plant’s thirst depends on the season, the light it gets, and the temperature of your home. Stick your finger about two inches into the soil; if it feels dry, it’s time to water. If you feel any moisture at all, wait a few more days and check again.
Creating a Watering Schedule That Works
While I don’t recommend a strict schedule, a general rhythm helps you remember to check. This follows what you’ll see in the often-cited general guide to watering indoor plants. In the warmer, brighter growing season (spring and summer), you might water every 2-4 weeks. When the days get shorter and cooler in fall and winter, your plant will drink much less, sometimes needing water only once a month or even less. For best results, adjust based on soil moisture and your plant’s specific needs.
When you do water, do it thoroughly. Take the plant to a sink and pour water evenly over the soil until it runs freely out of the drainage hole. Let it drain completely before putting it back in its decorative pot. Quick tip: A pot with a drainage hole is non-negotiable for preventing soggy soil.
- Check the Soil: Insert your finger 2 inches deep. Water only if it’s completely dry.
- Water Thoroughly: Soak the soil until water runs out the bottom drainage hole.
- Let it Drain: Never let the plant sit in a saucer of standing water.
- Wait and Repeat: Wait until the soil is bone dry again before the next watering.
Soil and Potting Essentials
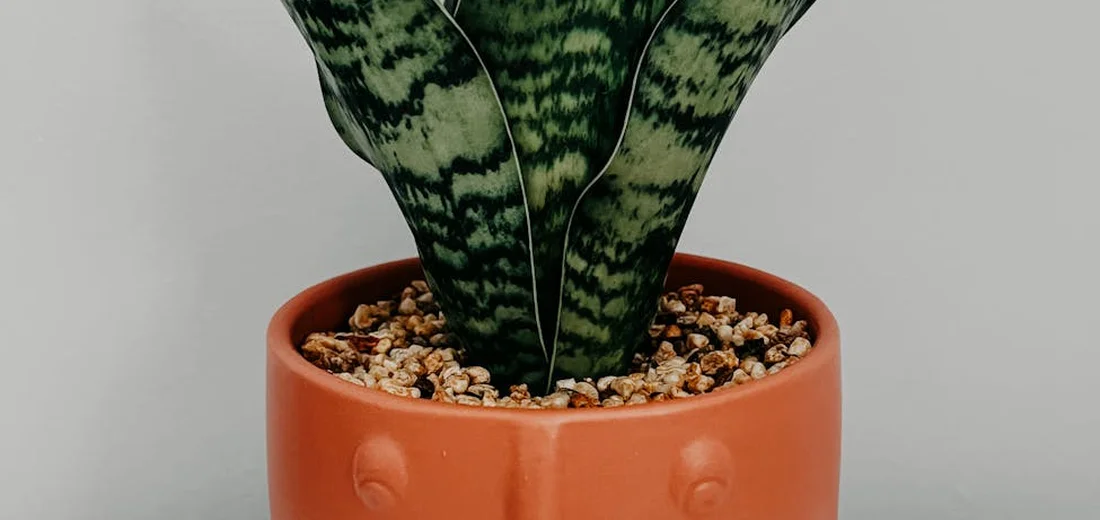
Getting the soil right for your snake plant is like giving it a solid foundation to build its life upon. I learned this the hard way when I lost a beautiful plant to root rot from using dense, moisture-retentive soil. Snake plants, with their succulent-like leaves, store water and absolutely despise wet feet. In our complete guide on using succulent soil for snake plants, you’ll find the exact mix and drainage tips that keep roots healthy.
You want a potting mix that is fast-draining and airy. A standard cactus or succulent potting mix from the garden center is a great starting point. For even better results, I always mix in some extra perlite or coarse sand to my store-bought cactus mix to guarantee rapid drainage. This simple step creates the perfect gritty, well-aerated environment their roots crave.
- A standard cactus/succulent mix: This is your easiest, most reliable option.
- A DIY blend: Mix two parts potting soil with one part perlite and one part coarse sand. I use this for all my snake plants and they thrive.
- What to avoid: Steer clear of heavy, moisture-retentive soils like standard indoor potting mix or garden soil. They hold too much water and will suffocate the roots.
When and How to Repot
Snake plants are the champions of being pot-bound and actually prefer it. You don’t need to repot them often. A good rule of thumb is to consider repotting only every 2 to 3 years, or when you see clear signs it’s needed. Pay attention to signs that the pot is crowded, like roots poking out of the drainage holes, or soil that dries out too quickly. These cues help you time repotting so you don’t disturb a happy, established plant. Rushing to repot can do more harm than good.
So, how do you know it’s time? Keep an eye out for these signals:
- The plant is visibly top-heavy and tips over easily.
- Roots are growing out of the drainage holes.
- The pot is bulging or looks like it’s being cracked apart.
- Growth has completely stalled, even during the growing season.
When you’ve decided it’s time, the process is straightforward. Here is my step-by-step method:
- Gently remove the plant: Tip the pot on its side and carefully coax the plant out. You might need to tap the sides of the pot or run a knife around the inside edge.
- Inspect and loosen the roots: Look at the root ball. If the roots are coiled tightly, gently tease them apart with your fingers. This encourages them to grow outward into the new soil.
- Choose the new pot: Select a new pot that is only 1-2 inches wider in diameter than the old one. A pot that is too large will hold excess soil and water, leading to rot. Always, always use a pot with drainage holes. This is non-negotiable for a snake plant’s health.
- Add fresh soil and repot: Place a layer of your well-draining soil mix in the bottom of the new pot. Set your snake plant in, making sure it’s sitting at the same depth as before. Fill in around the sides with more soil, gently firming it down to remove large air pockets.
- Wait to water: This is a crucial tip! Do not water your snake plant immediately after repotting. Give it about a week to allow any disturbed roots to heal, which helps prevent rot. After this period, you can resume your normal watering routine.
Feeding and Fertilizing for Growth
I used to think my snake plant was just a slow grower until I realized I was starving it. The right food, given at the right time, can transform your snake plant from a static decor piece into a vibrant, growing companion. They aren’t heavy feeders, but they do appreciate a nutritional boost during their active season.
When to Feed Your Snake Plant
Timing is everything with fertilizer. Giving your plant food when it’s trying to rest is like offering a big meal right before bedtime. I stick to a simple seasonal schedule that mimics the plant’s natural growth cycle.
- Spring and Summer: This is your plant’s main growing season. Feed it once a month.
- Fall and Winter: Growth slows way down. Stop fertilizing completely to let the plant rest.
- Brand New Plants: Wait at least 4-6 months after bringing a new plant home. The potting mix usually contains enough slow-release nutrients to start.
Choosing the Right Fertilizer
You don’t need anything fancy. I’ve tried expensive specialty formulas, but a simple, balanced fertilizer works perfectly. Look for an all-purpose, water-soluble houseplant fertilizer with a balanced NPK ratio, like 10-10-10 or 20-20-20.
My personal favorite is a liquid fertilizer because it’s so easy to mix and apply evenly. Always, and I mean always, dilute the fertilizer to half the strength recommended on the bottle. Snake plants are sensitive to salt buildup from strong fertilizers, which can burn their roots and cause brown leaf tips.
How to Apply Fertilizer Correctly
This is where I see most people go wrong. It’s not just about pouring food in; it’s about how you do it.
- Water your plant first with plain water a day or two before you plan to fertilize. A damp root system is better prepared to absorb nutrients and is less likely to get burned.
- Mix your half-strength fertilizer with water according to the diluted instructions.
- Slowly pour the fertilizer solution onto the soil, moving around the base of the plant. Avoid getting any on the leaves themselves.
- Let any excess water drain completely out of the pot’s bottom hole. Never let the plant sit in a saucer of fertilized water.
Signs You’re Over-Fertilizing
More food is not better. If you notice these signs, you’re likely feeding too much or too often.
- Brown, Crispy Leaf Tips: This is the most common sign of fertilizer salt buildup.
- White Crust on Soil Surface: A visible layer of salt deposits.
- Sudden Leaf Drop or Wilting: The roots are damaged and can’t take up water properly.
If you suspect over-fertilizing, stop feeding immediately and flush the soil by running a slow, steady stream of water through the pot for several minutes to wash away excess salts. Let it drain thoroughly afterward.
Routine Maintenance for a Healthy Plant

Keeping your snake plant thriving is surprisingly simple once you get into a rhythm. I’ve found that the most common mistake is being too attentive, not neglectful. These plants truly prefer a “set it and mostly forget it” approach.
How to Propagate New Snake Plants
One of my absolute favorite things about snake plants is how easy they are to multiply. I’ve filled my home with gifts for friends just from a single mother plant. You have two fantastic, reliable methods to choose from.
Method 1: Division (The Quickest Path to a New Plant)
This is my go-to method when I want a full, mature-looking plant fast. You’re essentially separating a clump of leaves, roots and all, from the main plant.
- Gently tip the entire plant out of its pot. You might need to squeeze the sides of a plastic pot or run a knife around the edge of a ceramic one.
- Look for a natural separation in the root ball-a cluster of leaves (called a pup) that seems a bit independent.
- Using your hands, or a clean, sharp knife if it’s stubborn, tease or cut the root mass to separate the pup. Try to keep as many roots intact as possible.
- Pot your new division in a fresh, well-draining soil mix, and you’re done! Water it lightly to help settle the soil.
This method gives you an instant new plant that will look established right away. I did this just last spring, and the division is already pushing out its own new growth.
Method 2: Leaf Cuttings (A Fun Experiment)
This method takes more patience but feels a bit like magic. You can create several new plants from a single leaf.
- Select a healthy, firm leaf and cut it cleanly at the base using sterile scissors or a knife.
- Cut that leaf into horizontal sections, each about 2-3 inches long. This is crucial: make a small notch or remember which end was pointing down toward the roots. The cutting will only root from the end that was closest to the soil.
- Let the cuttings sit out for a day or two until the cut ends form a dry callus. This prevents rot when you plant them.
- Stick the cuttings, right-side-up, into a pot of damp sand or a succulent mix. You can also root them in water first, which is fun to watch.
A fun tip: leaf cuttings from variegated varieties like the Laurentii will often revert to all-green plants. If you want to preserve the yellow stripes, division is your only guaranteed bet.
Whichever method you choose, place your new plant babies in bright, indirect light and resist the urge to overwater. In a few weeks to a few months, you’ll see new roots and eventually a tiny new leaf poking up from the soil. It’s a deeply rewarding process that never gets old.
Troubleshooting Common Snake Plant Problems
Even the toughest plants have their off days, and I’ve seen my fair share of snake plant woes. The good news is that most issues are easy to diagnose and fix once you know what to look for.
Soft, Mushy Leaves
This is almost always a sign of overwatering. I learned this the hard way with my first snake plant, ‘Steve’. The leaves felt like a squishy banana. Gently remove the plant from its pot and check the roots-healthy ones are firm and orange-ish, while rotten roots are brown, black, and slimy.
- Cut away all the mushy, rotten roots with a clean, sharp knife.
- Let the root system air dry for a day or two.
- Repot into fresh, dry succulent soil and do not water for at least a week.
Brown Tips on Leaves
Brown tips are your plant’s way of whispering that it’s a bit stressed. In my experience, this is usually caused by the minerals in tap water building up in the soil. The plant can’t process them, so they get pushed to the leaf tips and cause a burn.
- Switch to filtered water, rainwater, or even leave a jug of tap water out for 24 hours before using it.
- You can snip the brown tips off with clean scissors, following the leaf’s natural V-shape to make it look seamless.
Leaves Falling Over or Curling
A snake plant leaf that suddenly flops over is a cry for help. This can mean the roots are rotting and can no longer support the leaf, or the plant is desperately reaching for more light. If you’re wondering why your snake plant leaves are curling, that curling is often a sign of under-watering or insufficient light, and it can be fixed. Check the soil moisture first. If it’s wet, follow the steps for mushy leaves. If the soil is bone dry and the leaves are thin and curling, it’s a severe thirst issue. Give it a thorough, deep watering.
Pests (Spider Mites & Mealybugs)
While rare, pests can happen. I once found a fine webbing on a new plant-a classic sign of spider mites. Isolate the plant immediately to prevent the bugs from spreading to your other green friends.
- For spider mites, wipe the leaves with a damp cloth and then spray with a mix of water and a few drops of neem oil.
- For mealybugs (they look like tiny bits of white fluff), dab them directly with a cotton swab dipped in rubbing alcohol.
No New Growth
If your snake plant seems to be in a permanent state of pause, don’t panic. These plants are notoriously slow growers, especially in low light. They also often focus their energy on root growth first. To encourage a new pup, try moving it to a spot with a bit more bright, indirect light. A little more light was the trick that finally got my oldest plant to produce a baby after over a year of silence.
Keeping Your Snake Plant Safe for Pets
As a plant parent with a curious cat, this topic is very close to my heart. Snake plants are considered mildly toxic to cats and dogs if ingested. The plant contains saponins, which can cause nausea, vomiting, or diarrhea in our furry friends.
I’ve never had an issue because I’m proactive about placement. The simplest solution is to put your snake plant in a room your pet can’t access, or on a very high shelf they cannot reach. My tall ‘Moonshine’ snake plant lives on top of my bookshelf, well out of my cat’s leaping range.
If you’re worried your pet might still take a nibble, you have a few options:
- Hanging planters are a fantastic, stylish way to keep plants away from pets entirely.
- Create a physical barrier by placing the plant inside a large, decorative glass cloche or terrarium.
- You can also try using a pet-safe deterrent spray on the leaves, but always test it on a small area first to make sure it doesn’t damage the plant.
Knowing the signs of potential poisoning is also part of being a responsible pet owner. If you see your pet drooling excessively, vomiting, or showing a lack of appetite, contact your veterinarian immediately and let them know what plant was involved. It’s always better to be safe.
With a little planning, you and your pets can safely enjoy the beautiful, architectural presence of a snake plant. I’ve found that providing my cat with his own patch of cat grass has successfully distracted him from my other houseplants. It gives him a safe, approved snack and gives me peace of mind.
Common Questions

How often should I water my snake plant in winter?
Water your snake plant much less frequently in winter, typically only once a month or even less, as the soil takes much longer to dry out. This is part of a winter care guide to keep snake plants healthy through the cold months. For best results, place the plant in bright, indirect light and away from cold drafts.
Can I keep my snake plant outside?
You can keep a snake plant outdoors in the summer, but it must be in a shaded, sheltered spot and brought back inside long before any risk of frost. For more on seasonal outdoor care, check the live outside summer winter guide. It explains timing for outdoor exposure and winter protection.
What is the coldest temperature a snake plant can tolerate?
A snake plant can suffer damage if exposed to temperatures below 50°F (10°C) for an extended period.
What is the most common snake plant care mistake discussed on Reddit?
The most frequently cited mistake on platforms like Reddit is overwatering, which inevitably leads to root rot.
Besides watering, what is the most important part of snake plant maintenance?
Regularly wiping the dust off the leaves with a damp cloth is crucial to ensure the plant can photosynthesize efficiently.
Should I change my snake plant care routine with the seasons?
Yes, you should significantly reduce both watering and completely stop fertilizing during the fall and winter months when the plant’s growth slows.
Your Snake Plant Journey Starts Now
From my years of nurturing snake plants, I’ve learned that success boils down to three simple habits: give it the right light, water sparingly, and use well-draining soil. As they mature, big snake plants reveal their maximum height growth habits, and understanding this helps you plan space and care. With patience, you’ll learn how tall yours can get. Master these, and your snake plant will reward you with lush, upright growth that purifies your air effortlessly.
- Choose a spot with bright, indirect light-it’s flexible but thrives best here.
- Water only when the soil is bone-dry to avoid overwatering issues.
- Repot every couple of years in a mix that drains quickly to keep roots happy.
Don’t fret over occasional slips-snake plants are champions at bouncing back, and with these tips, you’re set for a beautiful, low-maintenance companion. I share more hands-on advice and seasonal reminders on Hardy House Plants, so drop by www.hardyhouseplants.com whenever you need a plant-care boost!
Further Reading & Sources
- Best tips for snake plant care
- Snake Plant Care Guide
- How to Care for a Snake Plant: The Complete Survival Guide
- Snake Plant Care Guide – The Turquoise Home
Lena Greenfield is a passionate horticulturist and plant care expert with over 10 years of experience cultivating and nurturing hardy house plants. With a deep understanding of both indoor and outdoor gardening, Lena shares practical advice on choosing, caring for, and maintaining resilient plants that flourish year-round. Through her knowledge and hands-on approach, Lena helps plant lovers transform their spaces into vibrant, green sanctuaries, no matter their gardening experience.
Light and Temperature