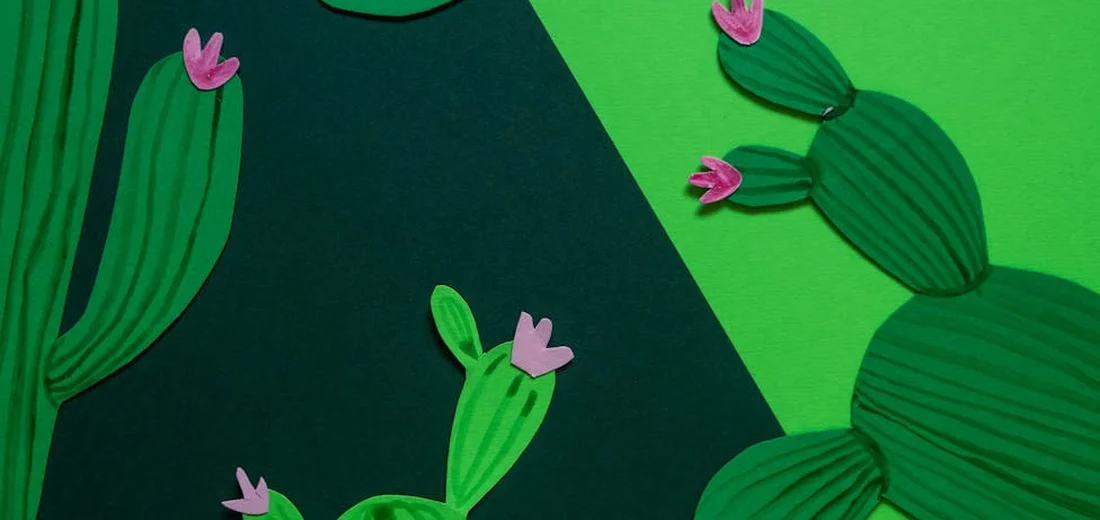
How to Transplant and Propagate Succulents Successfully
Published on: December 29, 2025 | Last Updated: December 29, 2025
Written By: Lena Greenfield
Transplanting and propagating succulents might feel intimidating, but with a few simple steps, you can do it confidently and see your collection flourish. If you’re worried about overwatering, root rot, or just not knowing where to begin, I’ve faced those same fears and learned how to overcome them through years of tending my own succulent garden.
In this guide, I’ll share my hands-on tips for choosing the right time, preparing the ideal soil mix, step-by-step propagation methods, and essential aftercare to ensure your succulents thrive.
The Best Time to Transplant and Propagate Your Succulents
Timing is everything with succulents, and I’ve learned this through plenty of trial and error. The absolute best time to get your hands dirty is during their active growing season, which is typically from early spring through summer. This is when your plants are naturally putting out new roots and leaves, so they can recover from the move much faster.
I always watch for two specific signals from the plant itself. First, if I see new, tiny rosettes forming at the base or fresh growth at the tips, I know it’s ready. Second, if the roots are visibly poking out of the drainage hole or the plant is so top-heavy it’s tipping over, it’s definitely time for a new home.
Avoid transplanting in the dead of winter. Succulents are often semi-dormant when the days are short and cool, meaning their growth has slowed way down. A transplant during this time can shock them, and they’ll take much longer to settle in, if they recover at all. If you’re trying to tell whether your succulent is simply dormant or dying, look for signs like new growth after a warm spell. Dormant plants should resume growth when conditions improve, while those that are dying tend to deteriorate or stay lifeless.
Gathering Your Essential Tools and Materials
Having the right gear on hand turns a potentially messy job into a smooth, enjoyable process. You don’t need anything fancy-just a few key items.
- A New Pot: Always choose one with a drainage hole. I’ve learned this the hard way! Terracotta pots are my favorite because they are porous and help the soil dry out more evenly.
- Fresh Potting Mix: Don’t reuse old soil from other plants. It can be depleted of nutrients and might harbor pests or diseases.
- Sharp, Clean Scissors or Pruners: A clean cut is vital for propagation and for trimming any dead roots. I wipe my blades with rubbing alcohol before I start.
- A Trowel or Spoon: A simple kitchen spoon works perfectly for scooping soil and making holes for new plants.
- Newspaper or a Tray: This is for containing the mess. Succulent soil is gritty and can get everywhere.
- Gloves (Optional): Some succulents have sap that can irritate skin, so I often wear them just to be safe.
Creating the Perfect Potting Mix for Drainage
This is the secret sauce for happy succulents. Regular potting soil holds too much moisture and will lead to root rot. You need a mix that mimics their natural, dry habitat and drains water almost instantly. So, do succulents really need special soil? The truth is yes—a gritty, fast-draining mix is essential to prevent soggy roots.
After years of experimenting, my go-to homemade recipe is simple and effective:
- Start with two parts regular potting soil.
- Mix in one part coarse sand (horticultural sand, not from the beach).
- Add one part perlite or pumice.
The perlite and sand create air pockets and prevent the soil from compacting. When you squeeze a handful of a good succulent mix, it should crumble apart easily and not form a muddy clump. If you’re short on time, a pre-mixed “cactus and succulent” soil from the garden center is a great alternative—just consider adding a handful of extra perlite to it for even better drainage. Using a perlite succulent soil mix helps ensure those conditions are met. Look for mixes labeled for succulents or cacti that include perlite.
Step-by-Step Guide to Propagating Succulents
Propagating from Leaf Cuttings
This is my absolute favorite way to multiply my collection because it feels like pure magic. You start with a single leaf and end up with a whole new plant. The key to success is a clean twist and a whole lot of patience. I’ve done this hundreds of times with my echeverias and sedums.
- Gently twist a healthy, plump leaf from the stem. Wiggle it side to side until it snaps off cleanly. You want the entire base intact, with no piece left on the stem.
- Lay the leaves on a dry paper towel or tray in a spot with bright, indirect light. Do not put them in soil or water yet. This callousing period is non-negotiable and prevents rot.
- Wait. For one to two weeks, you’ll see tiny pink roots and a miniature rosette emerge from the base. It’s a thrilling sight!
- Once the roots are about half an inch long, you can lightly mist the roots every few days or place them on top of dry succulent soil. The mother leaf will eventually shrivel up as the baby uses its energy.
Propagating from Stem Cuttings
When a succulent gets too tall and “leggy,” a stem cutting is the perfect fix. I just did this with an overgrown jade plant to make it bushier and create new plants. Stem cuttings grow into mature plants much faster than leaf cuttings. If you’d like to try another method, you can propagate succulents from leaf cuttings. Leaves can root into new plants after the cut ends callus and are placed on well-draining soil.
- Using clean, sharp scissors or pruning shears, cut a healthy stem a few inches long. Make your cut just above a leaf node.
- Remove the leaves from the bottom two inches of the stem. This gives you a clean section to plant and you can propagate those removed leaves too!
- Let the cut end of the stem callous over for 3-5 days. It should look dry and sealed, not fresh or moist.
- Stick the calloused end into a small pot filled with dry succulent mix. Do not water it for at least a week to encourage root growth.
Dividing and Transplanting Offsets (Pups)
Some succulents, like aloes, haworthias, and sempervivums, do the work for you by growing little baby plants right at their base. Dividing these pups is the quickest way to get a sizable new plant. When your succulents bloom and produce offshoots, propagating those offsets is a natural next step. Let the offsets callus briefly, then plant them in well-draining soil. My haworthia collection exploded once I started doing this regularly.
- Gently remove the entire mother plant and its cluster of pups from its pot. Brush away the soil so you can see where they connect.
- Look for the pup’s own root system. If it has its own roots, you can often gently wiggle it free from the main plant with your fingers.
- For pups that are firmly attached, use a sterile knife to make a clean cut, ensuring the offset takes some roots with it.
- Let any cut surfaces callous over for a day or two before potting the pup in its own container with fresh, dry soil.
How to Transplant a Succulent Into a New Home
Choosing the Right Container for Healthy Growth
The pot you choose is more than just decoration; it’s a key part of your succulent’s health. I’ve learned this through trial and error, and my plants are much happier for it. Always prioritize a pot with a drainage hole-it’s the single most important feature. A pot without one is a bathtub for your plant’s roots.
Terra cotta pots are my top choice because they are porous and allow the soil to dry out quickly, which prevents overwatering. Ceramic pots with a drainage hole are a great second option. For size, you only need to go up one to two inches in diameter from the current pot. A pot that’s too large holds excess moisture around the roots, which they hate.
Caring for Your Succulents After Propagation and Transplanting

This is the part where patience truly becomes your best gardening tool. I’ve found that the first two weeks after transplanting or propagating are the most critical for setting your new plants up for a lifetime of success.
The First Watering: A Delicate Dance
You’ve just repotted or planted a fresh cutting, and your first instinct is to give it a big drink of water. I urge you to wait! For transplanted succulents, I always wait at least 4-5 days before the first watering. This gives any tiny root abrasions time to callus over, preventing rot. For leaf or stem cuttings, do not water at all until you see tiny pink roots forming. Resisting the urge to water early is the single most important step you can take.
Finding the Perfect Light
Your new plant babies need bright, but indirect, light. A south or east-facing windowsill is often perfect. I made the mistake once of putting freshly propagated leaves in direct, hot sun, and they shriveled into nothing in hours. They are too tender for that kind of intensity. Think of it as a recovery room-plenty of light to encourage growth, but no harsh rays to cause stress.
- Transplanted Succulents: Bright, indirect light for 1-2 weeks before returning to their usual sunny spot.
- Leaf Propagations: Bright, indirect light always until the mother leaf withers and the new plant is established.
- Stem Cuttings: Bright, indirect light until firm roots have developed.
What to Expect in the Coming Weeks
Don’t panic if your transplanted succulent looks a little sad or doesn’t grow at first. It’s focusing all its energy underground, building a new root system to fill its fresh home. A period of stagnation is completely normal. For propagations, the waiting game is even longer. It can take weeks to see roots and months to see a substantial new plant. The key is to provide stable conditions and let nature do its work. Here’s a complete propagation timeline guide that breaks down typical durations—from root formation to visible new growth. Keep in mind that plants vary, but this helps you anticipate milestones.
Troubleshooting Common Problems
Even with the best intentions, things can sometimes go a little sideways. I’ve dealt with every issue in the book, so let’s troubleshoot together.
Why Leaves or Cuttings Fail to Root
It’s disappointing when a promising leaf just turns to mush or a stem cutting does nothing. From my experience, failure almost always comes down to a few key factors.
- Too Much Moisture: This is the #1 killer. If your propagation medium is consistently damp, the leaf will rot instead of root. The soil should be bone dry until roots appear.
- The Cut Didn’t Callus: If you plant a stem cutting or place a leaf on soil before the end has dried and formed a callus, it’s like leaving an open wound in dirt. It will absorb water directly into the stem and rot.
- Not Enough Light: While they shouldn’t be scorched, propagations do need bright light to trigger the rooting process. In a dim corner, they simply won’t have the energy to grow.
- Using a Sick “Mother” Leaf: Always choose plump, healthy leaves from a thriving plant. A stressed or dehydrated leaf doesn’t have the stored energy to produce a new pup.
Quick Tip: If a leaf isn’t rooting, try the “air propagation” method-just leave it on a dry plate near a bright window, no soil needed.
Saving a Wilting or Stagnant Transplanted Succulent
If your recently moved succulent is wilting, drooping, or losing lower leaves, you need to play plant detective. The first thing I do is gently nudge the plant at its base. If it feels loose and wobbly, that’s a major clue. Often, bottom leaves dying or wilting are the first signs of trouble, usually related to watering or root health after a move.
- Wobbly and Wilting: This often points to overwatering and early root rot. The roots are too damaged to absorb water, so the plant wilts from thirst even though the soil is wet. Gently unpot the plant, brush away the soil, and inspect the roots. Cut away any black or mushy parts with a clean knife. Let it dry out for a day or two, then repot in fresh, dry succulent mix. Do not water for at least a week.
- Firm but Wilting: If the plant is firmly in the soil but still looks sad, it’s likely suffering from transplant shock or underwatering. Check the soil moisture an inch down. If it’s bone dry, give it a thorough, deep watering until water runs out the drainage hole. Then, return to your normal watering schedule.
- Stagnant but Otherwise Healthy: If there’s no growth but no obvious distress, just be patient! The plant is putting energy into its roots. As long as the leaves are firm and the color is good, it’s simply getting settled. Growth will come.
I saved a wilting echeveria last year by unpotting it, discovering rotten roots, and performing “surgery” with a sterilized blade-it’s now one of my most prolific plants. Don’t be afraid to investigate; your plant will thank you for it.
Common Questions
How soon after propagating can I water my succulent?
Wait to water leaf or stem cuttings until you see new roots forming, which can take several weeks.
Why are the leaves on my propagated succulent turning yellow and mushy?
Yellow, mushy leaves are a classic sign of overwatering and the onset of rot.
Can I propagate a succulent leaf that has broken in half?
A leaf must be cleanly removed from the stem with its base intact to successfully propagate.
My succulent is growing tall and leggy; what does this mean?
A leggy, stretched-out succulent is not getting enough direct sunlight.
What is the best way to tell if my transplanted succulent needs water?
Check the soil an inch below the surface and only water when it is completely dry.
Is it normal for the bottom leaves of a transplanted succulent to dry up?
It is normal for a succulent to reabsorb and shed a few of its oldest lower leaves after being moved.
Your Succulent Success Starts Now
After years of nurturing succulents in my own home, I can confidently say that mastering transplanting and propagation is all about gentle handling, the right soil mix, and consistent aftercare. Focus on these elements, and you’ll watch your plants flourish with minimal fuss. For newly propagated succulents, aftercare in the early weeks is essential. This care guide for newly propagated succulents aftercare will walk you through the crucial steps to keep them thriving. Here’s a quick reminder of the essentials:
- Always use a well-draining soil blend to keep roots healthy.
- Water deeply but infrequently, letting soil dry between sessions.
- Provide bright, indirect light to support strong growth.
Trust that you’re on the right track—succulents are resilient and respond well to attentive care. To avoid killing your succulents, here are essential care tips for watering, light, and soil. For more hands-on tips and plant stories, keep exploring Hardy House Plants, where I share real-life lessons to help your indoor garden thrive.
Further Reading & Sources
- How to Propagate Succulents | Yard and Garden
- How to Grow Succulents from Leaves and Stem Cuttings
- Succulent & Houseplant Propagation Guide | Plant Perfect
- How to Propagate Succulents from Leaves and Cuttings | Succulents and Sunshine
Lena Greenfield is a passionate horticulturist and plant care expert with over 10 years of experience cultivating and nurturing hardy house plants. With a deep understanding of both indoor and outdoor gardening, Lena shares practical advice on choosing, caring for, and maintaining resilient plants that flourish year-round. Through her knowledge and hands-on approach, Lena helps plant lovers transform their spaces into vibrant, green sanctuaries, no matter their gardening experience.
Propagation Methods