How to Choose and Prepare Soil for Indoor Plants
Published on: December 18, 2025 | Last Updated: December 18, 2025
Written By: Lena Greenfield
Picking the right soil for your indoor plants can feel confusing, but it’s the secret to happy, thriving greenery. I’ve helped countless plants bounce back from poor soil, and I’ll show you how to avoid common mistakes that lead to wilted leaves or stunted growth.
Drawing from my years of indoor gardening, I’ll guide you through understanding soil types, matching soil to your plants, preparing your own mix, and troubleshooting common problems so you can confidently nurture your indoor jungle.
Why Your Indoor Plant’s Life Depends on Its Soil
I used to think soil was just dirt, a boring brown anchor for my plants. That misconception led to more plant funerals than I care to admit. The soil is your plant’s entire world-its pantry, its water reservoir, and its anchor system all in one. Get it wrong, and you’re fighting an uphill battle from day one.
Think of soil like a mattress. You wouldn’t sleep on a waterlogged sponge or a slab of concrete, and your plants don’t want to, either. The right soil mix provides the perfect balance of air, water, and nutrients that roots desperately need to thrive. When roots are happy, everything else-the lush leaves, the vibrant growth-follows naturally.
Over the years, I’ve learned that most indoor plant problems start below the surface. Root rot, the silent killer of many houseplants, is almost always a direct result of soil that holds too much water for too long. Choosing the right mix isn’t just a detail; it’s the single most important preventative care you can give your green friends. Beyond soil, plant suitability for indoor environments depends on factors like light, humidity, and temperature. These factors are key to choosing plants that thrive in your space.
The Great Soil Showdown: Tropicals vs. Succulents
This is the fundamental divide in the houseplant world. Mixing up the soil needs of a tropical plant and a succulent is like giving a camel a life jacket and a fish a canteen—you’ve got the right idea, but for the completely wrong creature. I keep two primary soil mixes pre-made in my potting shed to avoid any confusion, especially since succulents actually do require special soil.
What Tropical Houseplants Crave
Plants like Monsteras, Pothos, and Philodendrons hail from humid jungles where they grow in loose, airy, nutrient-rich leaf litter. Their soil needs to mimic this environment: consistently moist but never soggy, with plenty of pockets for oxygen to reach the roots. A dense, heavy soil will suffocate them.
My go-to tropical mix is simple and effective. I start with a high-quality, peat-based or coco coir potting mix as the base. Then, I “fluff” it up by adding a hefty amount of chunky amendments. Here’s my personal recipe:
- 2 parts Potting Mix (the base)
- 1 part Perlite (for aeration and drainage)
- 1 part Orchid Bark (for chunkiness and air pockets)
This creates a light, fluffy medium that holds just enough moisture while letting excess water drain away freely. You can test it by squeezing a handful; it should hold its shape briefly before crumbling apart easily. If it forms a tight, muddy ball, add more perlite and bark.
The Succulent & Cactus Recipe for Success
Succulents and cacti are the desert dwellers of the plant world, built to store water and endure drought. Their greatest enemy is “wet feet,” meaning roots sitting in moisture for more than a day or two. They need a gritty, fast-draining mix that dries out completely between waterings. This is especially important for succulents to thrive.
I learned this the hard way after losing a beautiful Echeveria to rot. Regular potting soil is a death sentence for these plants because it compactes and retains water for far too long. Their roots need to breathe and dry out quickly.
My fail-proof succulent and cactus mix is all about grit. I often use a pre-bagged cactus mix, but I always amend it heavily to make it even grittier. Here’s what I do:
- 2 parts Cactus & Succulent Potting Mix
- 1 part Perlite
- 1 part Coarse Sand (horticultural grade, not from the beach!)
You can even add a handful of small gravel or poultry grit for extra drainage. The final mix should look and feel very gritty, almost like a gravel path, and water should pour through it almost instantly. This ensures your succulents’ roots are never waterlogged. In our complete guide on using sand in succulent soil mixes, you’ll learn how to balance sand with perlite, pumice, and other amendments for optimal drainage. This approach helps tailor the mix to different succulent needs.
| Plant Type | Soil Feel | Key Ingredient | Watering Cue |
|---|---|---|---|
| Tropicals | Fluffy & Crumbly | Orchid Bark | Top inch of soil feels dry |
| Succulents | Gritty & Sandy | Coarse Sand | Soil is completely dry all the way through |
Quick Tip: When in doubt, err on the side of more drainage, especially for succulents. It’s much easier to water a thirsty plant than to fix a rotted one. To verify proper drainage, test your succulent soil’s drainage by watering and watching how quickly the water passes through. If it pools or stays wet for too long, adjust the mix. Getting the soil right from the start sets your plant up for a long, healthy, and beautiful life in your home.
Your Guide to Potting Mix Ingredients
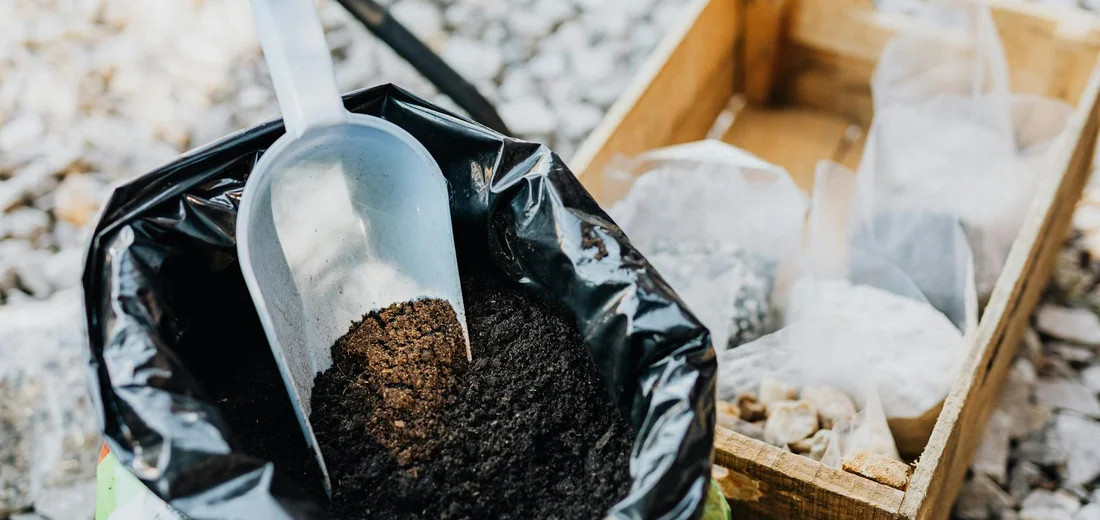
Think of potting mix like a custom-made bed for your plant’s roots. Getting the ingredients right is the single biggest factor in keeping your plants happy and healthy for years to come. I learned this the hard way after losing a beautiful string of pearls to a dense, soggy soil that suffocated its roots. Now, I always mix my own or carefully read the labels on pre-bagged mixes.
Ingredients for Moisture and Nutrients
These components act like a tiny reservoir and pantry for your plant, holding onto water and making nutrients available.
- Coco Coir: My personal favorite, this fluffy, brown material is made from coconut husks. It holds a surprising amount of water but still allows for good air space, which prevents it from becoming a compacted, soggy mess like peat moss sometimes can.
- Peat Moss: A classic ingredient that’s excellent at absorbing and holding water. The key with peat moss is to wet it thoroughly before you use it, as it can be water-repellent when dry. I find it can become too compact over time, so I often mix it with chunky ingredients.
- Compost or Worm Castings: This is the power-packed superfood of the soil world. It’s teeming with beneficial microbes and provides a gentle, slow-release nutrient boost. I always add a handful to my mixes for a nutritional head start.
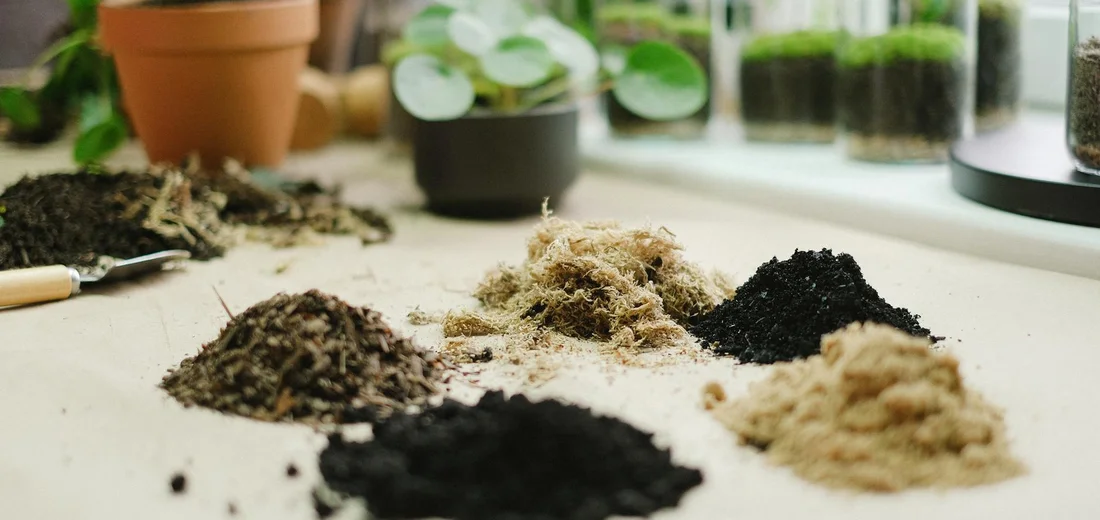
Ingredients for Drainage and Aeration
If the moisture-holding ingredients are the sponge, these are the rocks creating air pockets so the roots can breathe. For succulents, these are non-negotiable and should make up at least half of your mix.
- Perlite: Those little white, popcorn-like pieces you see in bagged soil. They are super-lightweight volcanic glass that creates essential air pockets. I always have a big bag on hand to mix into any soil that feels too dense.
- Orchid Bark: Don’t let the name fool you-this chunky pine or fir bark is fantastic for many houseplants, not just orchids. Adding bark to my aroid mixes (like Monsteras and Philodendrons) was a game-changer for their root health. It provides long-lasting structure and prevents compaction.
- Coarse Sand: Not the fine sand from a sandbox, but sharp, gritty sand like horticultural or builder’s sand. It adds weight and improves drainage dramatically. It’s my go-to for cactus and succulent mixes to mimic their natural, dry environment.
- Pumice: A heavier alternative to perlite that doesn’t float to the top when you water. It’s porous and provides excellent aeration and drainage. I prefer it for top-heavy plants that might tip over in a super-lightweight perlite mix.
Quick tip: Squeeze a handful of your moist potting mix-if water streams out, it needs more drainage materials like perlite or bark. The goal is for it to feel like a damp sponge that holds its shape when squeezed but crumbles apart easily.
My Go-To DIY Soil Recipes
After years of trial and error with countless bagged soils, I finally started mixing my own, and the difference in my plants’ health was incredible. Creating your own soil mixes allows you to tailor the environment to your plant’s exact needs, leading to stronger roots and happier growth. It’s easier than you think and saves money in the long run. To get the best results, tailor your mixes to different plant types. For example, succulents love fast-draining mixes, while tropicals thrive in richer, moisture-retentive blends.
A Simple All-Purpose Houseplant Mix
This is my workhorse mix, the one I use for most of my common tropical houseplants like Pothos, Philodendrons, and ZZ plants. It provides a good balance of moisture retention and drainage, which is what these plants crave.
Here is my simple recipe:
- 2 parts Potting Soil (a good quality, peat-based or coco coir base)
- 1 part Perlite (for aeration and to prevent compaction)
- 1 part Compost or Worm Castings (for slow-release nutrients)
I mix everything in a large tub or a clean wheelbarrow until it looks uniform. The perlite is non-negotiable here—it creates the air pockets that roots need to breathe and prevents the soil from becoming a dense, soggy brick. If I’m repotting a plant that really hates wet feet, I might add an extra half-part of perlite for insurance. That’s the essence of a proper succulent soil mix—heavy on perlite for drainage. For succulents, this perlite-forward approach keeps roots happy by drying out between waterings.
The Ultimate Gritty Succulent Blend
My succulents and cacti used to suffer from mushy stems until I switched to this super-gritty, fast-draining mix. They absolutely thrive in it now. This blend mimics the dry, rocky native habitats of succulents, encouraging tight, compact growth and preventing root rot.
My go-to gritty blend is:
- 2 parts Potting Soil or Coco Coir (just as a slight organic base)
- 1 part Coarse Sand (horticultural or builder’s sand, not fine play sand)
- 1 part Perlite
- 1 part Pumice or small gravel (for extra weight and drainage)
I combine all the ingredients thoroughly. You’ll notice it looks and feels completely different from regular soil-it’s rocky and loose. A quick tip: always water your succulents thoroughly until water runs out the drainage hole, and then let this gritty mix dry out completely before watering again. This soak-and-dry method is the secret to success.
How to Prepare and Sterilize Your Potting Mix
Mixing your own soil feels like baking a custom cake for your plant. You get to control the exact texture and nutrition, which is a game-changer for plant health. I’ve been doing this for years, and my plants always show their appreciation with lush, vibrant growth.
My Go-To Mixing Method
I do this right on my clean kitchen counter or in a large, shallow storage tub. A large tub makes mixing effortless and contains the mess perfectly.
- Start with your base. For most tropical plants, I use two parts high-quality potting soil.
- Add one part perlite. This is non-negotiable for me-it creates those crucial air pockets.
- Mix in one part coconut coir or peat moss. This holds onto moisture without getting soggy.
- For succulents and snake plants, I double the perlite and add a handful of coarse sand.
- Put on some gardening gloves and mix everything with your hands until it looks completely uniform.
Why Sterilization is Your Secret Weapon
Bagged soil isn’t always clean. I learned this the hard way when fungus gnats invaded my favorite pothos. Sterilizing your mix kills fungus gnat eggs, mold spores, and bacteria that can harm delicate roots. It’s a simple step that prevents so many headaches.
1. The Oven Method (My Favorite)
This is my go-to for larger batches. It makes your kitchen smell earthy and warm.
- Preheat your oven to 200°F (about 95°C).
- Spread your moistened potting mix in a thin layer on a baking sheet.
- Cover the soil tightly with aluminum foil.
- Bake for 30 minutes. Use a meat thermometer to check that the center has reached 180°F (82°C).
- Let it cool completely before using it.
Let the soil cool down entirely before you pot anything-hot soil will shock and cook your plant’s roots.
2. The Microwave Method for Small Batches
Need just enough for one repotting session? The microwave is incredibly fast.
- Put slightly damp soil in a microwave-safe bowl. A paper plate works as a loose cover.
- Microwave on high for 90 seconds to 2 minutes per pound of soil.
- Stir the soil and check its temperature. It should be steaming hot.
- Let it sit until it’s completely cool to the touch.
3. The Boiling Water Drench
This is the no-fuss, no-appliance method I use in a pinch.
- Place your dry potting mix in a heat-proof container, like a ceramic pot or a metal bucket.
- Slowly pour boiling water over the soil until it’s thoroughly saturated.
- Stir the mix carefully to ensure the heat penetrates everywhere.
- Allow the soil to drain and cool for a few hours before using.
Boiling water is a quick, chemical-free way to zap most pests and pathogens lurking in the bag.
A Quick Note on Chemical Sterilants
You can find soil sterilants at garden centers, but I avoid them. In my experience, the natural heat methods are just as effective and far safer for you and your home environment. They also don’t risk harming the beneficial biology you want to build in your soil over time.
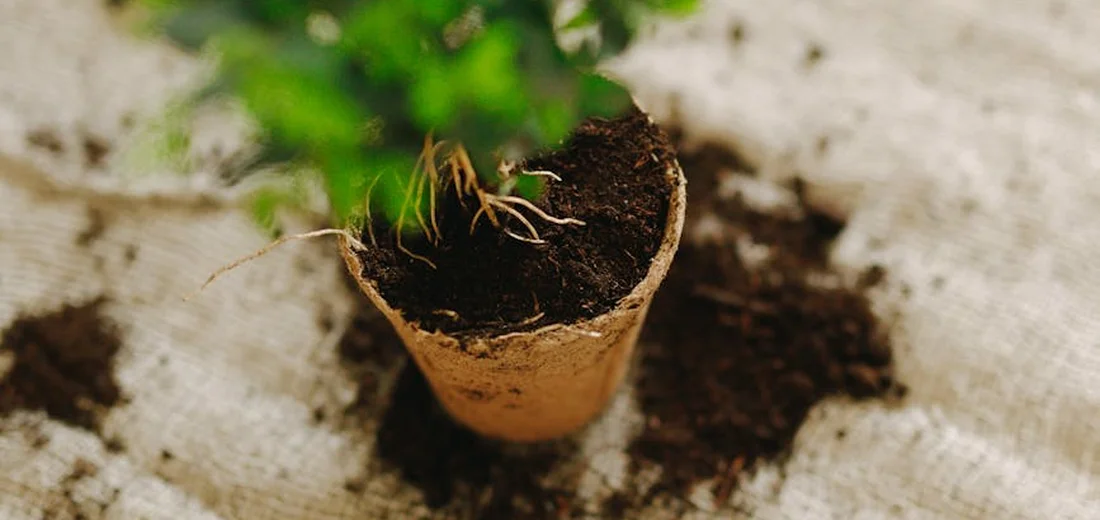
The Right Way to Repot with New Soil

I’ve repotted hundreds of plants over the years, and getting this step right makes all the difference between a plant that thrives and one that just survives. Think of repotting as giving your plant a brand-new, perfectly tailored home where its roots can stretch out and breathe.
Gather Your Supplies First
Before you even touch your plant, get everything ready on a table covered with newspaper. You’ll need:
- Your new, pre-mixed potting soil
- The new pot (only 1-2 inches wider than the old one)
- Pruning shears or sharp scissors
- A trowel or large spoon
- Something to cover the drainage hole, like a coffee filter or a piece of screen
Having everything within arm’s reach turns a potentially messy job into a smooth, enjoyable process.
Step-by-Step Repotting
Follow these steps carefully for a stress-free transition for your plant.
1. Gently Remove the Plant
Water your plant lightly a day before repotting to reduce stress. When it’s time, tip the pot sideways and gently squeeze the sides. I always support the plant’s base with my fingers as I ease it out, rather than pulling on the stems. If it’s stubborn, you can run a butter knife around the inside edge of the pot to loosen the root ball.
2. Inspect and Prune the Roots
This is your chance to check on your plant’s hidden foundation. Gently loosen the root ball with your fingers. Look for roots that are dark brown, mushy, or smell bad-these are rotten and need to be cut away with clean shears. If the roots are coiled tightly in a circle (root-bound), you can make a few vertical cuts to encourage them to grow outward.
3. Prepare the New Pot
Place your coffee filter or screen over the drainage hole-this keeps the soil in while letting water flow out. Add a layer of fresh soil to the bottom of the new pot, enough so that when you place the plant on top, its base sits about an inch below the pot’s rim. This space is crucial for watering without spillage.
4. Position and Fill
Place your plant in the center of the new pot. Holding it steady, start adding your new soil around the sides. I gently tap the pot on the table as I go to help the soil settle into any air pockets around the roots. Don’t pack the soil down hard; you want it to remain fluffy and aerated.
5. The First Watering
Once the soil level is correct, give your plant a thorough, gentle watering until water runs freely from the drainage hole. This initial deep watering helps the new soil settle around the roots and eliminates large air gaps. Let the plant drain completely before placing it back in its decorative cachepot or saucer.
My Top Repotting Tip
After repotting, place your plant in a spot with bright, indirect light and leave it alone for a week or so. Resist the urge to fertilize for at least a month, as fresh soil often contains nutrients and the roots need time to heal and adjust. I learned this the hard way after giving a freshly repotted fiddle leaf fig a “boost” and accidentally burning its tender new roots.
A Special Note for Succulents and Cacti
Repotting these desert dwellers requires one extra, critical step. After you repot a succulent or cactus, wait a full week before you give it its first watering (learn when and how to water succulents after repotting). This allows any tiny, accidental breaks in the roots to callus over, preventing rot when water is introduced. I keep my repotted succulents in a dry, airy spot during this waiting period.
Solving Common Indoor Plant Soil Problems
Over the years, I’ve dealt with just about every soil issue you can imagine. Identifying the problem is the first and most important step to getting your plant back on track. Let’s troubleshoot the most frequent headaches together.
Soil That Stays Wet For Too Long
If your soil feels like a wet sponge days after watering, your plant’s roots are basically drowning. I’ve lost a beautiful prayer plant to this exact issue. This is almost always a sign of a poor-draining soil mix or a pot without a drainage hole. The roots can’t get the air they desperately need.
Here’s what I do to fix it:
- Check the roots immediately. Gently remove the plant and look for roots that are brown, black, and mushy-these are rotten and need to be snipped off with clean scissors.
- Repot the plant into a fresh, well-draining mix. I make my own by combining two parts regular potting soil with one part perlite and one part orchid bark.
- Always use a pot with a drainage hole. This isn’t just a suggestion; it’s a non-negotiable for healthy roots.
- Resist the urge to water on a schedule. Instead, stick your finger about two inches into the soil. Only water if it feels dry.
Soil That Dries Out Too Quickly
Your plant seems constantly thirsty, and water runs right through the pot. I see this a lot with store-bought plants that are in cheap, peat-heavy soil. When soil becomes overly dry and compacted, it actually repels water instead of absorbing it. The water just takes the path of least resistance down the inside edges of the pot.
To rehydrate that bone-dry soil effectively:
- Try the bottom-watering method. Place your pot in a shallow tray or sink filled with a few inches of water and let it sit for 30-45 minutes. The soil will soak up the water from the bottom like a sponge.
- If the soil has pulled away from the pot’s edges, gently press it back against the sides after watering to close those gaps.
- For a long-term fix, consider repotting and mixing in some moisture-retentive materials like coconut coir or a small amount of sphagnum moss into your new soil blend.
Soil That Develops a Bad Smell
A foul, sour, or rotten egg smell coming from your plant’s soil is a major red flag. That stench is a telltale sign of anaerobic bacteria, which thrives in waterlogged, oxygen-deprived soil. I once had a pothos that developed this, and the smell was unmistakable.
Your plant needs an emergency intervention:
- Take the plant outside or to a well-ventilated area and carefully remove it from its pot.
- Shake off all the old, smelly soil and thoroughly rinse the roots with lukewarm water.
- Inspect the root system and trim away any slimy or disintegrating roots.
- Repot into a clean pot with completely fresh, sterile potting mix. Do not reuse any of the old soil.
White Mold or Fungus Gnats in the Soil
Seeing a fluffy white substance on the soil surface or tiny black flies buzzing around your plants? Don’t panic. Both mold and fungus gnats are symptoms of the same core issue: consistently moist soil. They are more of a nuisance than an immediate death sentence for your plant. If you’re dealing with fungus gnats on indoor plants or succulents, it’s time to learn how to get rid of them. A few simple adjustments can help you control them and protect your collection.
Here is my battle-tested plan for eradication:
- Let the soil dry out significantly. This is the most critical step. Fungus gnats and mold can’t thrive in dry conditions. Allow the top inch or two of soil to become completely dry before you even think about watering again.
- Physically scrape off the white mold from the soil surface and discard it.
- For fungus gnats, make sticky traps by putting yellow sticky notes near the soil. The adult gnats are attracted to the color and get stuck.
- My secret weapon: a light dusting of cinnamon on the soil surface. Cinnamon is a natural anti-fungal and seems to deter the gnats from laying eggs. I always keep a jar in my plant-care kit.
Common Questions
What is the best indoor plant soil mix ratio?
A good all-purpose mix ratio is 2 parts potting soil, 1 part perlite, and 1 part compost or worm castings for most tropical houseplants.
Why is my indoor plant soil not drying out?
Soil that stays wet for too long is typically caused by a poorly draining soil mix or a pot that lacks a drainage hole.
Why is my indoor plant soil drying out so quickly?
Soil that dries out too fast is often a sign of a compacted, peat-heavy mix that has become water-repellent.
What causes indoor plant soil to smell bad?
A foul, sour smell is a telltale sign of anaerobic bacteria thriving in waterlogged, oxygen-deprived soil.
Can I buy good indoor plant soil at Home Depot or Lowe’s?
Yes, you can find suitable base potting soils and soil amendments like perlite and orchid bark at major home improvement stores.
What can I use as an indoor plant soil cover?
You can use a light dusting of cinnamon on the soil surface, which also acts as a natural anti-fungal.
Your Soil Success Story Starts Here
From my years of nurturing house plants and succulents, I’ve found that picking the right soil and prepping it with care sets the stage for vibrant, healthy growth, whether you’re dealing with moisture-loving ferns or drought-tolerant cacti. Here’s the core advice in a nutshell:
- Match soil type to your plant’s needs-fast-draining for succulents, moisture-retentive for tropicals.
- Boost aeration and drainage by mixing in perlite, coarse sand, or other amendments.
- Always use clean pots and fresh ingredients to prevent pests and diseases.
You’re now equipped to create the perfect home for your green friends. For more hands-on tips and plant care insights, swing by Hardy House Plants at www.hardyhouseplants.com-we’re here to help you grow with confidence and joy. Trust me, with these steps, your indoor garden will thrive and bring you endless smiles!
Further Reading & Sources
- Indoor Plant Potting Mix: Premium Soils for Popular Houseplants – rePotme
- The 7 Best Soils for Indoor Plants The Spruce Has Tested
- What is the best potting soil for indoor plants?
- Best Potting Soil for Indoor Plants – The Home Depot
Lena Greenfield is a passionate horticulturist and plant care expert with over 10 years of experience cultivating and nurturing hardy house plants. With a deep understanding of both indoor and outdoor gardening, Lena shares practical advice on choosing, caring for, and maintaining resilient plants that flourish year-round. Through her knowledge and hands-on approach, Lena helps plant lovers transform their spaces into vibrant, green sanctuaries, no matter their gardening experience.
Soil Types