How to Propagate Specific Succulent Varieties
Published on: January 2, 2026 | Last Updated: January 2, 2026
Written By: Lena Greenfield
Propagating your favorite succulents can feel like performing magic, turning one plant into many. But you might worry that the process is too complicated or that different varieties need special care.
I’ve learned through years of trial and error that while the core principles are simple, knowing the specific tricks for each plant type is the real key to success. In this guide, I’ll walk you through the exact methods for jade plants, echeveria, haworthia, and string-of-pearls.
The Best Time to Propagate Your Succulents
Timing is everything in propagation, and getting it right makes the whole process smoother. The absolute best time to propagate your succulents is during their active growing season, which is typically from early spring through summer. This is when the plant is naturally putting out new growth and has the most energy to heal cuts and develop roots.
I learned this the hard way one winter when I tried to propagate a sad-looking Echeveria. The leaves just sat there for months, doing nothing. The plant was dormant, essentially sleeping, and had no resources to spare for making babies. Once spring arrived, those same types of cuttings took off with vigor.
You’ll see the most success when you align your propagation projects with the plant’s own internal clock.
- Spring & Summer: Prime time. Warmth and longer days signal growth.
- Early Fall: Still okay for many varieties, but aim to get new roots established before winter’s lower light levels arrive.
- Winter: Generally not recommended. Growth is slow or stalled, and cuttings are more prone to rot.
Your Propagation Toolkit: Methods for Different Succulents
Not all succulents are propagated the same way, and choosing the right method is your first step to success. Over the years, I’ve found that matching the method to the plant’s growth habit is the real secret to a high success rate. One friendly entry point is propagating succulents from leaf cuttings, which works well for many common species. Let’s break down the three main techniques.
Step-by-Step: Propagating from Leaf Cuttings
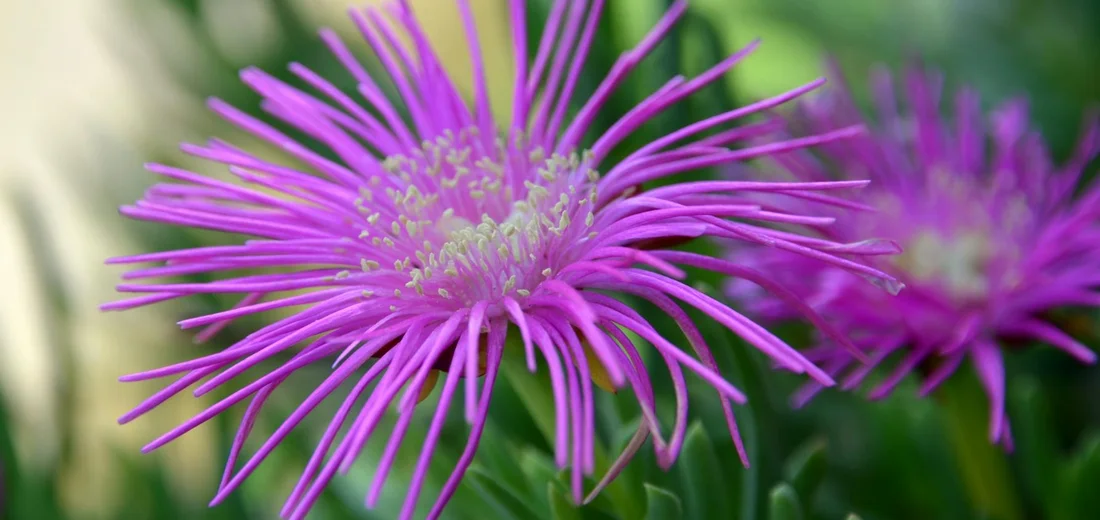
This is the classic method for rosette-forming succulents like Echeveria, Graptopetalum, and Sedum. It feels like magic to grow a whole new plant from a single leaf! With proper Echeveria succulent care, you can grow beautiful rosette varieties that brighten any space.
- Select the Right Leaf: Gently twist a healthy, plump leaf from the stem. The key is to get a clean break at the base, with no part of the leaf left on the stem. A damaged leaf won’t propagate.
- Let it Callus: This is the most critical step everyone rushes. Place the leaf on a dry paper towel out of direct sun. Leave it for 1-4 days until the broken end forms a dry, hardened layer (a callus). This seal prevents rot.
- Lay on Soil: Don’t bury it! Just place the callused leaves on top of well-draining succulent soil.
- Wait for Magic: Place in bright, indirect light. Mist the soil lightly every few days only after you see tiny pink roots or a new rosette forming. The mother leaf will eventually shrivel up and die-that’s normal, as it’s providing food for the baby!
Quick Tip: Resist the urge to water until you see roots! A dry leaf on wet soil is a recipe for mold.
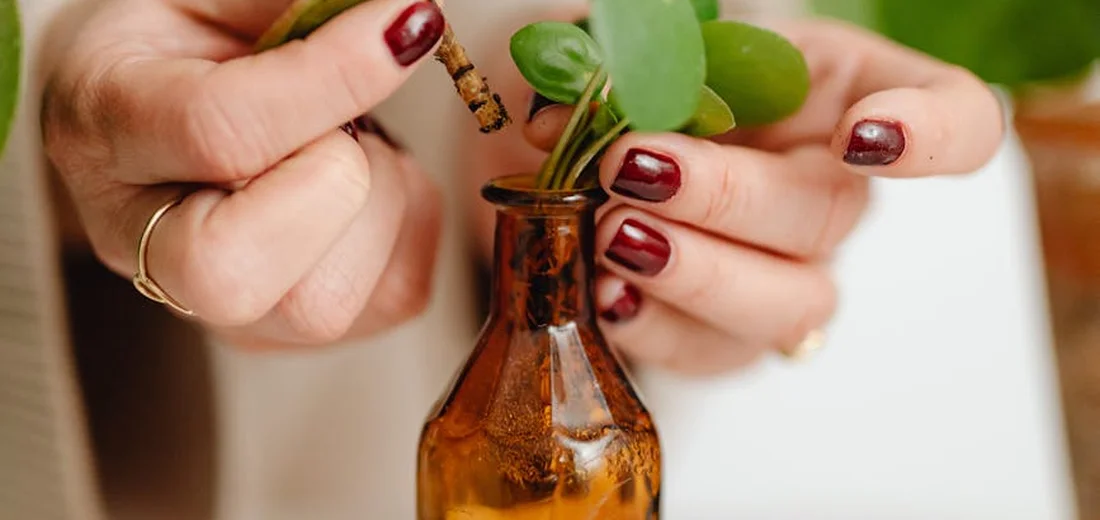
Step-by-Step: Propagating from Stem Cuttings
This is your go-to method for leggy or overgrown plants like String of Pearls, most Crassulas, and Aeoniums. You’re essentially giving the plant a fresh start.
- Make a Clean Cut: Using a sharp, clean knife or scissors, cut a piece of stem that’s 2-4 inches long. I always make my cut just above a leaf node (the little bump where a leaf attaches).
- Callus Again: Just like with leaves, the cut end of the stem must be allowed to dry and form a callus. This usually takes 2-5 days.
- Plant It: Once callused, stick the stem about an inch deep into a pot with dry succulent soil. You can remove a few of the bottom leaves to make a clean “stem” for planting.
- Hold Off on Watering: Wait a full week before giving it its first light watering. This encourages the stem to search for moisture and push out new roots.
This method is faster than leaf propagation because the cutting already has a structure to support new growth. Unlike leaf propagation, which can be slower and less reliable, using pups provides a head start for new plants.
Step-by-Step: Propagating from Offsets and Pups
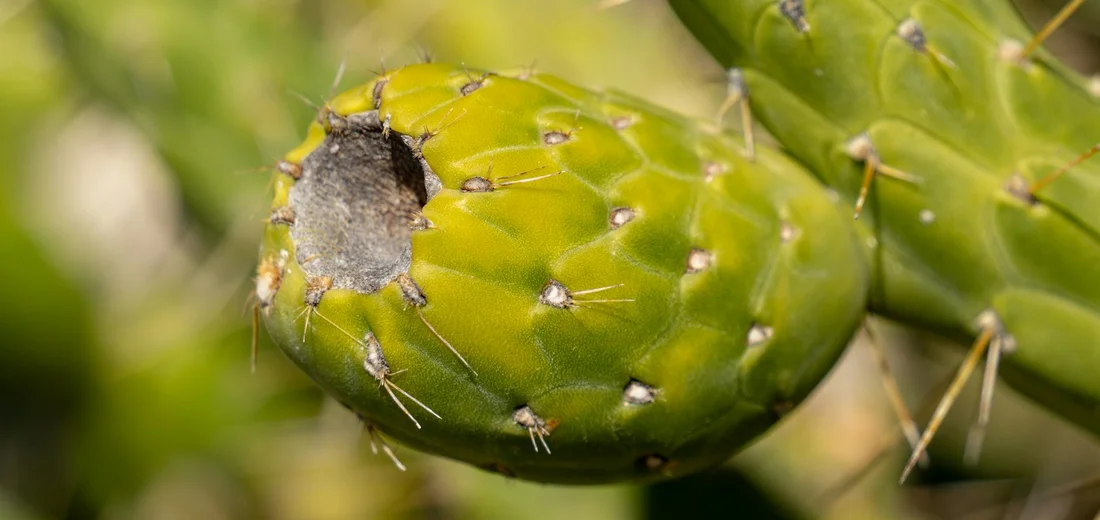
This is by far the easiest method, as the plant does most of the work for you! Look for these baby plants around the base of mother plants like Aloe, Haworthia, Sempervivum, and some cacti.
- Locate a Good Pup: Find an offset that is large enough to have its own root system starting. A good rule of thumb is that it should be at least one-third the size of the mother plant.
- Separate Gently: For pups connected by a stolon (a runner), you can often snap them off with your fingers. For those tightly clustered, I use a clean, sharp knife to carefully cut them away from the main plant, trying to keep some roots intact.
- Let it Rest (If Needed): If the separation left a raw, juicy wound, let the pup callus for a day or two. If it came away with its own roots cleanly, you can plant it right away.
- Pot It Up: Plant the pup in its own small pot with fresh soil. Water it lightly to settle the soil around the roots.
The main advantage of this method is that you’re dealing with a nearly independent plant from day one, so it establishes itself very quickly.
Crafting the Perfect Soil Mix for Propagation
Getting the soil mix right is the single most important step for successful propagation. I learned this the hard way after losing a whole tray of precious echeveria leaves to rot because my soil held too much moisture. Your goal is to create a mix that provides support but drains so fast it’s almost impossible to overwater. In this complete guide to using sand succulent soil mixes, you’ll learn how to balance texture and drainage. We’ll cover sand grades, ratios, and practical tips for different succulent types.
I never use regular potting soil straight from the bag for propagation. It’s simply too dense and retains water for far too long. Think of your propagation mix as a temporary, ultra-draining nursery for vulnerable baby roots.
My Go-To Propagation Soil Recipe
After years of experimenting, this is the mix I use for nearly all my succulent cuttings and leaves:
- 2 parts potting soil: This acts as the base and provides a tiny bit of water retention.
- 1 part coarse sand: Look for horticultural or builder’s sand, not fine play sand. This improves drainage dramatically.
- 1 part perlite or pumice: I prefer pumice as it’s less dusty, but both are fantastic for aeration and preventing compaction.
Mix these ingredients together thoroughly in a large tub. You’ll know it’s right when a handful of damp mix crumbles apart easily instead of clumping. This loose, gritty structure allows tiny new roots to push through effortlessly and find their footing.
Container Matters Just as Much
Your perfect soil mix needs a proper home. I always use shallow trays or pots with multiple drainage holes. A deep pot holds moisture at the bottom, right where your new roots are trying to grow. A shallow container ensures the entire soil profile dries out evenly, which is exactly what you want. When you choose a pot, you’re also choosing how you’ll prepare soil for indoor plants. Prep a light, well-draining mix to match the container.
Ideal Light and Temperature for New Cuttings
Light and temperature are the engines that drive root growth, but the wrong kind will fry your delicate cuttings. Providing bright, indirect light is the golden rule I follow for all my propagations. Direct sun, especially through a window, is too intense and will scorch leaves or dry out stems before they can root.
I place my propagation trays on a shelf about a foot away from a bright east-facing window. An east window provides that gentle morning sun which is perfect for encouraging growth without the burn. If you only have a south or west window, use a sheer curtain to diffuse the intense afternoon light.
The Sweet Spot for Temperature
Succulents are surprisingly picky about temperature when they’re trying to root. I’ve had the most consistent success by keeping my propagations in a room that stays between 65°F and 75°F (18°C – 24°C). This range aligns well with the optimal temperature ranges for succulents in general.
- Avoid cold drafts from windows or air conditioning vents.
- Don’t place them on top of a radiator or heating pad; too much bottom heat can cook them.
Consistent, comfortable room temperature signals to the plant that it’s a safe time to put energy into growing new roots.
What About Grow Lights?
If you don’t have a bright enough window, a simple LED grow light is a fantastic solution. I use a basic strip light placed about 6-8 inches above my propagation trays. Set the timer for 12-14 hours a day to mimic a long summer day, which is the natural growing season for most succulents. This consistent light source often leads to even faster and more uniform rooting. Learn how to use grow lights effectively for your own plants.
Watch your cuttings closely. If they start stretching out and looking leggy, they need more light. If the leaves are getting pale or crispy, they’re getting too much. Adjusting their position is a normal part of the process-don’t be afraid to move them around until they look happy.
Patience and Care: The Propagation Timeline
One of the most common questions I get is, “How long does this take?” Propagation is a lesson in patience, and the timeline varies wildly depending on the method and the variety you’re working with. I’ve learned to watch for subtle signs of progress rather than counting the days, especially when propagating succulents.
Leaf Propagation Timeline
This is the slowest method, but it’s incredibly rewarding. Don’t expect instant gratification.
- Callousing (2-4 days): The cut end of the leaf must form a dry, hardened layer. I lay mine on dry soil and ignore them completely during this phase.
- Roots Appear (2 weeks – 2 months): You’ll see tiny pink or white roots searching for moisture. This is when I start lightly misting the soil around the roots every few days.
- Baby Plant (Pup) Forms (1 – 4 months): A tiny rosette will eventually sprout from the base of the leaf. The mother leaf will start to shrivel as it gives all its energy to the baby.
- Mother Leaf Dies & Independence (3 – 6+ months): Once the pup is a decent size and the mother leaf is completely dried up, you can gently remove it. The new plant is now self-sufficient.
Stem Cutting Timeline
This method is significantly faster, as you’re starting with a more mature piece of the plant.
- Callousing (3-7 days): A thicker stem takes a bit longer to callous over properly. Be patient here to prevent rot.
- Rooting (2 – 6 weeks): You’ll know it’s working when you see new root growth from the calloused end or when you feel slight resistance if you give the cutting a very gentle tug.
- New Growth (1 – 2 months): Once the roots are established, you’ll see fresh leaves emerging from the top of the cutting. This is the sign it’s ready for a more regular watering schedule.
Pup/Offset Division Timeline
This is by far the quickest way to get a mature-looking new plant.
- Establishment (1 – 3 weeks): Since these pups already have their own root systems, they just need time to settle into their new pot and recover from the separation.
- Visible Growth (1 month): You’ll typically see the plant perk up and begin putting out new growth within a month, signaling it’s happy in its new home.
Quick Tip: Keep a propagation journal! I note the date I started each leaf or cutting. It helps manage expectations and is a fun way to track your successes.
Troubleshooting Common Propagation Problems
Not every propagation attempt goes perfectly, and that’s okay. I’ve had my share of failures, and they’ve taught me more than my successes. Here are the issues you’re most likely to encounter.
The Leaf is Shriveling and Dying
If your leaf prop is shriveling before a pup forms, it’s usually one of two things.
- It Used All Its Energy: Sometimes, a leaf just doesn’t have the reserves to create a new plant. It will shrivel up completely. This is normal; not every leaf will be successful.
- It’s Too Dry: If the leaf is shriveling and you see tiny roots, it’s begging for water. The roots need moisture to sustain the leaf while it grows a pup. Start a light misting routine.
In my experience, a leaf that shrivels from the tip inward is often a goner, but one that shrivels from the base while a pup is growing is a happy, self-sacrificing mother leaf.
Rotting Leaves or Stems
Rot is the arch-nemesis of propagation. It’s almost always caused by too much moisture.
- Prevent it at the start: Always let your cuttings and leaves callous fully before they touch any soil.
- Check your watering: Are you misting too often? Is the soil staying soggy? Only water when the soil is completely dry.
- Act fast: If a leaf starts turning mushy and black, remove it immediately to prevent the rot from spreading to others. For a rotting stem cutting, cut well above the rot, let it callous again, and restart.
Roots But No Baby Plant
You see a beautiful network of roots, but no pup in sight. This is frustrating but common.
- Be Patient: The plant is establishing a strong root system first, which is actually a great sign! The pup will come.
- Check the Light: Is it getting enough indirect light? Too little light can slow down the pup-forming process significantly.
- The Mother Leaf is Key: As long as the mother leaf is still plump and firm, it still has energy to give. Don’t give up on it.
Pests on New Growth
Your tender new plants are a delicacy for pests like mealybugs and fungus gnats.
- Mealybugs: I spot these cotton-like pests early by inspecting my props weekly. A dab of isopropyl alcohol on a cotton swab takes them out instantly.
- Fungus Gnats: These are a sign of overwatering. Let the soil dry out completely between waterings. I sometimes use a thin layer of sand on top of the soil to deter them from laying eggs.
Quick Tip: Always quarantine new propagations away from your main plant collection for a few weeks. This prevents any hidden pests from spreading. During quarantine, inspect for pests and treat any issues before integrating the plant. This helps prevent pest spread to your other plants.
FAQs
What is the success rate of propagating succulent varieties from leaves?
The success rate is generally high, often around 70-90%, when using healthy leaves and proper techniques.
How should you water newly propagated succulent cuttings?
Water lightly only after roots appear, ensuring the soil dries out completely between waterings to prevent rot.
What temperature and light conditions optimize propagation of succulent varieties?
Provide bright, indirect light and maintain temperatures between 65°F and 75°F for optimal root development.
Can succulent varieties be propagated from leaves?
Yes, many rosette-forming succulents like Echeveria can be easily propagated from leaves.
Can succulent varieties be propagated from stem cuttings?
Yes, stem cuttings are effective for varieties such as String of Pearls and most Crassulas.
How long does it take for propagated succulent varieties to root?
Rooting typically takes 2 weeks to 2 months, varying by method and succulent type.
Keep Growing Your Succulent Family
From my years of nurturing succulents, I can confidently say that successful propagation boils down to picking the right technique for your specific plant and sticking with gentle, consistent care. Transplanting your new growth into a well-draining pot is the next key step to propagate succulents successfully. Be patient as roots establish and adjust care accordingly. Remember these core steps:
- Match the propagation method to your succulent’s variety—leaf, stem, or offset.
- Use clean, sharp tools to prevent infections and encourage healthy growth.
- Provide bright, indirect light and minimal water until roots establish.
I’ve seen countless plant lovers thrive with these methods, and you will too-so keep experimenting and enjoy the process! For more hands-on advice and variety-specific tips, follow along at Hardy House Plants (www.hardyhouseplants.com); your green thumb journey is just getting started, and I’m here to help every step of the way.
Further Reading & Sources
- Growing and Propagating Succulents – Artemis Flower Farm
- How to Propagate Succulents | Yard and Garden
- Propagation: What Your Succulents Want You to Know – Debra Lee Baldwin
- How to Propagate Succulents from Leaves and Cuttings | Succulents and Sunshine
Lena Greenfield is a passionate horticulturist and plant care expert with over 10 years of experience cultivating and nurturing hardy house plants. With a deep understanding of both indoor and outdoor gardening, Lena shares practical advice on choosing, caring for, and maintaining resilient plants that flourish year-round. Through her knowledge and hands-on approach, Lena helps plant lovers transform their spaces into vibrant, green sanctuaries, no matter their gardening experience.
Propagation Methods