What Are the Best Pots and Containers for Succulents?
Published on: December 29, 2025 | Last Updated: December 29, 2025
Written By: Lena Greenfield
Picking the perfect pot for your succulents is key to keeping them healthy and happy. I’ve rescued many plants from soggy soil and cramped roots, so let’s find containers that help yours flourish.
In this article, I’ll share my hands-on tips and cover pot materials, drainage must-haves, ideal sizes, and budget-friendly options.
Why Your Succulent’s Pot is a Life-or-Death Decision
I’ve learned through trial and error that choosing the wrong pot is one of the fastest ways to accidentally kill a succulent. Your succulent’s container directly controls its two greatest enemies: excess water and suffocated roots. Think of the pot as your plant’s lungs and kidneys-it needs to breathe and expel excess moisture efficiently.
In my own collection, I once lost a beautiful echeveria to a gorgeous, but poorly draining, ceramic pot. The soil stayed wet for weeks, and the roots simply rotted away. That single experience taught me more about pot selection than any book ever could. A pot that’s too large holds onto water for far too long, while a non-porous material traps humidity around the roots, creating a perfect storm for rot.
The Ultimate Pot Material Showdown: A Side-by-Side Comparison
Let’s break down the most common pot materials. I’ve used them all, and each has a specific place in my plant care routine.
Breathable Terracotta and Clay Pots
Terracotta is my go-to recommendation for succulent beginners and experts alike. The porous clay walls allow air and water to pass through, which helps the soil dry out evenly and prevents root rot. You can literally feel the pot working—it often feels cool and slightly damp to the touch after watering. That same principle translates to succulent terrarium care, where you create and maintain mini ecosystems with careful moisture control. A terrarium’s closed environment rewards thoughtful planning and routine maintenance.
From my experience, terracotta is perfect for succulents that are especially sensitive to overwatering, like sedums and many cacti. Quick Tip: If you tend to be an over-enthusiastic waterer, switch to terracotta pots-they’re very forgiving!
Here are the key things to know:
- Pros: Excellent breathability, promotes healthy roots, widely available, affordable.
- Cons: Can dry out too quickly in very hot, dry climates; they are heavy and can break if dropped.
- Best For: Almost all succulents, but especially those prone to overwatering.
Stylish Ceramic Pots: Glazed vs. Unglazed
Ceramic pots offer endless style but require a bit more knowledge. The key difference is the glaze.
Unglazed ceramic behaves much like terracotta-it’s porous and breathable. I use these for my larger, established succulent specimens where I want a bit more style without sacrificing function.
Glazed ceramic pots have a non-porous, sealed surface. They are beautiful and come in every color imaginable, but they hold moisture much longer. I reserve these for my most drought-tolerant succulents, like snake plants or mature jade plants, and I am extra careful with my watering schedule.
- Glazed Ceramic Pros: Stylish, retains moisture longer (good for some plants), sturdy.
- Glazed Ceramic Cons: Poor breathability, high risk of overwatering, often more expensive.
- Unglazed Ceramic Pros: Good breathability, more decorative than plain terracotta.
- Unglazed Ceramic Cons: Heavier than plastic, can still be prone to breaking.
The Truth About Plastic Pots
Don’t write off plastic pots! They get a bad reputation, but they are incredibly useful. Plastic is non-porous, so it holds moisture in the soil for the longest time. This makes them a risky choice for beginners but a fantastic tool for specific situations.
I use plastic pots for propagating succulent leaves and cuttings. The consistent moisture helps encourage new root growth. I also use them for young succulents that are still establishing their root systems and need the soil to stay slightly moist for a bit longer. Just be vigilant-always check the soil with your finger before you water.
- Pros: Lightweight, inexpensive, retains moisture, great for propagation.
- Cons: Zero breathability, can promote root rot if not used carefully, can become brittle in sun over time.
- Best For: Propagations, young plants, or growers in extremely hot and dry climates.
The Non-Negotiable Rule: Drainage Holes are Everything
I’ve killed more succulents from overwatering in cute, hole-less pots than I care to admit. Succulents absolutely despise having wet feet, and a drainage hole is their only escape route for excess water. Without it, water pools at the bottom, creating a swampy environment that leads directly to root rot. That’s the silent killer of these otherwise tough plants. To avoid this, follow common succulent watering tips: check soil moisture first, and water only when dry. Always use a pot with drainage to prevent water from pooling.
Think of a drainage hole as a simple life insurance policy for your plant. It’s that important. I now have a strict rule in my own collection: no hole, no home for a succulent. It saves so much heartache and guesswork.
How to Add Drainage Holes to Almost Any Container
Don’t abandon that beautiful ceramic bowl or quirky mug just yet! You can often add a drainage hole yourself. I’ve converted many a thrift store find into a perfect succulent pot.
The key is using the right drill bit for the material to avoid cracking your container. A regular masonry bit works for unglazed terracotta, while a diamond-tip or glass-and-tile bit is essential for glazed ceramic, glass, or porcelain.
- Put on safety glasses. Tiny, sharp fragments will fly.
- Place a piece of painter’s tape over the spot where you want the hole. This helps prevent the drill bit from skating across the surface.
- Start your drill at a slow, steady speed with light pressure. Let the bit do the work-don’t force it.
- Keep the drill straight and gradually increase speed as you create a groove.
- Once you puncture through, you’re done! Peel off the tape and rinse the pot to remove any dust.
If drilling feels too risky, use the container as a decorative cache pot. Simply plant your succulent in a plain plastic nursery pot with drainage and then slip that pot inside the decorative, hole-less one. For watering, just take the inner plastic pot out, water it in the sink, let it drain completely, and then place it back. It’s a foolproof system I use all the time.
Finding the Perfect Fit: A Guide to Pot Size and Shape
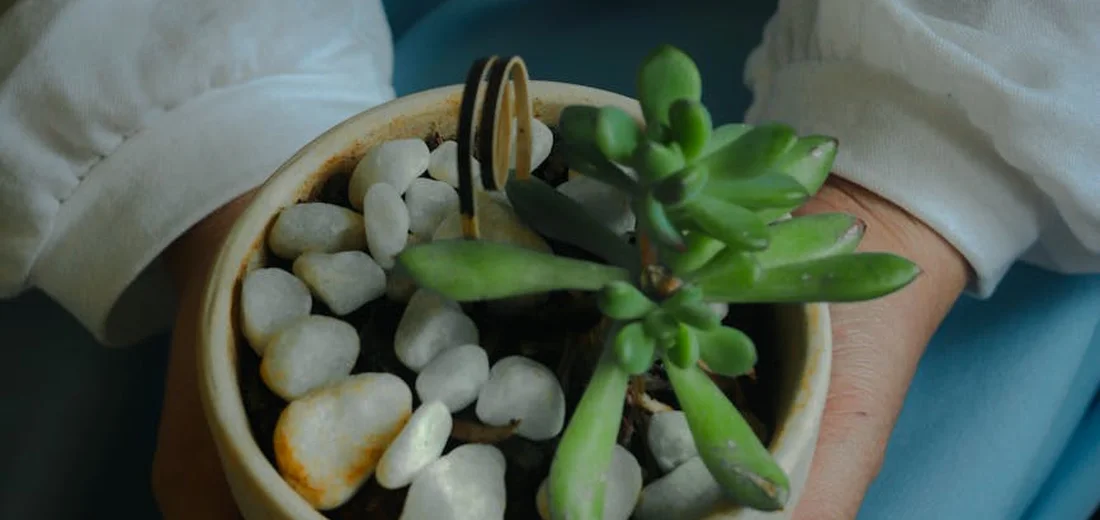
Succulents generally prefer to be a little snug. A pot that is too large holds more soil, which stays wet for longer, increasing the risk of root rot. A good rule of thumb is to choose a pot that gives the roots only about an inch of growing room on all sides. In practice, many succulents thrive in small pots to prevent root crowding. When roots start to circle the pot, it’s a sign they need a repot.
Shallow, wide pots are often better than deep, narrow ones. Succulent root systems tend to spread out horizontally rather than dig down deep. A wide, shallow bowl provides the perfect stage for a beautiful succulent arrangement or for rosette-forming types to multiply.
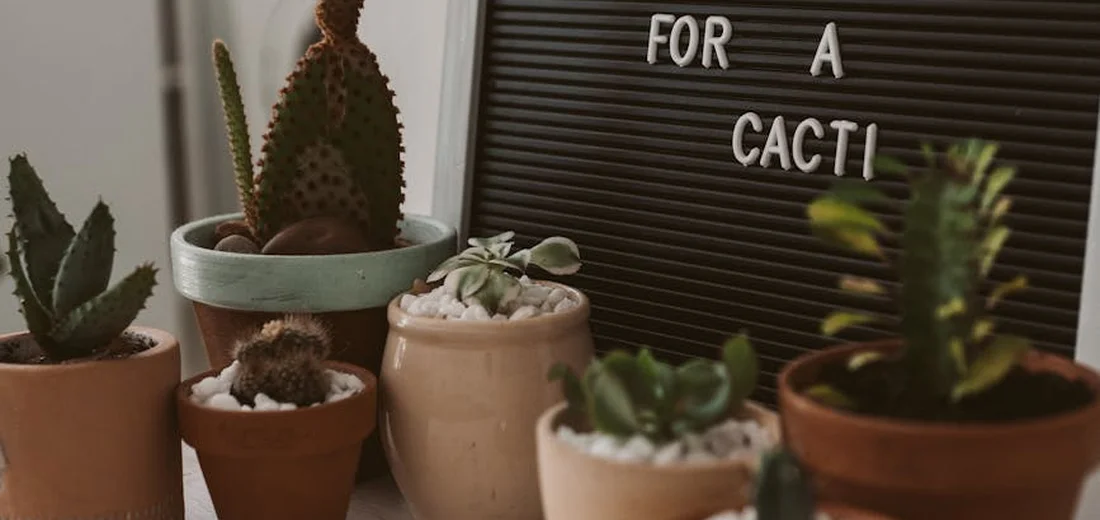
Pot Recommendations for Popular Succulent Types
Over the years, I’ve noticed that certain succulents really thrive in specific pot styles. Here’s a quick guide based on my experience. If you’re wondering where to buy succulent pots and planters, this style guide will help you shop confidently.
| Succulent Type | Ideal Pot Shape & Size | Why It Works |
|---|---|---|
| Echeveria, Sempervivum (Hen & Chicks) | Wide, shallow bowl | Gives their flat rosettes room to spread and produce offsets (baby plants) without wasting soil depth. |
| Aloe, Haworthia, Snake Plant | Medium-depth, sturdy pot that’s slightly wider than the plant | Accommodates their thicker, sometimes vertical, root systems and provides stability for taller growth. |
| String of Pearls, Burro’s Tail | Hanging basket or tall, narrow pot | Allows their beautiful trailing stems to cascade over the sides without getting crushed or sitting on damp soil. |
| Cacti (like Mammillaria or Barrel types) | Shallow, wide pot | Mimics their natural, shallow desert root run and provides a low center of gravity to prevent tipping. |
When in doubt, err on the side of a pot that looks a touch too small rather than one that’s definitely too big. Your succulent will thank you with tight, healthy growth and vibrant colors.
My Favorite Pots for Indoor and Outdoor Succulents
Over the years, I’ve tested dozens of pots, and my collection’s survival rate has taught me what truly works. The right pot doesn’t just hold your plant; it actively contributes to its health and happiness.
Best Indoor Pots for Your Windowsill
For your indoor succulent haven, you need pots that combine function with a bit of flair. My sunny windowsill is a testing ground, and these are the champions.
- Unglazed Terracotta: This is my absolute go-to. The porous clay allows the soil to breathe and dries out evenly, which is a lifesaver for forgetful waterers. I’ve noticed my succulents in terracotta have far fewer issues with root rot compared to those in plastic.
- Ceramic Pots with Drainage Holes: I love these for adding a pop of color to my decor. The key is finding ones with at least one solid drainage hole. I have a beautiful glazed ceramic pot from a local artist that my jade plant has thrived in for three years.
- Concrete Pots: They have a modern, weighty feel and are surprisingly breathable, similar to terracotta. I use smaller concrete pots for my echeverias, and they provide excellent stability, so top-heavy plants don’t tip over.
Quick Tip: A pot without a drainage hole is a swimming pool for your succulent’s roots. Always opt for drainage! To ensure your mix has proper drainage, test your succulent soil by watering and noting how quickly it dries.
Best Outdoor Pots That Can Handle the Elements
Outdoor pots face sun, rain, and sometimes frost. They need to be tough. My patio has taught me that durability is non-negotiable.
- Fiberglass and Resin: These are my top picks for large outdoor arrangements. They’re incredibly lightweight, won’t crack in freezing temperatures, and often mimic the look of heavier materials like stone or wood. I have a large fiberglass trough that has survived three winters perfectly.
- Glazed Ceramic (Frost-Resistant): If you love the look of ceramic outdoors, you must ensure it’s labeled as frost-proof or frost-resistant. Standard ceramic will crack and flake. My frost-proof glazed pot has held up beautifully through seasonal changes.
- Stone and Concrete: For a permanent, sturdy display, you can’t beat real stone or thick concrete. They protect roots from temperature swings. I use a concrete bowl for a hardy sedum mix that gets full sun all day.
The material of your outdoor pot directly impacts how often you’ll need to water. Porous pots dry out faster in the summer sun.
Creative and Thrifty Container Ideas for Succulents
You don’t need to spend a fortune on fancy pots. Some of my most charming planters cost me nothing but a little creativity.
- Vintage Tea Cups and Mugs: I drill a small drainage hole in the bottom of chipped or orphaned cups. They make adorable individual homes for tiny haworthias or a string of pearls. This is one of my favorite ways to add a personal touch.
- Wooden Crates or Boxes: Line a rustic wooden crate with a heavy-duty plastic sheet (poke holes in it!) and you have a fantastic, shallow planter perfect for a succulent sampler. I found a small vintage crate at a flea market that’s now a centerpiece on my table.
- Colanders and Sieves: These are naturally well-draining and have a fun, farmhouse aesthetic. I’ve planted a beautiful trailing sedum in an old metal colander that hangs on my porch.
- Hollowed Logs or Driftwood: For a truly natural look, hollow out a small section of a log or a piece of driftwood. It creates a stunning, organic display. I sealed the inside of my driftwood planter with a non-toxic sealant to help it last longer.
Always clean and disinfect any upcycled container with a mild bleach solution before planting to keep your succulents safe from pests or bacteria. Regularly inspect plants for common pests like mealybugs, scale, and aphids to identify and treat issues early. Practicing proper care, including quarantine of new plants and avoiding overwatering, helps prevent infestations.
The Final Step: A Simple Guide to Repotting Your Succulent
I know repotting can feel a little intimidating, like you’re performing surgery on your plant baby. After repotting hundreds of succulents in my own collection, I can tell you it’s a straightforward process that gets easier every time. The goal is to give your plant a fresh start in its new, well-draining home without causing too much stress. If you’re new to this, here’s a simple, beginner-friendly, step-by-step guide to repot succulents. We’ll walk through the basics together.
Gather Your Supplies
Before you start, get everything you need within arm’s reach. This makes the whole process smooth and quick for both you and the plant.
- Your new pot with a drainage hole
- Fresh, fast-draining succulent & cactus soil mix
- Your succulent that needs a new home
- A small trowel or spoon
- Newspaper or a tray to contain the mess
- A pair of gloves (optional, but keeps your hands clean)
The Repotting Process, Step-by-Step
Step 1: Prep the New Pot
Fill the bottom of your new pot about one-third of the way with fresh soil. Don’t pack it down; you want it to stay fluffy and airy to encourage root growth.
Step 2: Gently Remove the Succulent
This is the trickiest part. Tip the current pot on its side and gently squeeze the sides if it’s flexible. For rigid pots, I slide a butter knife around the inside edge to loosen the soil ball. Always handle your succulent by its leaves, not its delicate stem, to avoid breakage.
Step 3: Loosen the Roots and Inspect
Once the plant is out, gently tease apart the root ball with your fingers. You’re not untangling a knot, just encouraging the roots to spread out. Look for any roots that are mushy or black-these are signs of rot and should be snipped off with clean scissors.
Step 4: Place and Fill
Set your succulent in the center of the new pot on top of the soil layer. Its base should sit just a little below the pot’s rim. Hold the plant steady with one hand and use the other to scoop fresh soil around the roots, filling all the empty spaces. Learn how to transplant and propagate succulents to ensure healthy growth.
Step 5: The No-Water Wait
This is my number one tip for success. Do not water your newly repotted succulent for at least 5-7 days. This waiting period allows any tiny, accidental root injuries to callus over, which prevents rot when you finally do water. Knowing when and how to water succulents after repotting is crucial for their health and longevity.
Aftercare is Key
Place your repotted friend in a spot with bright, indirect light for a week or so. Direct sun can be too intense while it’s settling in. After the waiting period, give it a thorough watering until water runs out the drainage hole, and then return to your normal watering routine.
Common Questions
What are the best pots for succulents overall?
Unglazed terracotta pots are widely considered the best due to their excellent breathability, which helps prevent root rot.
What are the best succulent pots with drainage holes?
Any pot, whether terracotta, ceramic, or plastic, is a great choice as long as it has at least one drainage hole at the bottom.
Where can I find the best succulent pot STL files for 3D printing?
You can find excellent STL files for succulent pots with integrated drainage trays on popular 3D model repositories like Thingiverse and Cults 3D.
What are the best pots for indoor succulents?
For indoor use, choose stylish and functional pots like unglazed ceramic or concrete that complement your decor and have proper drainage.
What are the best pots for outdoor succulents?
For outdoor succulents, select durable, weather-resistant materials like fiberglass, resin, or frost-proof ceramic to withstand the elements.
What are the best pots for a ‘Hen and Chick’ (Sempervivum) arrangement?
A wide, shallow bowl is ideal for ‘Hen and Chicks’ as it gives the parent and offsets plenty of room to spread and multiply.
Happy Planting!
From my years of nurturing succulents, I can confidently say that picking the right pot is all about ensuring top-notch drainage and breathability to prevent root issues. Stick to these core principles:
- Always use pots with drainage holes.
- Choose porous materials like terracotta or unglazed ceramic.
- Match the pot size to your succulent’s roots for a snug fit.
Trust me, with these simple steps, your succulents will thrive and bring you joy for years. Do succulents need to thrive? They do best when they have bright light, well-draining soil, and sparing water. For more hands-on plant care advice, follow along on our blog—I’ve got plenty of tips to share from my own gardening journey!
Further Reading & Sources
- r/succulents on Reddit: Which type of pot is better?
- Choosing the Right Pot for your Succulents | Succulents and Sunshine
- How to Choose the Best Pots for Succulents (+5 Faves) – The Girl with a Shovel
- What kind of pot should you plant succulents in for indoor growing? – Quora
Lena Greenfield is a passionate horticulturist and plant care expert with over 10 years of experience cultivating and nurturing hardy house plants. With a deep understanding of both indoor and outdoor gardening, Lena shares practical advice on choosing, caring for, and maintaining resilient plants that flourish year-round. Through her knowledge and hands-on approach, Lena helps plant lovers transform their spaces into vibrant, green sanctuaries, no matter their gardening experience.
Repotting Guidelines