How to Repot Succulents for Beginners: Step-by-Step Guide
Published on: December 30, 2025 | Last Updated: December 30, 2025
Written By: Lena Greenfield
Repotting succulents can feel intimidating, but it’s a simple process that boosts their health and growth. I’ve repotted dozens of succulents over the years, and I’ll show you how to do it confidently without harming your plants.
In this guide, I’ll walk you through the key steps and tips I’ve learned from hands-on experience. Here’s what we’ll cover:
- When to repot your succulents
- Tools and materials you’ll need
- Step-by-step repotting instructions
- Aftercare to keep them happy
- Common pitfalls and how to avoid them
Knowing When Your Succulent Needs a New Home
Your succulent will give you some pretty clear signals when it’s feeling cramped. I always tell people to look for roots peeking out of the drainage hole-that’s the most obvious “help me!” sign your plant can give. It’s like its toes are literally trying to escape the pot.
Here are the other big clues I’ve learned to spot over the years:
- It’s top-heavy and tips over easily. The plant has grown so much that its current pot can’t anchor it anymore.
- The soil dries out incredibly fast. If you’re watering every few days and it’s still parched, it’s likely more roots than soil in there.
- It hasn’t grown in over a year. A little growth stall is normal in winter, but a complete halt during the growing season often means it’s root-bound.
- The plant is producing a huge number of pups or offsets. All those babies are competing for space and nutrients with the mother plant.
I once had a haworthia that stopped growing for almost two years. When I finally pulled it out, the roots were wound so tightly they held the shape of the pot! Repotting it was like giving it a deep, satisfying stretch after being curled up for too long.
Gathering Your Repotting Toolkit
Having everything ready before you start makes the whole process smooth and stress-free-for you and the plant. Think of it like setting up your mise en place before cooking a fancy meal. You don’t want to be searching for tweezers with one hand holding a dirty plant.
Here’s my go-to list of essentials I always have on my repotting table:
- A new pot that’s just 1-2 inches wider than the current one. Succulents like being a little snug, and a pot that’s too big holds excess moisture.
- Fresh, well-draining succulent & cactus soil. I often mix a bagged mix with extra perlite or pumice for even better drainage.
- A piece of mesh, a coffee filter, or a small rock to cover the drainage hole. This keeps the soil from washing out while still letting water escape.
- Your old succulent, of course! Make sure it’s been dry for a few days before you repot.
And these are the “nice-to-have” tools that make life much easier:
- Tweezers or chopsticks: Perfect for gently removing old soil from delicate roots without breaking them.
- A soft-bristle brush: I use a clean makeup brush to whisk away soil from the leaves after repotting.
- Newspaper or a small tarp: This contains the mess and makes cleanup a 30-second job.
- A small trowel or spoon for scooping soil into the new pot.
Quick Tip: A cheap paintbrush from the hardware store is my secret weapon for cleaning soil off fuzzy succulents like Panda Plants without damaging their leaves.
Choosing the Perfect Pot and Soil
Getting the foundation right is the single most important thing you can do for a happy, healthy succulent. I’ve learned from experience that the wrong pot or soil can undo all your good care in a matter of weeks. So, do succulents really need special soil? The truth is they thrive in a fast-draining, gritty mix rather than heavy, moisture-retentive potting soil.
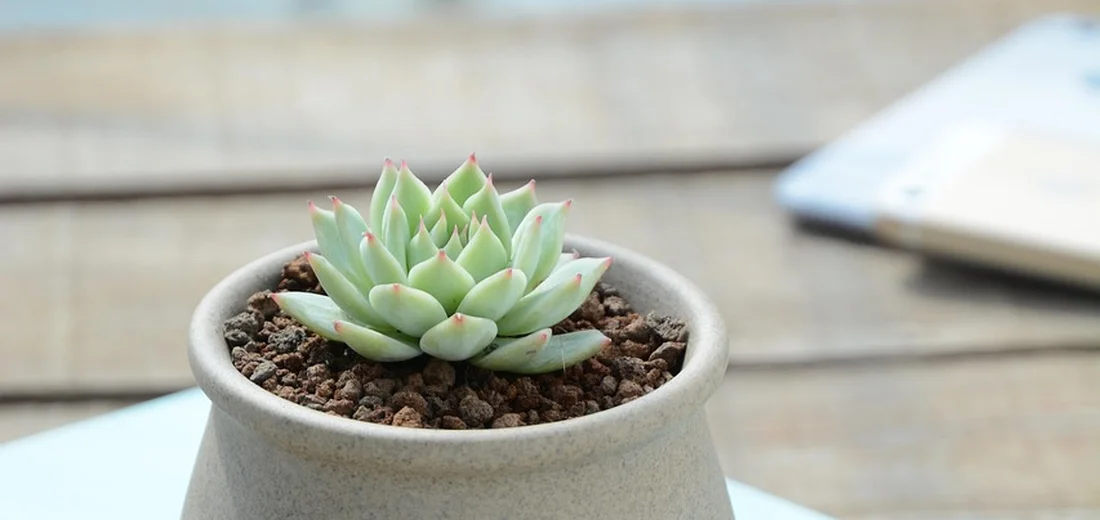
Why Terracotta Pots Are a Top Choice
When I first started, I used any cute pot I could find. Glazed ceramic and plastic pots led to my first few cases of root rot. Terracotta’s porous nature allows the soil to dry out evenly, which is exactly what succulent roots crave. It acts like a wick, pulling excess moisture away from the root ball. This breathability gives you a much bigger margin for error with watering.
Other Pot Options to Consider
- Unglazed Ceramic: Works similarly to terracotta but often comes in more modern shapes and colors.
- Concrete Pots: Very porous and durable, but they can be heavy and may alter soil pH over a long period.
- Plastic Pots: Lightweight and cheap, but they hold water for a long time. Only use these if you are very confident in your light-watering habits.
Crafting the Ideal DIY Succulent Soil Mix
Bagged potting soil is a death sentence for most succulents; it’s simply too dense and moisture-retentive. After losing a beautiful echeveria to soggy soil, I started making my own mix, and the difference was like night and day. Your goal is to create a gritty, fast-draining environment that mimics their natural, rocky habitats.
Here is my go-to, beginner-friendly recipe that has never failed me:
- 2 parts Potting Soil (a basic, cheap one is fine)
- 1 part Coarse Sand (horticultural or builder’s sand, not fine play sand)
- 1 part Perlite or Pumice
Mix these together thoroughly in a large tub. You’ll know it’s right when a handful feels gritty and falls apart easily instead of clumping. This blend provides just enough organic matter for nutrients while the inorganic parts ensure rapid drainage and plenty of air pockets for the roots.
The Step-by-Step Repotting Process
-
Step 1: Gently Remove the Succulent
First, make sure the soil is completely dry. Tilt the current pot on its side and gently squeeze the flexible sides if it’s plastic. For rigid pots, I slide a butter knife or a chopstick carefully between the soil and the pot wall to loosen the root ball. The key is to support the plant at its base and let gravity do most of the work, avoiding a tug-of-war that can break leaves and roots.
-
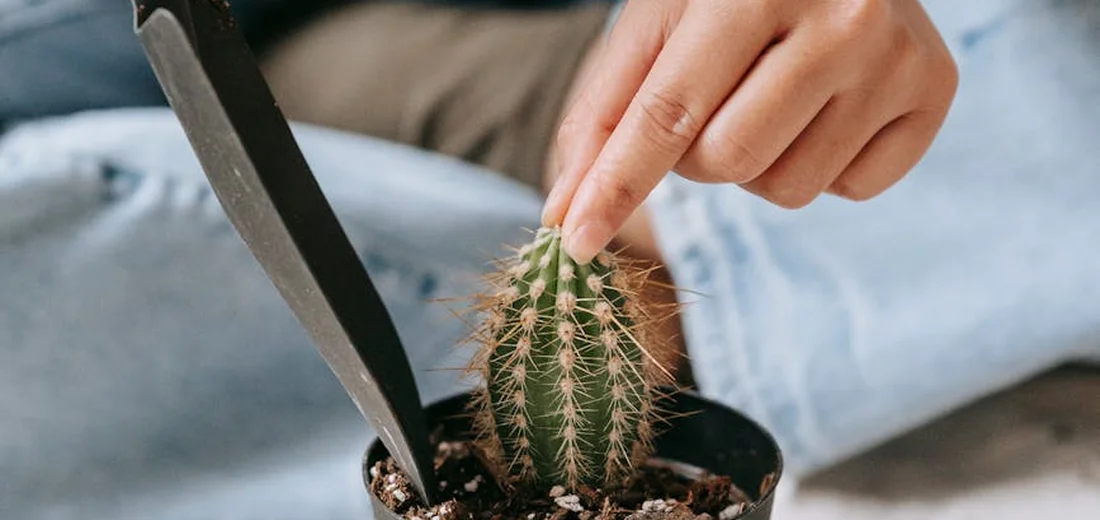
Step 2: Inspect and Tend to the Roots
Once the plant is out, gently brush away the old soil to get a clear look at the roots. Healthy roots are firm and often white or light tan. Use your fingers to untangle any circling roots, which encourages them to grow outward in their new home. If you see any roots that are mushy, black, or smell bad, that’s root rot. Snip these off with clean, sharp scissors. Don’t be afraid to remove unhealthy roots; the plant will grow new, stronger ones.
-
Step 3: Prepare the New Pot
Your new pot should only be 1-2 inches wider in diameter than the old one. Start by covering the drainage hole with a small piece of mesh or a broken shard of terracotta to prevent soil from washing out. I do not recommend a layer of gravel or pebbles at the bottom, as this can actually create a perched water table and keep the soil wetter for longer. Instead, fill the pot about one-third of the way with your fresh, dry succulent soil mix.
-
Step 4: Settle Your Plant into Its New Pot
Place your succulent in the center of the pot. The goal is to have the base of the plant sit just below the rim. Hold it in place with one hand and use the other to scoop soil around the roots. Gently tap the pot on the table a few times as you go to help the soil settle and eliminate large air pockets. Avoid packing the soil down tightly. The root crown (where the stem meets the roots) should be level with the soil surface, not buried.
Quick Tip: Wait at least 5-7 days after repotting before you give your succulent its first drink. This gives any tiny root abrasions time to callus over, preventing rot. Learn more about proper watering techniques for succulents.
Caring for Your Succulent After Repotting
The real work begins after you’ve settled your plant into its new home. Proper aftercare is what bridges the gap between a stressful move and a thriving plant. I’ve learned this through trial and error, and I’m here to help you skip the error part.
The First Crucial Watering
This is the step where most beginners, including a past version of myself, get tripped up. You’ve just repotted and your instinct is to give it a welcome drink. Resist that urge!
- Wait at least one week before the first watering. This gives any tiny root injuries a chance to callus over, preventing rot.
- When it’s time, water thoroughly until it runs out the drainage hole, then let all excess water drain completely.
- Return to your normal succulent watering routine from there, which usually means letting the soil dry out completely between waterings.
Finding the Perfect Spot for Recovery
Your succulent needs a gentle environment to recuperate. Think of it as a patient in recovery.
- Place it in a spot with bright, indirect light for the first week or two. A windowsill with a sheer curtain is perfect.
- Avoid direct, harsh sunlight immediately after repotting. The plant is stressed and more susceptible to sunburn.
- After the initial recovery period, you can gradually move it back to its preferred sunny spot.
What’s Normal and What’s Not
It’s normal to see a little droopiness or for the plant to look unchanged for a week or two. It’s focusing its energy underground, establishing new roots. A little patience is your best tool here.
Watch for these positive signs:
- Firm, plump leaves
- New, tiny growth at the center
- The plant stands upright and perky
Be concerned if you see:
- Mushy, translucent leaves (a classic sign of overwatering)
- Leaves shriveling dramatically and not plumping up after watering (severe underwatering)
- Stem turning black or brown (stem rot)
Turning One Plant into Many: Propagation During Repotting
Repotting is the perfect opportunity to multiply your plant collection for free. I always check for propagation-ready parts whenever I unpot a succulent; it feels like a bonus round! Leaf cuttings are a popular method. Clean a healthy leaf, let the cut end callus, then root it in well-draining soil to propagate succulents from leaves.
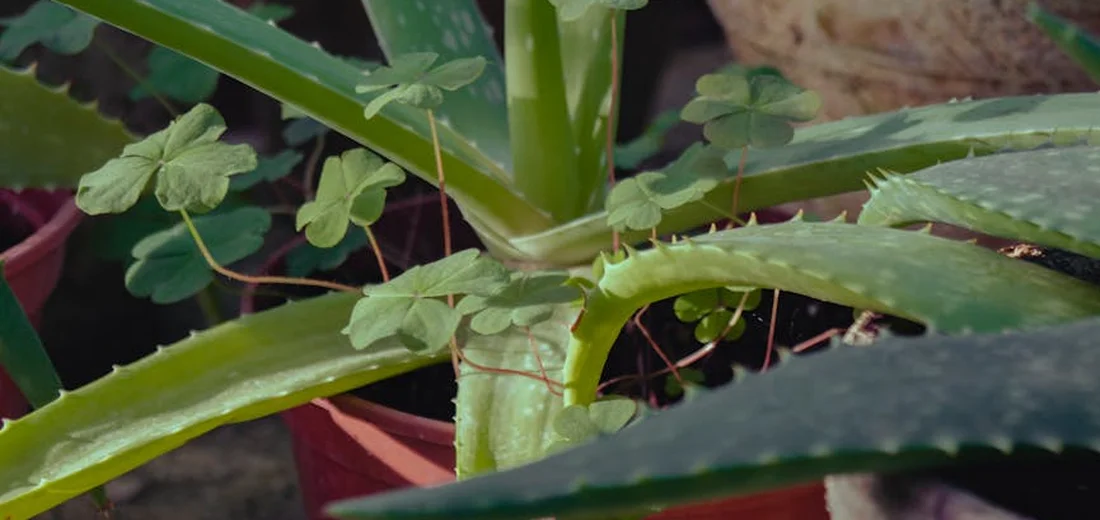
Separating “Pups” or Offsets
Many succulents, like aloes, haworthias, and sempervivums, grow little baby plants right at their base. These are the easiest to propagate. For rarer succulents, offsets can still work, but you may need extra patience and careful handling to propagate successfully.
- Gently tease the root ball apart with your fingers to find where the pup connects to the mother plant.
- If it has its own roots, you can often snap the connection by hand. For tougher connections, use a clean, sharp knife.
- Let the pup’s wound callus over for a day or two, just like with cuttings.
- Plant it in a small pot with fresh succulent mix and care for it as you would any newly repotted plant.
Harvesting Leaves for New Plants
For succulents like echeverias and sedums, you can grow entirely new plants from just a single leaf. This process is magical to watch. After roots form, you can carefully transplant the new plant into its own pot. With proper light and minimal watering, you can propagate succulents successfully.
- While handling your plant, look for plump, healthy leaves from the lower part of the stem.
- Gently wiggle the leaf from side to side until it snaps cleanly off the stem. The key is to get the entire base of the leaf without breaking it.
- Lay the leaves on top of dry soil in a bright, indirect light spot. Do not bury them.
- Forget about them! Seriously, ignore them. In a few weeks, you’ll see tiny pink roots and a miniature rosette forming. Only mist the soil lightly when you see roots.
I’ve had the most success with leaf propagation using my jade plant and graptopetalum. It’s a slow process, but incredibly rewarding.
A Quick Propagation Tip
Not every leaf or pup will succeed, and that’s perfectly okay. Propagation is a numbers game. If a leaf shrivels up without growing roots, just compost it and focus on the ones that are thriving. This mindset saves a lot of frustration.
Troubleshooting Common Repotting Worries
I’ve repotted hundreds of succulents over the years, and I can tell you, the fear of doing something wrong is totally normal. Seeing your plant look a little sad after a move is common and doesn’t mean you’ve failed. Let’s walk through the usual suspects. When you’re propagating, there are common mistakes to avoid. We’ll cover them next so you can keep your cuttings healthy.
Why Are My Succulent’s Leaves Droopy or Wrinkly After Repotting?
This is the number one question I get, and it almost always comes down to water. If the leaves are soft and wrinkly leaves, your plant is thirsty. That wrinkling is the plant’s way of signaling water deficit, which is why the leaves feel soft and squishy. A fresh, dry potting mix can sometimes be a little water-repellent at first. Give your succulent a thorough, deep watering until water runs freely from the drainage hole, and it should plump back up in a day or two.
On the flip side, if the leaves are mushy, translucent, and droopy, you might be dealing with overwatering. This often happens if the roots were damaged during the move and can’t absorb the water you gave them. In this case, you’ll need to unpot the plant, let the roots dry out for a day, and then repot it into completely dry soil, holding off on water for about a week.
What If I Accidentally Broke Some Roots?
Don’t panic! I’ve snapped my fair share of roots, especially when untangling a tight root ball. Succulents are remarkably resilient, and a few broken roots are not a death sentence. Just use a clean pair of scissors to snip off any obviously torn or shredded roots. This is actually healthier for the plant, as it encourages it to grow fresh, strong roots into its new home. Even broken pieces can be replanted and encouraged to regrow into a healthy new plant. Let the cut ends callus briefly, then plant in well-draining soil and water sparingly as it establishes.
My Succulent Looks Loose and Wobbly in the Pot
This usually means it isn’t anchored well. A wobbly plant can’t establish new roots properly. The fix is simple: add more soil. Gently hold the plant in place at the height you want it and carefully spoon more potting mix around the base, tamping it down lightly with a chopstick. Your goal is to have the soil level come up to just below the lowest leaves, providing firm support for the stem.
Dealing with Pests You Discover During Repotting
Finding uninvited guests like mealybugs (they look like tiny bits of white fluff) or fungus gnats is alarming, but repotting is the perfect time to deal with them!
- Gently rinse all the old soil off the roots.
- Spray the entire plant, especially the nooks between leaves, with a 70% isopropyl alcohol solution.
- Let the plant air dry completely before placing it into its fresh, clean pot and new soil.
Discovering pests during a repot is a lucky break-you’ve caught the problem early and can give your plant a completely fresh start.
The Leaves Fell Off When I Handled the Plant
Some succulents, like Sedums or certain Echeverias, are just fragile. If a few leaves pop off, don’t stress. You haven’t just experienced a disaster; you’ve just gotten bonus plants! Lay those leaves on top of dry soil in a bright spot, and in a few weeks, they’ll likely sprout tiny new rosettes. It’s one of the most magical parts of succulent care.
FAQs
What is the best guide to repot succulents?
This step-by-step guide offers a clear, beginner-friendly approach to repotting succulents successfully.
How often should you repot succulents?
Repot succulents every 1-2 years or whenever they exhibit signs of being root-bound.
How do you prevent root rot when repotting succulents?
Use a well-draining soil mix and avoid watering for at least a week after repotting to let roots heal.
What soil mix is best for repotting succulents?
A gritty DIY blend of 2 parts potting soil, 1 part coarse sand, and 1 part perlite ensures optimal drainage.
What pots are best for repotted succulents?
Terracotta pots are ideal due to their porosity, which helps soil dry evenly and prevents moisture buildup.
How do you choose the right pot size for succulents?
Select a pot that is only 1-2 inches wider than the current one to keep the roots snug and avoid overwatering risks.
You’re All Set to Repot!
In my years of nurturing succulents, I’ve found that a successful repot comes down to gentle hands and the right setup.
- Pick a pot with drainage holes and well-draining soil.
- Handle roots carefully to avoid damage.
- Water lightly after repotting and give your plant time to adjust.
Keep following Hardy House Plants for more easy-to-follow guides I swear by. Your succulents will thank you, and remember, every plant parent learns as they grow – you’ve got this! For a clear, complete definition, see Succulent Plants: Complete Definition. It’s a great starting point to understand what counts as a succulent.
Further Reading & Sources
- Repotting Succulents Is Simple-Here’s How to Do It in 6 Easy Steps
- How to Repot a Succulent Arrangement – Succulents Box
- getting ready for our little gardener 💚
- How to repot succulents
Lena Greenfield is a passionate horticulturist and plant care expert with over 10 years of experience cultivating and nurturing hardy house plants. With a deep understanding of both indoor and outdoor gardening, Lena shares practical advice on choosing, caring for, and maintaining resilient plants that flourish year-round. Through her knowledge and hands-on approach, Lena helps plant lovers transform their spaces into vibrant, green sanctuaries, no matter their gardening experience.
Repotting Guidelines