ZZ Plant Care: Your Simple Guide to Watering, Light, and Soil
Published on: December 11, 2025 | Last Updated: December 11, 2025
Written By: Lena Greenfield
Are you worried about overwatering your ZZ plant or unsure if it’s getting enough light? I’ve nurtured ZZ plants for years, and I know that getting the basics right can transform your plant from surviving to thriving.
In this guide, I’ll walk you through watering, light, and soil requirements based on my hands-on experience.
Getting to Know Your ZZ Plant
When I first got my ZZ plant, I was amazed by its ability to just… exist happily. ZZ plants are survivors, equipped with potato-like rhizomes under the soil that store water for dry spells. This built-in water reservoir is their superpower, making them incredibly forgiving if you forget a watering or two (or ten!).
Those glossy, waxy leaves aren’t just for show-they’re designed to minimize water loss. This efficient design means your ZZ plant is working with you, not against you, to stay healthy. It’s a plant that truly understands the busy, modern lifestyle.
What Makes a ZZ Plant So Tough?
- Rhizome Roots: These thick, underground stems hoard water, allowing the plant to go weeks without a drink.
- Waxy Leaf Coating: The shiny surface reduces moisture evaporation, keeping the plant hydrated for longer.
- Slow Growth: ZZ plants take their time, which means they use up water and soil nutrients very slowly.
I’ve found that appreciating these features helps you understand its care needs on a deeper level. Treating your ZZ plant like a thirsty tropical plant is the fastest way to make it unhappy. It thrives on a little benign neglect. So, what’s the best way to prune and maintain ZZ plants? Keep pruning minimal: snip off yellowing or damaged leaves at the base with clean scissors, and avoid over-pruning.
The Golden Rule of ZZ Plant Watering
After accidentally over-loving my first ZZ plant, I learned its one non-negotiable rule. The golden rule for watering a ZZ plant is simple: when in doubt, wait it out. It is always, always better to underwater than to overwater this particular plant.
Think of its watering needs like a gentle desert rain. A thorough soak followed by a period of complete drought mimics its natural environment perfectly. You want to completely saturate the soil, let the excess water drain away, and then not water again until the soil is bone dry.
My Simple Watering Check
- Check the Soil: Stick your finger about two inches into the soil. If you feel any moisture at all, walk away from the watering can.
- Feel the Weight: Lift the pot. A pot that feels light is a thirsty pot. A heavy pot still has plenty of water in the soil.
- Watch the Leaves: A well-hydrated ZZ plant has firm, upright leaves. Slight wilting or wrinkling can be a sign it’s ready for a drink.
In my home, this usually translates to watering every 3-4 weeks in the summer and even less frequently in the winter. Your plant will tell you what it needs far more accurately than any calendar ever could. Paying attention to these signals is the key to a long and happy relationship with your ZZ.
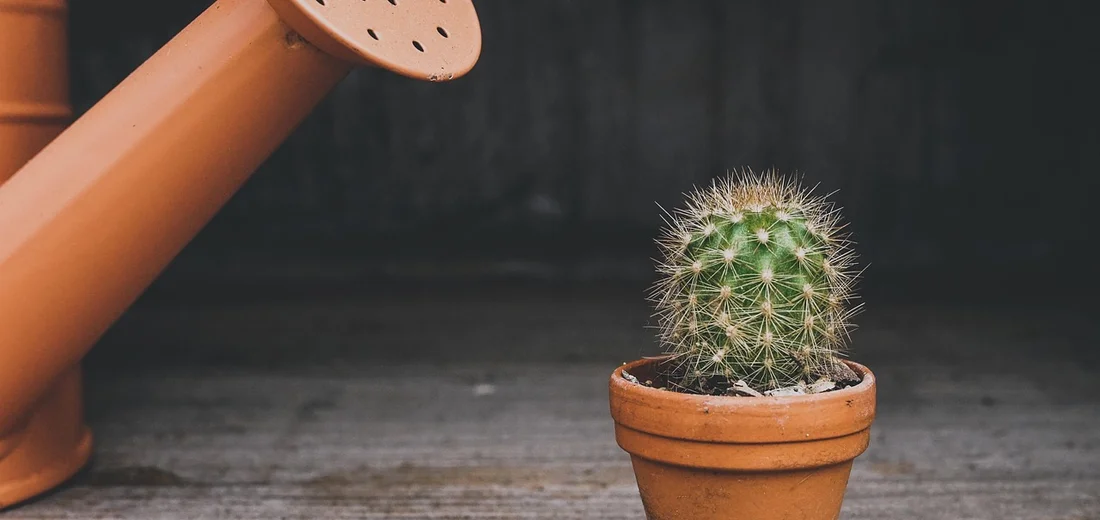
Quick Tip: If you’re a serial over-waterer, plant your ZZ in a terracotta pot. The porous clay helps soil dry out faster, giving you a bigger margin for error.
Finding the Perfect Light for Your ZZ Plant
One of the best things about the ZZ plant is its incredible adaptability to different lighting situations. In my own home, I have ZZ plants thriving in a dim north-facing bathroom and another putting on a ton of new growth in a bright, indirect living room spot. In its native tropical habitat, the ZZ plant typically grows with indirect light under a forest canopy and steady moisture. This background helps explain its broad tolerance for low to bright indirect light and rugged indoor conditions. This flexibility makes it a winner for almost any room.
What Kind of Light is Best?
ZZ plants are champions of low light, but they aren’t limited to it. Think of them as versatile performers.
- Low to Medium Indirect Light: This is their sweet spot. A few feet back from a north or east-facing window is perfect. They’ll grow steadily and maintain their deep green color.
- Bright Indirect Light: If you want to encourage faster growth, place your ZZ in a spot with plenty of bright, filtered light, like near a south or west-facing window with a sheer curtain. I’ve found my ZZ in a bright room pushes out new stems almost twice as fast as the one in lower light.
- Very Low Light: They will survive in a dark corner or a room with only fluorescent lighting, but their growth will be extremely slow. The plant is surviving, not thriving.
Light to Absolutely Avoid
While ZZ plants are tough, they have one major enemy: direct, hot sun.
- Intense Direct Sunlight: The harsh afternoon sun coming through a south or west window will scorch the leaves, causing ugly brown, crispy patches. If you see bleached or scorched spots on the leaves, it’s a sure sign your plant is getting too much direct sun.
A Quick Tip for Reading the Leaves
Your ZZ plant will tell you if it’s happy with its light. Lush, deep green leaves and steady, upright growth mean you’ve nailed the lighting. If the new stems are stretching out long and leggy, reaching for a light source, it’s a cry for more brightness. Pale or yellowing leaves can sometimes indicate too much light.
Don’t overthink it. When in doubt, err on the side of less light rather than more; a ZZ plant is far more likely to suffer from sunburn than from a little shade. Rotate your plant a quarter turn every time you water to ensure it grows evenly and doesn’t lean toward the light source.
Crafting the Ideal ZZ Plant Soil and Potting Mix
I used to think any old bag of potting soil would do for my ZZ plant. That was before I learned that the right soil mix is the secret to a thriving, problem-free ZZ. These plants have unique, potato-like rhizomes that store water, and they absolutely despise having wet feet. That naturally brings up the topic of how often to water ZZ plants indoors. In reality, they prefer infrequent, deep waterings—let the soil dry out between sessions to avoid root rot.
What ZZ Plants Really Need From Their Soil
ZZ plants aren’t picky about many things, but they are very specific about their foundation. The perfect soil environment for them mimics their natural, arid habitats. For the best soil mix ZZ plants thrive in, choose a fast-draining, gritty blend. A well-aerated mix—often cactus or succulent potting soil with added perlite or pumice—prevents root rot and keeps roots healthy.
- Fast Drainage: Water should flow through the mix quickly, not pool around the roots.
- Good Aeration: The roots and rhizomes need access to oxygen to breathe and avoid rot.
- Slight Acidity to Neutral pH: They aren’t super fussy, but a pH between 6.0 and 7.0 is ideal.
My Go-To DIY ZZ Plant Soil Recipe
After years of trial and error, this is the simple, two-part mix I use for all my ZZ plants. It has never failed me.
- Start with two parts of a high-quality, all-purpose potting soil as your base.
- Mix in one part of a coarse, chunky material. I prefer perlite, but succulent and cactus mix also works wonderfully.
- Thoroughly combine them in a large bucket until the perlite is evenly distributed.
This blend creates the perfect airy, well-draining environment that ZZ plant roots crave. The potting soil provides some nutrients and moisture retention, while the perlite ensures excess water drains away instantly. For the ultimate guide on pot size, learn how to choose the right container for a ZZ plant. We’ll also cover when to upgrade the pot as it grows.
Choosing and Using the Right Pot
The pot you choose is just as important as the soil you put in it. I learned this the hard way with a beautiful, glazed ceramic pot that had no drainage hole.
- Drainage Holes are Non-Negotiable: Always, always use a pot with at least one hole in the bottom.
- Material Matters: Terracotta and clay pots are fantastic because they are porous and allow the soil to dry out more evenly.
- Size Appropriately: Only repot when the plant is root-bound, and only go up one pot size (about 1-2 inches wider in diameter).
A pot that is too large holds onto excess moisture for far too long, which is the fastest way to cause root rot. When you do repot, be gentle with the rhizomes and only lightly tamp the new soil around them.
When to Consider a More Advanced Mix
If you live in a very humid climate or tend to be an over-enthusiastic waterer, you might want to make your mix even grittier. For my plants in lower-light areas, I sometimes use this three-part recipe for extra insurance.
- 1 part potting soil
- 1 part perlite
- 1 part orchid bark or horticultural sand
This super-charged, chunky mix is practically impossible to overwater. It gives the roots tons of space and ensures any extra moisture evaporates quickly.
Feeding Your ZZ Plant: A Simple Fertilizer Schedule

Think of fertilizer as a vitamin boost, not a daily meal. ZZ plants are naturally slow growers and incredibly efficient at using the nutrients already in their soil. In my own collection, I’ve had ZZ plants thrive for years with very little feeding, and overdoing it is a much more common mistake than underfeeding.
When to Feed Your ZZ Plant
Your ZZ plant will tell you when it’s hungry by its growth cycle. I only fertilize during the active growing season, which is typically from late spring through early fall. When you see new shoots emerging from the soil, that’s your green light.
During the fall and winter, your plant is essentially napping. Feeding it now is like offering a heavy meal to someone who’s asleep-it can’t use the nutrients, and the excess salts can build up and burn the roots.
- Active Season: Late Spring to Early Fall
- Dormant Season: Late Fall to Winter (No fertilizer needed)
Choosing the Right Fertilizer
You don’t need anything fancy here. A simple, balanced, water-soluble houseplant fertilizer works perfectly. I personally use a half-strength dose of a balanced 10-10-10 fertilizer for my ZZ plants every time I feed them. This diluted approach prevents any risk of root burn.
Organic options like worm castings or fish emulsion are also fantastic, gentle choices if you prefer to go that route. The key is to avoid “bloom booster” fertilizers, as your ZZ is grown for its gorgeous foliage, not its flowers.
My Simple Feeding Steps
- Confirm your plant is in its active growing season.
- Water your ZZ plant thoroughly first with plain water. Never apply fertilizer to dry soil, as this is a surefire way to damage the roots.
- Mix your liquid fertilizer at half the strength recommended on the bottle.
- Use this diluted fertilizer solution to water the plant as you normally would.
- Repeat this process only once a month during the growing season.
Quick Tip: Once a year, in early spring, I take my ZZ to the sink and run a gentle stream of water through the soil for a few minutes to flush out any mineral buildup. This keeps the root system happy and healthy.
Signs You’re Feeding Too Much
More isn’t better when it comes to fertilizer. Keep an eye out for these warning signs:
- Yellowing leaves, especially starting at the tips
- A white, crusty layer on top of the soil
- Stunted growth or a sudden drop of leaves
If you see any of this, stop fertilizing immediately and give the soil a good flush. In my experience, a ZZ plant will always recover faster from a lack of food than from an overabundance of it.
Troubleshooting Common ZZ Plant Problems
Why Are My ZZ Plant Leaves Turning Yellow?
Seeing a yellow leaf on your ZZ plant can be alarming, but don’t panic. In my experience, yellow leaves are almost always a sign that you’re being a little too generous with the watering can. These plants store water in their potato-like rhizomes underground, so they handle drought far better than a flood.
When you overwater, the roots and rhizomes can’t breathe and start to suffocate and rot. This damage means they can’t transport water and nutrients up to the leaves, which then turn yellow as a distress signal. Before you water, do the finger test. Stick your finger two inches into the soil. If it feels damp, wait.
- Overwatering: The most common culprit. Leaves are typically yellow and may feel soft or mushy.
- Underwatering: Less common, but possible. Leaves will be yellow, crispy, and the soil will be bone-dry and pulling away from the pot’s edges.
- Natural Aging: An occasional older, lower leaf yellowing and falling off is just the plant’s way of making room for new growth.
Quick tip: When in doubt, wait it out. A thirsty ZZ plant is a happy ZZ plant.
Spotting and Stopping Root Rot
Root rot is the most serious issue a ZZ plant can face, and it’s a direct result of soggy soil. I’ve rescued many ZZ plants from this fate, and catching it early is the key to success. The first signs are often those squishy yellow leaves we just talked about. Yellowing or browning leaves are a common symptom that can stem from overwatering, poor drainage, or inconsistent watering. We’ll cover the main causes and practical solutions to bring your ZZ plant back to health.
To confirm your suspicions, you need to get a look at the roots. Gently tip the plant out of its pot. Healthy ZZ plant roots are firm and white or light tan. If you see dark brown or black roots that feel slimy and fall apart easily, you’ve found root rot. A foul, musty smell from the soil is another dead giveaway.
Here is my step-by-step rescue plan for a ZZ plant with root rot:
- Remove the plant from its pot and gently wash the soil away from the roots under lukewarm water.
- With a clean, sharp pair of scissors or pruners, cut away every single soft, rotten root and rhizome. Be ruthless-any rot left behind will spread.
- Let the plant’s root system air dry for a few hours out of direct sun.
- Repot the plant into a clean pot with fresh, well-draining potting mix. A terracotta pot is great here because it helps wick away extra moisture.
- Do not water the plant for at least a week after repotting to give the cuts time to callous over and prevent new rot.
Preventing root rot is much easier than treating it. Always use a pot with a drainage hole and a fast-draining soil mix amended with perlite or orchid bark. Your ZZ plant will thank you with years of lush, green growth.
When and How to Repot Your ZZ Plant

Your ZZ plant will tell you when it’s time for a new home, and it’s rarely in a hurry. I typically only repot my ZZs every two to three years, as they actually enjoy being a little bit root-bound. A snug pot encourages them to focus energy on growing those beautiful, glossy leaves above the soil.
Signs It’s Time for a Bigger Pot
Don’t just repot on a schedule; watch for these clear signals from your plant.
- Roots are escaping from the drainage holes at the bottom of the pot.
- You notice the pot is bulging or cracking from the pressure inside.
- Water runs straight through the pot without being absorbed, meaning it’s more roots than soil in there.
- Growth has completely stalled, even during the spring and summer growing season.
Choosing the Perfect New Pot and Soil
Getting this combination right is the secret to a happy, long-lived ZZ plant.
- Pot Size: Only go up one pot size, about 1-2 inches wider in diameter. A pot that’s too large holds excess moisture and can lead to root rot.
- Pot Material: I’m a big fan of terracotta or clay pots for ZZ plants. They are porous and allow the soil to dry out more evenly, which these plants love.
- Soil Mix: Use a well-draining, chunky potting mix. I make my own by combining two parts regular indoor potting soil with one part perlite and one part orchid bark. This creates the airy, fast-draining environment that ZZ plant roots crave.
My Step-by-Step Repotting Process
Follow these simple steps for a stress-free transition for your plant.
- Water your ZZ plant lightly a day or two before repotting. This makes it easier to remove from the old pot and reduces transplant shock.
- Gently lay the pot on its side and carefully wiggle the plant out. You might need to tap the sides of the pot to loosen it.
- Inspect the root ball. Look for any mushy, black, or rotten roots and snip them off with clean scissors.
- Place a layer of your fresh soil mix in the bottom of the new pot.
- Position your ZZ plant in the center and fill in around the sides with more soil, gently firming it down.
- Give it a light watering to help settle the soil, and then place it back in its favorite spot with indirect light.
Quick Tip: Wear gloves when handling your ZZ plant, as the sap can be a mild skin irritant for some people. It’s a simple precaution that makes the job more comfortable.
Don’t be alarmed if your plant looks a little sad or doesn’t grow for a few weeks after repotting. This is normal as it settles into its new space and focuses energy on root development. Just resume your normal care routine, and it will perk back up in no time.
Bonus ZZ Plant Care Tips for Thriving Growth
After years of tending to ZZ plants, I’ve picked up a few tricks that go beyond the basic water-and-light routine. These bonus tips are the secret sauce that transforms a good ZZ plant into a spectacular, glossy-leaved showstopper.
Choosing the Right Container
The pot you choose is more than just decoration; it’s a key part of your plant’s environment. I always recommend using a pot with drainage holes to prevent your ZZ’s rhizomes from sitting in a swamp.
Terracotta pots are my personal favorite for ZZ plants. The porous clay allows the soil to breathe and dry out more evenly, which is perfect for a plant that dislikes wet feet. If you fall in love with a pot without a hole, use it as a decorative cache pot. Just slip the plastic nursery pot inside and remember to empty any drained water after watering.
Cleaning the Leaves for Maximum Shine
Dusty leaves don’t just look dull; they can’t photosynthesize efficiently. Giving your ZZ plant a gentle leaf cleaning once a month makes a huge difference in its health and appearance.
Here’s my simple, two-step method:
- Take a soft, damp cloth and gently wipe the top and bottom of each leaf. I use filtered water to avoid any mineral spots.
- For a beautiful, natural shine, you can finish by wiping the leaves with the inside of a banana peel. It’s a weird but wonderful household trick I learned that leaves them gleaming without any chemical sprays.
Handling the Rhizomes with Care
Those potato-like lumps at the base of your plant are its secret weapon. ZZ plant rhizomes store water, which is why the plant is so resilient during dry spells.
When you repot, you might be tempted to break these apart. Be gentle! I only divide rhizomes that have naturally formed their own separate growth points. Cutting into a healthy, solid rhizome can shock the plant and invite rot. Think of them as the plant’s personal pantry-you don’t want to bust the door down.
Quick Tips for the Skimmer
- Wipe those leaves! A clean plant is a happy, efficient plant that can soak up all the light it needs.
- When in doubt, choose terracotta. It’s the safest bet for preventing overwatering and keeping those precious rhizomes healthy.
Common Questions
Why are the leaves on my ZZ plant turning yellow?
Yellow leaves are most commonly a sign of overwatering, so allow the soil to dry out completely between waterings.
How often should I fertilize my ZZ plant?
Fertilize your ZZ plant only during its active growing season, using a half-strength, balanced liquid fertilizer once a month. For more on how big ZZ plants get and their growth rate, see our ultimate size guide.
Can a ZZ plant be grown outdoors?
ZZ plants can be grown outdoors in warm climates but must be placed in a shaded location protected from direct sun and rain. Understanding their light and temperature requirements is crucial for successful outdoor cultivation.
What is the best type of soil for a ZZ plant?
A well-draining, chunky mix, such as two parts potting soil to one part perlite, is ideal for preventing root rot.
How do I know when my ZZ plant needs water?
Water your ZZ plant only when the soil is completely dry, which you can check by feeling the soil or lifting the pot to gauge its weight. If your ZZ plant is drooping or not growing, watering issues are a common culprit. This approach helps prevent root problems and supports healthier growth.
What are the top care tips for a ZZ plant indoors?
The key to indoor care is providing bright, indirect light and watering sparingly, as the plant is highly drought-tolerant.
Your ZZ Plant Success Guide
From my years of growing ZZ plants, I can confidently say they’re one of the easiest houseplants to keep happy with simple attention to watering, light, and soil.
Here’s the core care checklist:
- Water deeply only when the soil is completely dry
- Place in bright, indirect light or even lower light spots
- Use a fast-draining cactus or succulent soil mix
For more plant care insights, explore Hardy House Plants at www.hardyhouseplants.com.
ZZ plants are wonderfully resilient, so trust your instincts and enjoy watching your green friend thrive. In the zz plant complete introduction benefits guide, you’ll find simple tips on light, watering, and soil. This guide helps beginners maximize resilience and growth.
Further Reading & Sources
- ZZ Plant 101: How to Care for ZZ Plants | Bloomscape
- When And How Often to Water a ZZ Plant: A Detailed Guide
- ZZ Plant Care Tips: Watering, Light, and Maintenance Guide – Ugaoo
- ZZ Plant Care Made Simple: Step-by-Step Guide
Lena Greenfield is a passionate horticulturist and plant care expert with over 10 years of experience cultivating and nurturing hardy house plants. With a deep understanding of both indoor and outdoor gardening, Lena shares practical advice on choosing, caring for, and maintaining resilient plants that flourish year-round. Through her knowledge and hands-on approach, Lena helps plant lovers transform their spaces into vibrant, green sanctuaries, no matter their gardening experience.
Watering Practices