How Often Should You Fertilize and Repot Succulents?
Published on: January 10, 2026 | Last Updated: January 10, 2026
Written By: Lena Greenfield
You should fertilize your succulents lightly about once a year, and repot them every two to four years when they outgrow their container. It’s easy to worry about overdoing it, but these resilient plants thrive on a little benign neglect.
I’ll walk you through the simple signs and schedules I’ve used for years, covering the best time of year to fertilize, how to spot a root-bound succulent, choosing the perfect soil mix, a step-by-step repotting guide, and the most common mistakes to avoid.
Understanding Your Succulent’s Growth Cycle
I used to treat all my succulents the same, and let me tell you, that was a mistake. Succulents have distinct active and dormant growing seasons, and feeding them at the wrong time is like offering a heavy meal to someone who’s fast asleep. You’ll confuse them and potentially harm their roots.
Most succulents are actively growing in the warmer, brighter months of spring and summer. This is when they’re putting out new leaves, stretching towards the sun, and maybe even flowering. They’re hungry for nutrients to fuel that growth spurt. Proper care during the summer months is crucial to keep them healthy.
Come fall and winter, with shorter days and cooler temperatures, many succulents enter a dormant or semi-dormant state. Their growth dramatically slows down or even stops completely as they conserve energy. During this rest period, fertilizing can force weak, leggy growth and make them susceptible to root burn.
Here are some common examples from my own collection:
- Echeveria, Sedum, and most Aloes are spring/summer growers.
- Haworthia and some Aeoniums often slow down in the peak of summer heat and then perk up again in the fall.
- Christmas and Easter cacti have their main growth flushes before their blooming periods.
The best advice I can give you is to watch your plant. If you see new, vibrant growth emerging from the center, it’s a clear signal your plant is awake and ready for a light snack. No new growth? Then hold off on the fertilizer.
Creating Your Succulent Fertilizing Schedule
For years, I followed the “less is more” mantra, and it has never steered me wrong. A consistent but gentle feeding schedule is far better for your succulents than occasional heavy doses. Think of it as a steady, balanced diet versus binge eating.
Here is a simple seasonal schedule I follow for my most common succulents:
| Season | Frequency | Notes |
|---|---|---|
| Spring & Summer (Active Growth) | Once per month | Begin when you see new growth and stop about a month before the first expected frost. |
| Fall & Winter (Dormancy) | Do not fertilize | Let your plants rest. Water sparingly and provide as much light as possible. |
If you’re using a slow-release fertilizer mixed into your soil, a single application in early spring is often enough to last the entire growing season. Always err on the side of under-fertilizing; you can always add a little more, but you can’t take it back.
Selecting the Right Fertilizer Type
Walking down the fertilizer aisle can be overwhelming. I’ve tried many types, and for succulents, simplicity wins. Look for a balanced, water-soluble fertilizer specifically formulated for cacti and succulents. These are typically low in nitrogen, which prevents the soft, mushy growth that pests love. To fertilize without inviting pests, apply at the prescribed strength and avoid frequent feedings. Always flush the soil with water after feeding to dilute any leftover salts that could attract pests.
You’ll usually see three numbers on the bottle, like 2-7-7 or 1-2-2. These represent the ratio of Nitrogen (N), Phosphorus (P), and Potassium (K).
- A lower first number (Nitrogen) helps promote sturdy, compact growth instead of leggy, weak stems.
- A higher middle number (Phosphorus) supports strong root development and can encourage blooming.
- The last number (Potassium) contributes to the plant’s overall health and disease resistance.
I personally prefer organic options like worm castings or fish emulsion because they are very gentle and enrich the soil life. Organic fertilizers feed the soil, which in turn feeds your plant, creating a healthier mini-ecosystem in the pot. Synthetic fertilizers work faster but carry a higher risk of salt buildup that can damage delicate succulent roots over time. Choosing the right organic or inorganic soil components for succulents is equally important to ensure proper nutrient balance.
Mixing and Applying Fertilizer Correctly
This is where most people, including my past self, get into trouble. Never, ever apply fertilizer to dry soil-it’s a guaranteed way to burn the roots and cause severe damage. Always water your succulent first with plain water to moisten the soil.
My foolproof method for applying liquid fertilizer is simple:
- Water your plant thoroughly until water runs out the drainage hole. This pre-moistens the root ball.
- Mix your liquid fertilizer at HALF the strength recommended on the package label. Succulents are light feeders.
- Use this diluted fertilizer solution to water your plant as you normally would, until it drains from the bottom.
Applying fertilizer to damp soil helps dilute it further and allows for even absorption, preventing hot spots of concentrated nutrients. Make sure no fertilizer solution pools on the leaves, as this can cause burns, especially in bright light. If any gets on the leaves, just wipe it off with a damp cloth.
Quick tip: I always fertilize in the morning. This gives the leaves a chance to dry completely and allows the plant to photosynthesize and use those nutrients throughout the day.
Recognizing When It’s Time to Repot
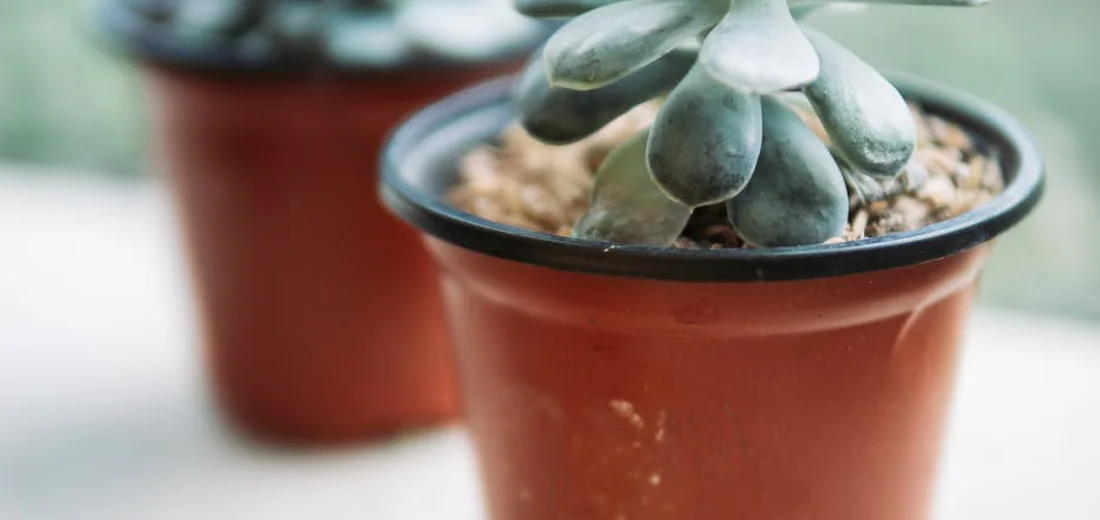
Your succulent will give you clear signals when it’s feeling cramped. I always tell people to watch for roots peeking out of the drainage holes; that’s the most obvious cry for help. It means the root system has completely filled its current home and has nowhere else to go.
Other signs are just as telling. If you notice your plant’s growth has slowed to a crawl even during its active season, it’s likely root-bound. A pot that feels unusually top-heavy or dries out in just a day or two are also red flags I’ve learned to spot over the years.
Choosing the Perfect Pot and Soil
Getting the pot and soil right is the single most important step for a happy repotted succulent. My golden rule is to only go one pot size up, choosing a new container that’s about an inch wider in diameter than the old one. A pot that’s too large holds excess moisture, which is a fast track to root rot. In our repot succulents beginners step-by-step guide, we’ll walk you through the exact process so you can transplant with confidence. You’ll know how to prep the soil, choose the right pot, and care for the plant after replanting.
For material, I’m a huge fan of unglazed terra cotta pots. They are porous, which allows the soil to dry out more evenly and helps prevent overwatering. Whatever pot you choose, a drainage hole is absolutely non-negotiable.
Your soil mix is just as critical. Standard potting soil is too dense and holds too much water. I always make my own mix for the best results.
- Two parts potting soil
- One part perlite
- One part coarse sand
This creates the fast-draining, airy environment that succulent roots crave. You can also use a pre-mixed bag labeled for cacti and succulents.
The Step-by-Step Guide to Repotting Succulents
Repotting doesn’t have to be stressful for you or your plant. Follow these steps for a smooth transition.
- Prepare the new pot. Place a small piece of screen or a coffee filter over the drainage hole to keep soil from washing out. Add a layer of your fresh soil mix to the bottom.
- Remove the succulent. Tilt the old pot sideways and gently squeeze it to loosen the root ball. Ease the plant out. If it’s stuck, you can run a butter knife around the inside edge.
- Tease the roots. Gently loosen the tight root ball with your fingers. This encourages the roots to spread out into their new soil instead of continuing to grow in a circle.
- Position the plant. Place your succulent in the new pot. The base of the plant should sit just below the rim of the pot.
- Fill with soil. Add your soil mix around the roots, gently tapping the pot on the table to settle it. Avoid packing the soil down tightly.
Here’s my best pro tip: wait a full week before you give your repotted succulent its first watering. This gives any tiny, damaged roots a chance to heal, which dramatically reduces the risk of rot. Knowing when and how to water succulents after repotting is key to keeping them healthy.
Tools You’ll Need for Success
Having the right tools on hand makes the whole process easier and protects your plant. You don’t need anything fancy.
- Your new pot with a drainage hole
- Fresh, well-draining succulent soil mix
- Gardening gloves (some succulents have sharp spines!)
- Tongs or a folded piece of paper to handle spiky plants
- Newspaper or a tarp to contain the mess
- A small trowel or spoon for scooping soil
I always repot over a newspaper-it makes cleanup a five-second job. A little preparation goes a long way in making repotting a simple, successful task.
Combining Repotting with Propagation
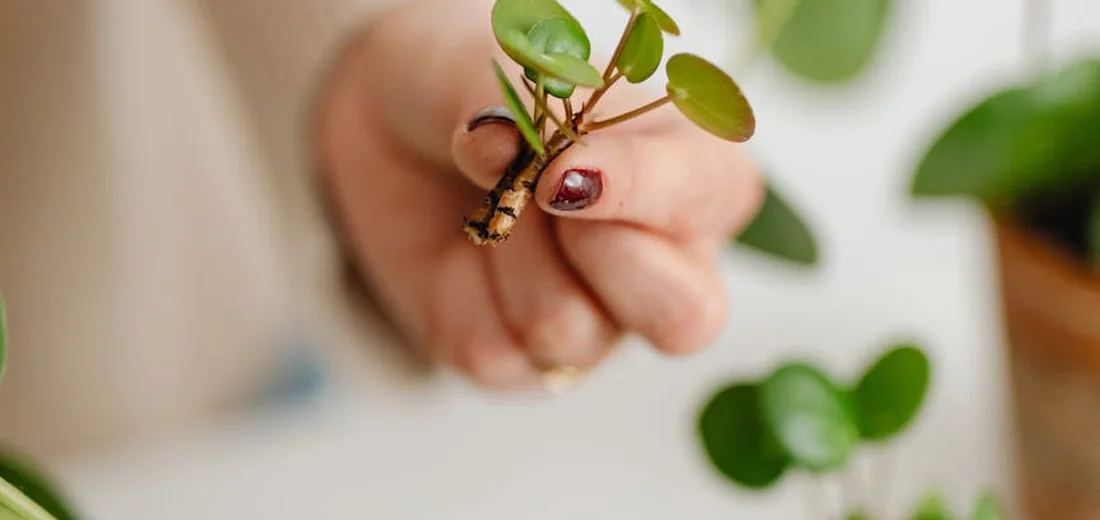
Repotting day is the perfect time to multiply your plant collection. I always see repotting as a two-for-one deal: I refresh the mother plant’s home and create a bunch of new baby plants. It’s less stressful for the plant when you handle everything in one go, and it’s incredibly rewarding.
My favorite method is separating the “pups” or offsets that many succulents, like aloes and haworthias, produce. When you gently tip the plant out of its pot, you’ll often see smaller plants clustered around the base. Gently wiggle them apart, ensuring each pup has some of its own roots. If they’re stubborn, I use a clean, sharp knife to make a clean cut. This immediate separation prevents the main plant from getting overcrowded and gives the pups their own space to thrive.
For succulents like echeverias or sedums, I practice leaf propagation right then and there. As I’m handling the plant, any healthy, plump leaves that snap off cleanly get set aside. I lay them on top of fresh, dry succulent soil in a shallow tray. I don’t bury them. I just leave them in a bright spot and forget about them for a few weeks. Soon enough, tiny pink roots and a miniature rosette will appear.
My Simple Propagation Steps During Repotting
- Gently remove the entire plant from its old pot.
- Inspect the root ball for natural offsets or pups.
- Carefully tease the pups apart with your fingers or a sterile knife.
- Set aside any intact, healthy leaves that fall off during the process.
- Pot the main plant and any rooted pups individually in fresh soil.
- Place unrooted leaves on a dry soil surface to callous and sprout.
Caring for Your Succulent After Repotting and Feeding
The first week after repotting is a critical recovery period. Your succulent’s roots are tender and may have tiny, invisible abrasions. The most important rule is to withhold water for at least 5-7 days after repotting to allow any damaged roots to callous over and prevent rot. I know it’s tempting to give them a drink, but trust me, patience here saves so many plants.
Place your repotted succulent in a spot with bright, indirect light. Avoid direct, harsh sun for the first week. Think of it like a patient recovering from surgery; they need a calm environment. A windowsill with a sheer curtain is perfect. This gentle light helps the plant focus its energy on re-establishing its root system without the stress of intense heat or light.
If you added fertilizer to the new soil, you’ve already given it a nutrient boost that will last for months. You don’t need to do anything else. After that initial dry period, you can resume your normal watering routine. Water deeply until it runs out the drainage hole, then wait until the soil is completely dry before watering again.
What to Expect (And Not Panic About)
- Some bottom leaves may wilt or be reabsorbed. This is normal as the plant redirects energy to root growth.
- The plant might look a little droopy or sad for a few days. It’s just settling in.
- You won’t see any new top growth for a few weeks. All the action is happening underground!
Resist the urge to poke, prod, or repot it again. Give it a full season to recover and grow. In my experience, a well-timed repot and feed in the spring sets your succulents up for a spectacular, vibrant growing season. You’ll be amazed at the transformation.
Common Questions
What are the signs that a succulent needs to be repotted immediately?
Roots visibly growing out of the drainage hole is the most urgent sign that your succulent needs a new pot.
Is there a bad time of year to repot my succulents?
It is best to repot during the plant’s active growing season, typically spring and summer, for a faster recovery.
Should I water my succulent right after repotting it?
You should wait about a week after repotting before watering to allow any damaged roots to heal.
What should I do if I accidentally over-fertilize my succulent?
Flush the soil thoroughly with water to help dilute and wash away the excess fertilizer.
Can I fertilize my succulent on the same day I repot it?
You should not fertilize a newly repotted succulent, as the fresh soil typically contains enough nutrients and the roots need time to settle. If you’re wondering when to change the soil, most succulents benefit from a refresh every 1–2 years. Do it sooner if the mix has compacted, drains poorly, or shows salt buildup.
How do I know if my succulent is dormant and shouldn’t be fertilized?
A complete lack of new growth is the primary indicator that your succulent is dormant and does not need fertilizer. If you’re trying to tell whether it’s dying versus dormant, check for signs like wilting leaves or soft spots, which suggest decline rather than dormancy. You can also inspect the roots and soil moisture for a final check.
Your Simple Succulent Care Plan
In my experience, the golden rule is to fertilize during active growth and repot only when your succulent clearly needs more space. For maximum growth, align fertilization with the plant’s peak growing season and keep the feed light. This approach helps prevent fertilizer burn while still promoting growth. Keep this quick guide handy:
- Fertilize every 4-6 weeks in spring and summer with a diluted, balanced formula.
- Repot every 1-2 years or when roots circle the pot’s bottom.
For more trusted tips, explore other articles on Hardy House Plants, like what succulents need to thrive. With consistent care, your succulents will stay happy and healthy for years to come.
Further Reading & Sources
- Fertilizing Succulents: How, When, Why & With What | Debra Lee Baldwin, Succulent Expert
- How and When to Fertilize Succulent Plants
- Learn how to fertilize succulents | Succulents and Sunshine
- Succulent Spring Feeding – Debra Lee Baldwin
Lena Greenfield is a passionate horticulturist and plant care expert with over 10 years of experience cultivating and nurturing hardy house plants. With a deep understanding of both indoor and outdoor gardening, Lena shares practical advice on choosing, caring for, and maintaining resilient plants that flourish year-round. Through her knowledge and hands-on approach, Lena helps plant lovers transform their spaces into vibrant, green sanctuaries, no matter their gardening experience.
Repotting Guidelines