How to Design and Create a Stunning Succulent Garden
Published on: December 2, 2025 | Last Updated: December 2, 2025
Written By: Lena Greenfield
You want a beautiful succulent garden, but you’re worried it might be too difficult or that you’ll pick the wrong plants. I’ve been there, and after years of designing succulent displays, I can tell you it’s much simpler than it looks.
In this guide, I’ll walk you through everything I’ve learned, from my first wobbly arrangements to the lush, thriving gardens I create today. We’ll cover design principles for visual impact, selecting the right succulents for your space, choosing containers and soil, and simple maintenance for long-term success.
Dreaming Up Your Succulent Garden Vision
Before you buy a single plant, I want you to close your eyes and imagine your perfect succulent space. This mental blueprint is the single most important step in creating a garden you’ll adore for years. I’ve learned that skipping this leads to a mismatched collection that never feels quite right.
Start by looking at your available space. Is it a sunny windowsill, a wide patio planter, or a vertical wall? I once tried to cram a large, sprawling Agave into a tiny tabletop pot, and it was a lesson in scale I’ll never forget. Measure your area and keep those dimensions in mind.
Finding Your Garden’s Personality
What feeling do you want your garden to evoke? Your succulent choices can create wildly different moods.
- Modern & Minimal: Think clean lines and geometric shapes. Use a monochromatic color scheme with plants like Haworthia and stacked Crassulas.
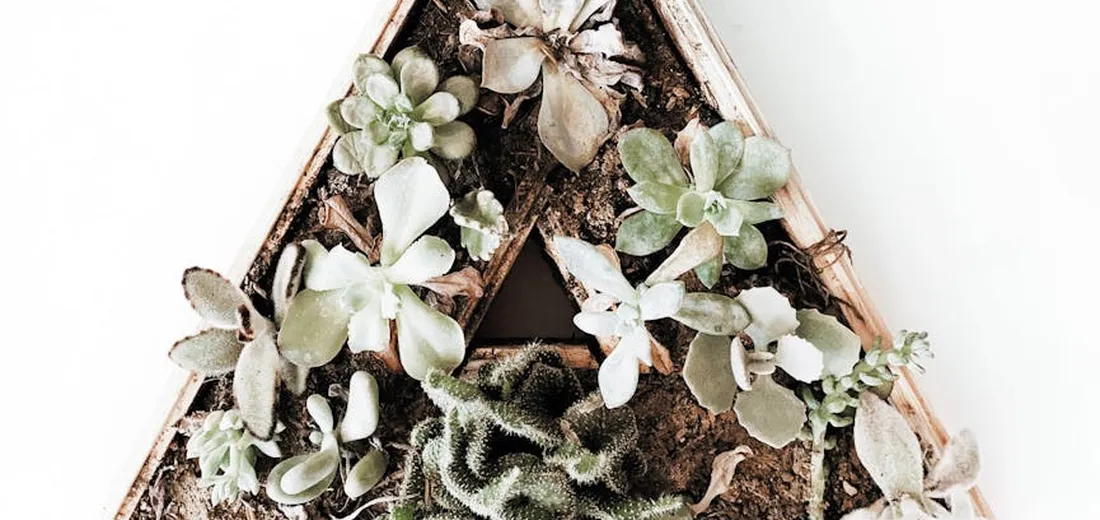
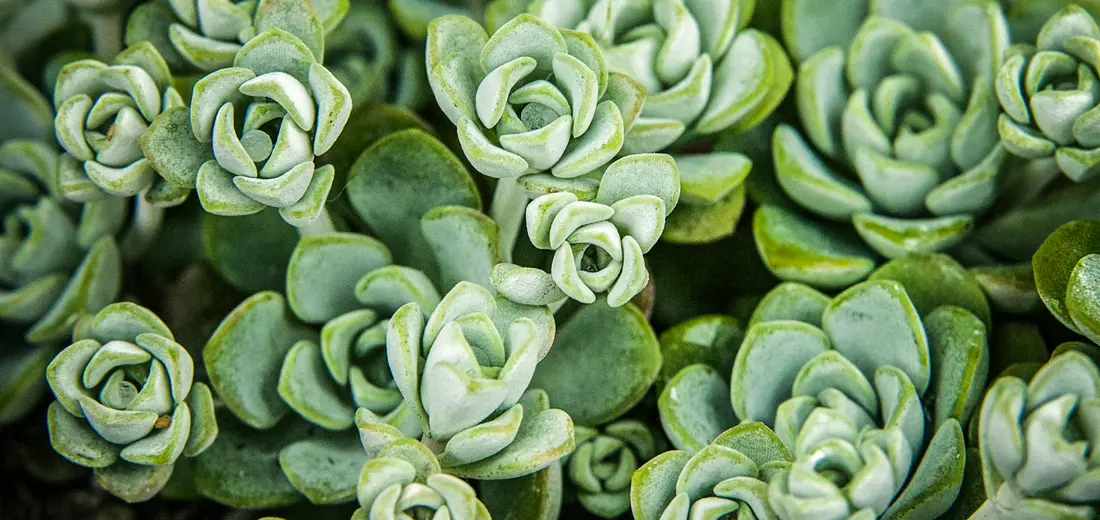
- Soft & Whimsical: This is all about texture and flow. I love using trailing String of Pearls and fluffy Echeveria varieties to create a fairy-tale feel.
- Desert Oasis: Go for bold, architectural statements with cacti, large Aloes, and spiky Yucca plants. Use a top dressing of sand or gravel to complete the look.
Quick Tip: Snap a photo of your space and use a simple photo-editing app to “draw” in where you want different shapes and colors to go. It’s a game-changer for visualizing the final product.

Playing with Color and Texture
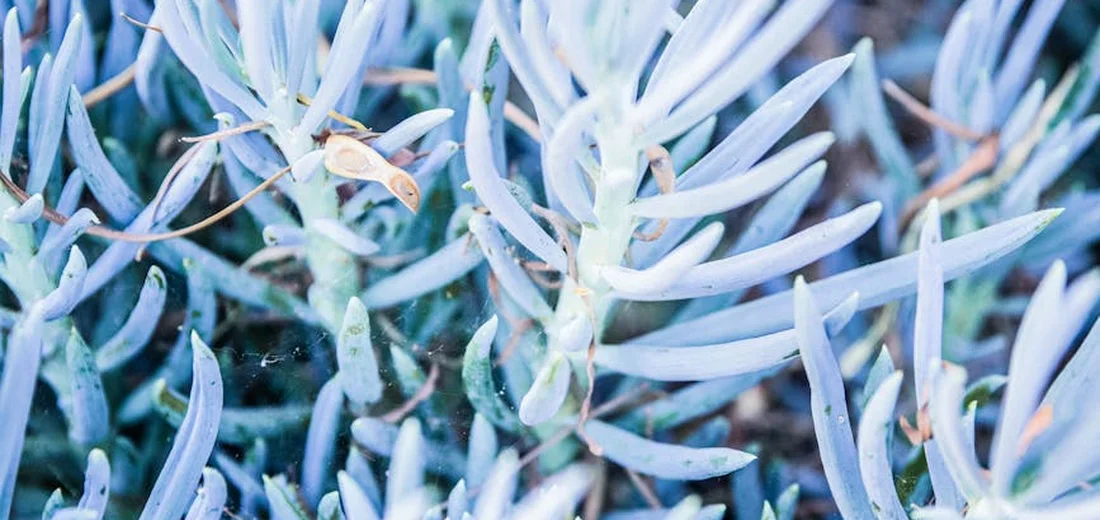
Succulents offer a painter’s palette of colors beyond basic green. You can find them in shades of deep plum, fiery red, silvery blue, and even near-black. Grouping plants with contrasting textures, like the smooth, round leaves of a Pachyphytum next to the spiky frills of a Sempervivum, creates incredible visual interest. In my own garden, a section of red-tipped Graptopetalum next to a blue Senecio serpens is the combo that always gets compliments. With careful placement, you can transform any collection into a stunning display of rare colorful succulents. Mastering color and texture balance makes these displays truly eye-catching.

Selecting the Perfect Succulents for Your Design
Now for the fun part-choosing your plants! This is where your vision meets reality. I always tell fellow plant lovers to shop with a plan, not on a whim, to ensure all your selections will thrive together.
Grouping by Sun and Water Needs
The biggest mistake I see is mixing high-light and low-light succulents in the same container. One will always suffer. So, how much light do different succulents really need? Understanding each plant’s light needs helps you group them safely and keep everyone thriving.
- Full Sun Lovers: These are your Echeveria, most Sedum, and Aloes. They need several hours of direct sunlight to maintain their compact shape and vibrant colors.
- Bright, Indirect Light Preferrers: Think Haworthia, Gasteria, and Sansevieria. They’ll scorch in harsh afternoon sun but thrive in a bright room.
Always check the plant tag or ask the nursery about light requirements. Grouping plants with similar thirst levels is just as crucial for a low-maintenance garden. A water-loving Portulacaria afra does not want to share a pot with a drought-hardy Cactus.
Building Your Plant “Cast”
Think of your garden design like casting a play. You need stars, supporters, and fillers.
- The “Thriller” (Focal Point): This is your star plant. Choose one with dramatic height, a unique shape, or a striking color. A tall, branching Euphorbia or a large, rosette-forming Aeonium works perfectly.
- The “Filler” (Supporting Cast): These plants bulk out your design and surround the thriller. Look for medium-sized, mounding succulents like Graptoveria or compact Sedum varieties.
- The “Spiller” (The Finishing Touch): These trail over the edges of your container, softening the look. My go-to spillers are String of Bananas and Burro’s Tail.
Don’t be afraid to hold plants together at the nursery to see how their colors and forms complement each other before you buy. Trust your eyes-you’re the artist here.
Mastering Succulent Garden Design Principles
Designing a succulent garden is like painting with living sculptures. I’ve found that thinking about your space as a canvas helps you arrange plants in a way that feels both intentional and naturally beautiful. Let’s break down the core principles I use in my own garden designs.
Playing with Color and Texture
Color is the first thing that grabs your attention. Succulents offer an incredible palette beyond just green. I love creating pockets of drama by grouping a deep, almost black Echeveria ‘Black Prince’ next to the powdery lavender of a Graptopetalum. This contrast makes both plants pop.
Think about the mood you want. For a cool, serene spot, combine blue tones like Blue Chalk Sticks (Senecio serpens) with silvery plants. For a warm, fiery display, use red-tipped Jelly Bean plants (Sedum rubrotinctum) and coppery Kalanchoes.
Texture is just as important as color. Running your hand over a garden should be a tactile experience, from the smooth, waxy leaves of a Jade Plant to the fuzzy, soft feel of a Panda Plant (Kalanchoe tomentosa). I always mix in a few spiky options, like Aloe or Agave, to break up the rounder shapes and add architectural interest.
My Go-To Color & Texture Combinations
- Cool & Serene: Echeveria ‘Lola’ (pale lavender), Senecio serpens (blue), and Crassula ‘Buddha’s Temple’ (stacked green columns).
- Warm & Vibrant: Sedum nussbaumerianum (orange-copper), Echeveria ‘Perle von Nurnberg’ (pink-purple), and a trailing String of Pearls.
- High-Contrast Drama: Echeveria ‘Black Prince’, graptoveria ‘Fred Ives’ (pastel peach), and a spiky, green Haworthia.
Building Structure with Layering and Hardscape
A flat garden can look one-dimensional. The secret to a professional-looking design is building height and depth through strategic layering. I always start with a “thriller”-a taller, statement plant like a tall Aeonium or an upright Euphorbia to anchor the entire arrangement.
Then, I build the middle layer with rosette-forming succulents like Echeverias and Sempervivums. These are the fillers that give the garden body and volume. Finally, I add “spillers”-trailing plants like Sedum morganianum (Burro’s Tail) or a String of Bananas to cascade over the edges of a container or wall, softening the hard lines.
Hardscape refers to the non-living elements. Don’t underestimate the power of a beautiful pot, some interesting rocks, or even a piece of driftwood to tie the whole garden together. I often use a large, textured rock as a focal point and tuck smaller succulents around its base to make it look like they’ve grown there naturally.
A Simple Layering Formula I Use Every Time
- Choose Your Thriller: Pick one tall, architectural plant for the center or back.
- Add Your Fillers: Surround it with medium-sized, mounding succulents.
- Incorporate Spillers: Place trailing varieties along the edges to overflow.
- Finish with Hardscape: Add a top dressing of gravel and one or two decorative rocks.
Remember to leave a little space between plants. It’s tempting to pack them in tightly for instant gratification, but giving them room to grow prevents moisture buildup and allows each plant’s unique form to shine. They will fill in the gaps beautifully over time.
Choosing the Right Container and Soil Foundation
Getting the container and soil right is like building a solid house on a good foundation. I’ve learned that the pot you pick and the dirt you use are the two most critical factors for a thriving succulent garden. Get this part wrong, and you’ll be fighting an uphill battle, no matter how green your thumb is.
Your Container is More Than Just Decor
Succulents aren’t fussy about fancy pots, but they have one non-negotiable need: drainage. A container without a drainage hole is a death sentence for these plants. I learned this the hard way with a beautiful, hole-less ceramic pot that turned into a swamp. When choosing pots and containers for succulents, always prioritize drainage.
When selecting your container, consider these factors:
- Material: Terra cotta is my go-to. It’s porous, allowing the soil to dry evenly and preventing root rot. Ceramic and concrete are also great, durable choices.
- Size: Don’t plant a small succulent in a huge pot. The excess soil holds too much moisture. Choose a container that gives the roots just a little room to grow, about an inch wider than the plant’s span.
- Shape: Shallow, wide bowls are fantastic for creating those lush, overflowing succulent arrangements you see online.
Crafting the Perfect Gritty Soil Mix
Regular potting soil is a succulent’s worst enemy. It holds onto water for far too long. These plants hail from arid environments and need a fast-draining, gritty home.
You can buy a pre-made cactus and succulent mix, but I always doctor mine up for even better results. Here is my personal, fail-proof recipe:
- Start with two parts bagged succulent/cactus potting mix.
- Add one part perlite for aeration.
- Add one part coarse sand or poultry grit for ultimate drainage and weight.
- Mix it all together thoroughly in a large tub.
Your final mix should feel loose and gritty, not dense or muddy. When you water it, the liquid should rush through immediately, not pool on the surface.
A Quick Drainage Test
Not sure if your mix is right? Try this simple test I use. Grab a handful of your moistened soil mix and squeeze it in your fist. If it clumps together into a muddy ball, it needs more grit. If it crumbles apart easily, you’ve nailed it!
A Step-by-Step Guide to Building Your Garden
-
Step 1: Prepare your container with drainage materials.
Your container’s foundation is the most critical part of the entire project. I never, ever skip creating a drainage layer at the bottom of my pots. Without it, water has nowhere to go, and soggy soil is a death sentence for succulents. I use a one- to two-inch layer of clay pebbles, small lava rock, or even broken pieces of a terracotta pot. This layer acts like a reservoir, keeping the roots up and out of any excess water that drains through the soil.
-
Step 2: Add your specialized soil mix.
Don’t just grab a bag of garden soil from the shed! Succulents need a gritty, fast-draining mix to mimic their natural, arid habitats. I make my own blend using two parts potting soil to one part perlite and one part coarse sand. This creates air pockets and ensures water flows through quickly. If you’re buying a pre-made mix, look for one specifically labeled for cacti and succulents. Fill your container with this mix, leaving enough space at the top for your plants and a layer of gravel.
-
Step 3: Arrange and plant your succulents.
This is the fun, creative part! Before you plant, play with the arrangement while they’re still in their nursery pots. I always design my garden around a “thriller, filler, spiller” concept for a professional look. Place a taller, striking plant (the thriller) as your focal point, surround it with smaller, rosette-shaped plants (the fillers), and let a trailing variety (the spiller) cascade over the edge. Once you’re happy with the layout, gently remove each plant, loosen its root ball, and nestle it into the soil. Give them a little room to grow; don’t pack them in too tightly.
-
Step 4: Add decorative gravel mulch and final touches.
A top dressing of gravel is the secret ingredient that makes a succulent garden look polished and professional. This layer of small, colorful stones does more than just look pretty-it keeps the soil in place, reduces moisture evaporation, and prevents the leaves from touching damp soil. I love using white pea gravel for a clean look or red lava rock for a dramatic contrast. Carefully pour the gravel around the base of each plant, covering all the exposed soil. Use a small brush or a puff of air to clean any stray soil off the succulent leaves.
-
Step 5: Initial watering and placement for correct sun exposure.
Your new garden is thirsty after its journey! Give your succulents a good, deep initial watering until you see water run out of the drainage hole. This encourages the roots to grow downward. After this, do not water again until the soil is completely dry, following the recommended watering schedule for new succulents. Finally, find the perfect spot for your creation. Most succulents crave bright, indirect light. A south or east-facing windowsill is ideal indoors. Avoid intense, direct afternoon sun right away, as it can scorch the leaves of plants that aren’t yet acclimated.
Caring for Your New Succulent Garden
You’ve built a beautiful arrangement, and now the real fun begins-keeping it thriving. I’ve found that the joy of a succulent garden isn’t just in the creating, but in the simple, mindful routine of caring for it. Let’s walk through the essentials to keep your plants happy and healthy for years to come. What do succulents need to thrive?
Mastering the Art of Watering
This is the number one area where succulent lovers, including myself, have made mistakes. The goal is to mimic the desert downpours they’ve evolved to love.
- The “Soak and Dry” Method is Your Best Friend: I never give my succulents little sips. Instead, I thoroughly drench the soil until water runs freely out of the drainage hole. Then, I wait. I don’t water again until the soil is completely dry all the way through.
- Feel the Soil, Don’t Follow the Calendar: Sticking to a rigid “water every Tuesday” schedule is a recipe for overwatering. In the summer, my outdoor gardens might need water every 7-10 days, while my indoor ones in the winter might go a full month. Your finger is the most reliable tool you own-poke it deep into the soil to check for moisture.
- Watch for Thirsty Signals: Succulents are great communicators. When they’re thirsty, their leaves may look a bit wrinkled, thinner, or feel soft and pliable. A well-hydrated succulent has firm, plump leaves.
Providing the Perfect Amount of Light
Light is their food, and getting it right makes all the difference in color and form.
- Bright, Indirect Light is the Sweet Spot: Most of my succulents thrive in a spot that gets several hours of bright, filtered light. A south or east-facing windowsill is often perfect indoors.
- Avoid the Scorch: Intense, direct afternoon sun through a window can actually sunburn your plants, leaving permanent brown or white scars. If you see this, simply move them back from the window a few feet.
- The Leaning Tower of Succulent: If your plant starts stretching out and leaning desperately towards the light, it’s telling you it needs more. This process, called etiolation, means it’s time to find a brighter location.
The Right Soil and Pot Make All the Difference
I learned this lesson the hard way after losing a few beautiful plants to root rot. The secret is all in the foundation.
- Drainage is Non-Negotiable: You must use a pot with a drainage hole. There are no exceptions if you want a low-maintenance garden. I’ve drilled my own holes into ceramic pots I just had to have!
- Skip the Standard Potting Mix: Regular soil holds too much moisture. I always use a specialized succulent and cactus mix, which is grittier and drains much faster. For an extra boost, I sometimes mix in some perlite or pumice to make it even airier.
Simple, Ongoing Maintenance
A little bit of tidying up goes a long way in keeping your garden looking pristine.
- Remove Spent Leaves: Gently pull away any dried-up, dead leaves from the bottom of your plants. This not only looks better but improves air circulation and deters pests.
- Don’t Be Afraid to Prune: If a stem gets too long or leggy, you can simply snip it! Use clean, sharp scissors and cut where you want to encourage new, bushier growth. You can even replant the cutting to grow a whole new plant-it’s like free gardening!
- Keep an Eye Out for Unwanted Guests: Check your plants occasionally for signs of mealybugs (they look like tiny bits of white fluff) or aphids. If you spot them early, a cotton swab dipped in rubbing alcohol is often all you need to wipe them out.
FAQs
How do I start designing a succulent garden if I’m a beginner?
Begin by assessing your space and light conditions, then choose succulents with similar care needs for a cohesive design, especially if you’re planning to create a living succulent wall garden.
What are some easy DIY succulent garden ideas for small budgets?
Use recycled containers like old teacups or wooden crates, and propagate succulents from cuttings to save money.
How can Pinterest help me with succulent garden design inspiration?
Search for boards dedicated to succulent arrangements to visualize color schemes, layouts, and container ideas that suit your style. These ideas translate well into creative ways to decorate display succulents in your home. Try pairing them with decorative pots, terrariums, and floating shelves to make a living centerpiece.
What are the best succulent garden designs for compact areas like apartments?
Opt for vertical gardens or tiered planters to maximize space while incorporating trailing and compact succulent varieties. Trailing hanging succulents thrive in these designs, creating lush, cascading vertical gardens.
Are there special tips for succulent garden design in Australia’s climate?
In Australia, focus on drought-tolerant succulents and provide afternoon shade to protect plants from intense sun.
Where can I find high-quality images of succulent garden designs for ideas?
Explore gardening websites, Instagram hashtags, and online plant forums for a wealth of inspirational succulent garden photos.
Your Succulent Garden Awaits
From my years of tending to succulents, I can confidently say that a stunning garden hinges on matching plants to your environment, using well-draining soil, and watering with care. Focus on these fundamentals, and you will set yourself up for success from the start. This approach also forms the core of an outdoor succulent care guide for growing succulents in your garden.
- Select succulents that thrive in your home’s light and humidity levels.
- Always opt for a gritty, fast-draining soil mix to keep roots healthy.
- Water deeply but infrequently, letting the soil dry completely between drinks.
- Play with colors, textures, and heights to design a visually engaging arrangement.
I invite you to browse our website for more plant care insights and creative ideas. Remember, every gardener learns by doing, and your patience will be rewarded with a lush, vibrant space that grows with you.
Further Reading & Sources
- Succulent Garden Design Essentials from an Award-Winning Garden
- Succulent Landscaping
- Succulent Garden | California Landscape Design | Plan & Plants – California Wild Gardens
- Succulent Garden: Stunning Design Ideas for Any Space
Lena Greenfield is a passionate horticulturist and plant care expert with over 10 years of experience cultivating and nurturing hardy house plants. With a deep understanding of both indoor and outdoor gardening, Lena shares practical advice on choosing, caring for, and maintaining resilient plants that flourish year-round. Through her knowledge and hands-on approach, Lena helps plant lovers transform their spaces into vibrant, green sanctuaries, no matter their gardening experience.
DIY Projects