How to Make a Living Succulent Wreath
You’ve seen stunning living succulent wreaths and wondered if you could make one yourself, but maybe you’re worried it’s too difficult or that you’ll kill the plants. I’m here to tell you it’s an incredibly rewarding project, and with the right guidance, your wreath will thrive for months.
I’ve made dozens of these over the years, and in this guide, I’ll walk you through the exact materials you need, a foolproof assembly process, and my personal tips for long-term care.
Gathering Your Succulent Wreath Supplies
Before we get our hands dirty, let’s gather our tools. Having everything within arm’s reach makes the entire process smoother and more enjoyable. I learned this the hard way after scrambling for my floral pins with moss-covered hands!
Here is your essential shopping list:
- Wreath Base: A 12-inch grapevine or sphagnum moss wreath form is my go-to. I find this size is the perfect canvas to work on.
- Sheet Moss: This acts as the liner that holds everything in. Get a big, fluffy bag of it.
- Potting Mix: Use a fast-draining cactus and succulent mix. Don’t use regular potting soil-it holds too much moisture.
- Assorted Succulents: Aim for a variety of textures, colors, and sizes. I love using 20-30 small cuttings (called “cuttings” or “plugs”) for a full look.
- Floral Pins or Greening Pins: These U-shaped wire pins are non-negotiable for securing your plants.
- Scissors or Pruners: For trimming roots and any wayward stems.
- A Spray Bottle: Filled with water to mist your moss and soil as you work.
- Gloves (Optional): Some people dislike the feel of moss and soil, so gloves are a great idea.
Quick Tip: Soak your sheet moss in a bowl of water for 10 minutes before you start. This makes it pliable and easy to shape around your wreath form.
Choosing and Preparing Your Wreath Base
Your base is the foundation of your entire creation. Choosing the right one will determine not just how your wreath looks, but how long it thrives. I’ve experimented with almost every type over the years.
Selecting a Sturdy Base Form
You have two fantastic, plant-friendly options for your base. Each has its own personality.
- Grapevine Wreath: This is my personal favorite for beginners. The twisted vines create a sturdy, open framework that provides excellent drainage and plenty of nooks to tuck succulent stems into. Its rustic look adds instant character, even before you add a single plant.
- Sphagnum Moss Wreath Form: These are dense, packed forms that look like a giant donut of moss. They hold moisture beautifully, which can give you a little more wiggle room with watering. They are fantastic for a lush, full look right away.
My advice? If you want maximum drainage and a more rustic aesthetic, go with grapevine. If you prefer a very solid base that’s a bit more forgiving, choose a sphagnum moss form.
Building the Soil and Moss Cushion
This is where we turn that bare base into a cozy home for your succulents. Think of it as making a comfy bed for them to root into. And while tiny pots seem tempting, many succulents prefer a bit more room to spread their roots. Understanding root crowding and pot size helps you choose the right pot size for healthy growth.
- Line the Base: Take your pre-soaked sheet moss and pull off generous handfuls. Press it firmly onto the top and inner sides of your wreath form, creating a continuous layer. You want it to be about half an inch to an inch thick.
- Add the Soil: Scoop your cactus potting mix onto the moss-lined base. Gently pat it down to create an even layer that’s about 1-2 inches thick. Don’t pack it down like concrete; you want it to be firm but still fluffy enough for roots to grow through.
- Secure the Bed: This is the secret to a wreath that doesn’t fall apart! Take your floral pins and push them through the soil and moss, anchoring them into the wreath form underneath. Space them out every few inches like little staples to hold your soil layer securely in place.
- Mist and Settle: Give your prepared base a good, thorough misting with your spray bottle. This helps settle the soil and gives your succulents a welcoming, moist environment to start in.
Your base should now feel solid and look like a beautiful, earthy ring ready for planting. If you poke it and soil falls out, add a few more floral pins. A secure foundation is the key to success!
Selecting the Perfect Succulents

Choosing the right plants is the most exciting part of the process, and I’ve found that a mix of textures, colors, and growth habits creates the most stunning wreath. I always aim for a combination of rosette shapes, trailing varieties, and some spiky or upright forms for visual interest.
From my many wreath-making experiments, these are my go-to succulent picks:
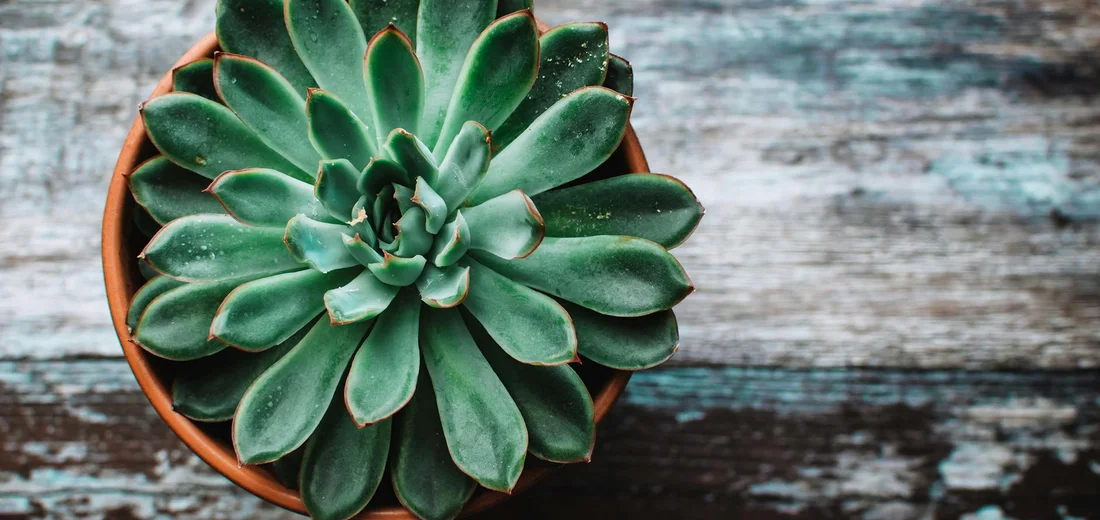
- Rosette Stars: Echeverias and Sempervivums (Hens and Chicks) are the classic, beautiful anchors. Their symmetrical shapes look like floral decorations.
- Trailing Accents: String of Pearls, Sedum morganianum (Burro’s Tail), or any creeping Sedum. These will gracefully spill over the wreath’s edge as they grow.
- Textural Fillers: Crassulas (like the Jade plant), some smaller Aloes, or Graptopetalum. They add different leaf shapes and fill gaps beautifully.
When you’re at the nursery, gently touch the leaves. A firm, plump leaf means the plant is well-hydrated and ready for its new home. Avoid any with mushy spots or significant gaps between leaves, as they might be stressed.
The Step-by-Step Planting Process
Now for the fun part-bringing your wreath to life! I lay out all my materials on a big table covered with newspaper. It can get a little messy, but that’s half the joy.
Step 1: Soaking and Prepping Your Plants
This is a step many beginners skip, but it’s a game-changer for your wreath’s success. Gently remove each succulent from its nursery pot and carefully shake off as much of the old soil from the roots as you can. This is exactly the kind of step you’d find in a beginner’s step-by-step guide to repot succulents.
I then give the root balls a quick soak in a shallow bowl of water for about 10 minutes. This ensures they start their new life fully hydrated. After their soak, I lay them all out on a towel to drain while I prepare the wreath base. Pro Tip: Letting the roots dry for an hour or two after soaking makes them less fragile and easier to handle during planting.
Step 2: Creating Your Arrangement Design
Don’t just start sticking plants in! I always do a “dry fit” first. Place your empty wreath form on the table and arrange your prepped succulents on top of it. Play with different layouts until you find a composition that feels balanced and full, similar to how you would when designing a succulent garden.
Here’s my personal strategy for a design that grows in beautifully:
- Place your largest, most striking rosettes (like Echeverias) at the “bottom” of the wreath or spaced evenly around it as focal points.
- Tuck the trailing varieties along the outer and inner rims so they can eventually cascade down.
- Use the smaller, textural filler plants to connect the larger elements and cover any bare moss.
Take a picture with your phone once you’re happy. It will be your guide!
Step 3: Securing Succulents to the Base
It’s time to make it permanent. Working with one section at a time, use a pencil or your finger to poke a small hole in the moss of your wreath form. If you’re propagating succulents from leaf cuttings, nestle the leaf bases into the moss and let them root there. Insert the roots of your first succulent into the hole and gently pack the moss back around the stem to hold it firmly in place.
For extra security, especially for heavier plants, I use U-shaped floral pins or even long, sturdy pieces of wire bent into a hairpin shape. Push the pin over the base of the plant’s stem and down into the wreath form-this locks it in place while the roots establish. Continue this process, following your design photo, until every plant is securely tucked into the moss.
Caring for Your New Living Succulent Wreath

Initial Watering and Establishment
Right after planting, your wreath needs a special kind of drink to help it settle in. I lay my wreath flat on a table and use a watering can with a long, narrow spout to gently water the moss and the base of each succulent. Your goal is to moisten the entire moss form without creating a muddy mess that dislodges your plants. I learned this the hard way when a heavy-handed watering session sent a few cuttings floating away!
Let the wreath rest flat for a full day or two before you even think about hanging it. This gives the roots a chance to start grabbing onto the moss. This initial “settling in” period is critical for encouraging the cuttings to establish a strong foothold. You’ll know it’s ready to hang when the plants feel firmly in place and don’t wobble when you give the wreath a gentle shake.
Long-Term Maintenance and Pruning
Living wreaths are surprisingly low-maintenance, but they aren’t “set it and forget it” projects. I check mine weekly by poking a finger into the moss. Water only when the moss feels dry and crumbly, about once every 1-2 weeks depending on your home’s humidity. I always take it down and lay it flat to water, ensuring a deep, even soak.
Succulents will eventually grow, and some might get a bit leggy as they reach for light. Don’t be afraid to give them a haircut! Use clean, sharp scissors to snip off any overgrown stems or dead leaves, which encourages bushier growth. You can even replant those trimmings to start a whole new project, especially when succulents flower and produce offshoots.
Here’s a simple seasonal checklist I follow:
- Spring & Summer: Water more frequently as the moss dries faster. This is the main growing season.
- Fall & Winter: Water much less, sometimes only once a month. The plants are mostly dormant.
- Year-Round: Rotate your wreath every few weeks so all sides get equal light exposure.
Troubleshooting Common Succulent Wreath Issues
Even with the best care, you might run into a few hiccups. I certainly have over the years!
If you notice leaves starting to wrinkle or look deflated, your wreath is thirsty. Wrinkled, thin leaves are a classic sign of underwatering and mean it’s time for a good, thorough soak. The plants should plump back up within a day or two.
The opposite problem is mushy, translucent, or black leaves, which signal overwatering and potential rot. If you see rot, immediately stop watering, remove the affected plant, and let the entire wreath dry out completely. It’s better to lose one plant than the whole wreath to rot.
Sometimes, a succulent just doesn’t take and dies. Don’t panic! Simply pull it out and tuck a fresh cutting into the empty spot. I always keep a few extra rooted succulents on hand for quick wreath repairs. You can also learn how to replant and regrow broken succulent pieces to have more cuttings available.
For the viewer who is skimming: When in doubt, don’t water! Succulents can recover from being dry far better than they can from being too wet. If you want to tell when they need water, watch for signs like wrinkled leaves and dry soil. When the soil feels dry several inches down, it’s usually time to water again.
FAQs
What is a succulent wreath tutorial?
A succulent wreath tutorial is a step-by-step guide for creating a living, decorative wreath from various succulent plants. You can also explore creative ways to display succulents in your home, such as eye-catching centerpieces or vertical wall gardens.
What materials are needed for a succulent wreath tutorial?
You will need a wreath base, sheet moss, a fast-draining cactus and succulent potting mix, assorted succulents, floral pins, scissors or pruners, and a spray bottle.
What base options are available for a succulent wreath tutorial?
The two most common and recommended base options are a sturdy grapevine wreath or a dense sphagnum moss wreath form.
How do you choose succulents for a succulent wreath tutorial?
Select a mix of rosette-shaped, trailing, and textural filler succulents that are firm and plump to the touch for a visually interesting and healthy wreath. Echeveria care basics—bright light, well-draining soil, and sparing watering—help these rosette varieties stay lush and compact.
How do you arrange succulents on a wreath base in a succulent wreath tutorial?
Place larger rosettes as focal points, position trailing varieties along the rims to cascade, and use smaller fillers to connect elements and cover the base.
How do you care for a succulent wreath after assembly?
After the initial settling period, water only when the moss feels dry by laying the wreath flat for a thorough, even soak and rotate it regularly for even light exposure.
Your Succulent Wreath Journey Starts Now
In my years of crafting living wreaths, I’ve found that success hinges on starting with a sturdy frame, selecting resilient succulents, and committing to gentle, consistent care. This living succulent wall garden creation care guide builds on those lessons, helping you plan, install, and maintain a thriving vertical display. Here are the core steps to keep in mind:
- Opt for fast-draining soil and a moss-lined base to prevent waterlogging.
- Choose compact, drought-tolerant succulents like echeverias or sedums for easy arrangement.
- Water sparingly-only when the soil feels dry-and place in bright, indirect light.
I’m excited for you to enjoy this rewarding project, and for more hands-on guides, browse the tips at Hardy House Plants. Remember, every wreath tells a story, and yours will thrive with a little patience and love!
Further Reading & Sources
- How to Make a Living Succulent Wreath | Succulents and Sunshine
- Make a Succulent Wreath, Step-By-Step – Debra Lee Baldwin
- Succulent Wreaths
- Living Succulent Wreath | Costco
Lena Greenfield is a passionate horticulturist and plant care expert with over 10 years of experience cultivating and nurturing hardy house plants. With a deep understanding of both indoor and outdoor gardening, Lena shares practical advice on choosing, caring for, and maintaining resilient plants that flourish year-round. Through her knowledge and hands-on approach, Lena helps plant lovers transform their spaces into vibrant, green sanctuaries, no matter their gardening experience.
DIY Projects