Propagate Rare Succulents: Simple Steps for Success
Published on: February 28, 2026 | Last Updated: February 28, 2026
Written By: Lena Greenfield
You’re eager to grow your collection of rare succulents, but maybe you’re nervous about messing up the propagation process. I’ve felt that same worry, and after years of nurturing these plants, I can assure you it’s totally doable with the right approach.
In this article, I’ll guide you through choosing the best method, gathering essential tools, following step-by-step instructions, and troubleshooting common issues to help your new plants thrive.
What Makes a Succulent “Rare” and Worth Propagating
When I talk about a “rare” succulent, I’m not just referring to price tags. I look for plants that are genuinely hard to find in everyday nurseries. True rarity often comes from a combination of incredibly slow growth, specific propagation challenges, and breathtakingly unique forms you won’t see anywhere else.
I’ve learned that propagating these gems is more than just making more plants. It’s about preservation. Many rare succulents are threatened in their native habitats, and by learning to propagate them, we’re creating a safeguard against their loss. You’re essentially becoming a plant conservationist on your windowsill.
- Slow Growth Rate: Some succulents, like certain Haworthias or Astrophytums, take years to reach a noticeable size. Commercial growers often avoid them because they aren’t “fast money.”
- Difficult Propagation: A plant might not produce many offsets, or its seeds could have a very low germination rate. I’ve had some leaf cuttings where only 1 in 10 decides to grow.
- Unique Variegation or Morphology: This includes stunning color patterns (variegation) or bizarre shapes that occur as spontaneous mutations. These traits are often unstable and can’t be reliably reproduced from seed.
Quick Tip: If a succulent’s price makes you gasp, it’s likely rare due to one of these factors. Propagating it yourself is the most rewarding way to afford it! Speaking of costs, you may be wondering: how much do succulent plant arrangements cost? We’ll break down typical price ranges and share easy ways to save.
Essential Gear for Propagating Rare Succulents
Using the right tools is non-negotiable when working with rare plants. I’ve ruined precious cuttings by being lazy and using whatever was nearby. Your success rate will skyrocket when you treat propagation like a delicate science project instead of a casual gardening task.
- Sharp, Sterile Blade: I use a brand-new razor blade or a scalpel for every session. Dull scissors crush the tissue, and dirty tools introduce rot.
- Small Terracotta Pots or Shallow Trays: These provide the excellent air circulation rare succulent roots desperately need. Plastic holds moisture for too long.
- Spray Bottle with Fine Mist: You need to provide humidity without drenching your delicate props. A harsh stream of water can dislodge them.
- Rooting Hormone (Powder Form): This is my secret weapon. It’s not a magic dust, but it significantly increases the chances of a clean cut forming healthy roots.
- Chopsticks or Tweezers: For handling tiny leaves and seedlings without damaging them with your fingers.
Creating the Perfect Well-Draining Soil Mix
This is the most critical step, and where most people fail. Bagged “cactus soil” from the store is often too rich and moisture-retentive for rare succulents, especially during propagation. I always make my own mix because it gives me complete control over the moisture level around my precious cuttings. If you prefer a ready-made option, you can buy quality succulent soil potting mix at reputable garden centers or online retailers. Look for blends labeled for cacti and succulents that promote excellent drainage.
My go-to recipe, perfected over years of trial and error, is simple:
- 2 parts potting soil (a basic, peat-free kind)
- 1 part coarse sand (horticultural grit, not playground sand)
- 1 part perlite or pumice
Mix these together thoroughly until you have a gritty, loose blend. When you squeeze a handful, it should crumble apart immediately instead of forming a clump. This structure allows water to flow straight through while providing tiny air pockets that encourage root growth.
Quick Tip: Test your soil mix by watering it in a spare pot. If water pools on the surface for more than a second, add more perlite. For succulents, this drainage check is crucial—aim for a mix that drains quickly and dries out between waterings. This helps prevent root rot and keeps roots healthy.
Step-by-Step Guide to Propagation Methods
Mastering Leaf Cuttings for Rare Varieties
I’ve found that leaf propagation is the most magical way to multiply your collection, but rare succulents demand a gentler touch. The single biggest mistake I see is people being too rough when removing the leaf from the mother plant. You must twist it side-to-side gently until it snaps off cleanly at the base. A torn leaf rarely produces a new plantlet. These are common succulent propagation mistakes to avoid. By keeping the removal gentle and giving cuttings proper care, you’ll boost your success rate.
Once you have your healthy leaf, the waiting game begins. Lay it on a dry paper towel out of direct sun for a few days. This callusing period is non-negotiable. I place mine on a shelf in my bright kitchen. A callused end prevents the leaf from soaking up too much water and rotting instantly when you introduce it to soil.
- Select plump, healthy leaves from the lower part of the plant.
- Gently wiggle the leaf until it detaches with a clean break.
- Let the cut end form a dry callus for 2-4 days.
- Place callused leaves on top of dry, well-draining succulent mix.
- Ignore them completely until you see tiny pink roots searching for soil.
Patience is your greatest tool here. I once waited nearly three months for a rare Echeveria leaf to sprout. Resist the urge to water or poke at them. The mother leaf provides all the moisture and nutrients the baby needs.
Propagating from Stem Cuttings and Offsets
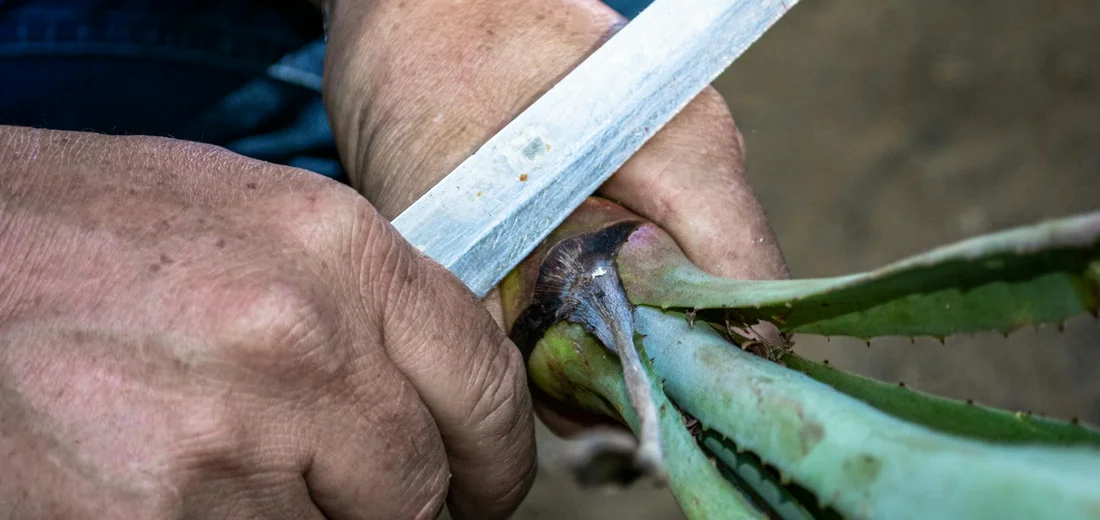
When a rare succulent gets leggy, a stem cutting is your best friend. I use this method for my prized Crassula and Sedum varieties. Always use a sharp, sterilized knife or pruners- a clean cut heals faster and drastically reduces the risk of infection. A ragged, crushed stem is an open invitation for rot.
Cut a section of stem a few inches long, and just like with leaves, let it callus over for several days. I stick my stem cuttings upright in an empty, dry pot during this phase. Once callused, you can plant them about an inch deep in a gritty mix. The real key is holding off on water. Wait at least a week after planting, or until you feel some resistance when you give the stem a very gentle tug.
- Identify a healthy stem section and make a clean, sharp cut.
- Remove the lower leaves to expose a few inches of bare stem.
- Allow the cut end to dry and callus for 3-7 days.
- Plant the callused stem in a dry, fast-draining soil mix.
- Do not water until roots have established, typically in 1-2 weeks.
For offsets, or “pups,” the process is even simpler. These are the ready-made baby plants that grow at the base of the mother. Wait until the offset is about one-third the size of the parent plant. Gently wiggle it away, ensuring it has some roots of its own. You can often pot these up directly into slightly damp soil, as they already have a root system ready to go.
An Introduction to Grafting Rare Succulents
Grafting sounds intimidating, but it’s a fantastic way to speed up the growth of slow-growing, rare cacti and other succulents. I first tried it to save a rare, variegated cactus that was struggling on its own roots. Think of grafting like giving a delicate plant a strong, robust root system to supercharge its growth. The hardy rootstock does all the hard work of sucking up water and nutrients, much like propagating succulents from leaves and cuttings provides new plants their initial support.
The basic principle is to join the vascular tissue of a slow-growing “scion” (your rare plant) to a fast-growing “rootstock” (a common, vigorous plant). You need a very sharp, sterile blade to make clean, flat cuts on both pieces. The cuts must align perfectly so their vascular rings touch. I use rubber bands or grafting clips to hold gentle pressure while the union heals.
- Rootstock: Choose a fast-growing, common succulent like a robust Hylocereus or Pereskiopsis.
- Scion: This is your prized, rare, or slow-growing plant.
- Make a flat, clean cut on both the rootstock and scion.
- Press the two cut surfaces together, ensuring their centers align.
- Secure them with gentle pressure and keep them in bright, indirect light.
It feels like plant surgery, and the success rate isn’t 100%, but it’s incredibly rewarding when it works. My grafted Lophophora grows ten times faster than it ever did on its own roots.
Creating the Ideal Environment for Rooting
The Delicate Balance of Watering New Cuttings
This is where most people lose their precious propagations. The urge to water is powerful, but you must fight it. New cuttings and leaves have no roots to drink with, so watering the soil only creates a soggy environment where rot thrives. I learned this the hard way with a batch of Haworthia leaves that turned to mush.
Your propagation medium should be almost completely dry. I use a mix of half perlite and half cactus soil for maximum drainage. You only introduce the slightest bit of moisture once you see those first tiny, hair-like roots emerging. I use a spray bottle to mist the soil *around* the roots, not the plant itself, about once a week. The goal is to encourage the roots to grow downward in search of water.
QUICK TIP: If you’re unsure, err on the dry side. A dehydrated cutting can be revived with water, but a rotten one is a total loss.
Once your new plant has a solid root system and is actively growing, you can begin a more regular watering routine. Even then, always let the soil dry out completely between waterings. I stick my finger an inch into the soil to check. If it’s dry, it’s time for a thorough soak.
Troubleshooting Common Propagation Problems
Diagnosing Rot, Desiccation, and Slow Rooting
I’ve lost my fair share of rare cuttings over the years, and each one taught me something new. The key to solving propagation problems is to act fast and understand what your plant is trying to tell you.
Rot is the number one killer of succulent cuttings. You’ll see it as a black or brown, mushy spot that often starts where the cutting was calloused. I once lost a beautiful Echeveria ‘Lola’ because I was too eager and planted it before the cut end was fully dry. If you spot rot, use a sterile knife to cut well above the mushy area until you see only healthy, green tissue. Let it callous over completely before you even think about putting it near soil again. Overwatering is often the culprit behind rot, so be cautious when watering succulent cuttings.
Desiccation is the opposite problem-your cutting shrivels up like a raisin. This happens when the environment is too dry or the callous is too thick, preventing any water absorption. If your cutting is wrinkling severely, try a light misting around its base (not directly on it) to encourage root growth without causing rot. I keep a small spray bottle handy just for this purpose.
Slow rooting can test anyone’s patience. I had a Haworthia cooperi cutting that took nearly three months to show a single root! Consistent, indirect light and a stable, warm temperature are your best allies for encouraging stubborn roots. Don’t keep unpotting it to check; you’ll only disturb any tiny root initials that are forming.
- Problem: Rot – Cause: Overwatering or planting before callousing. Solution: Cut away rot, let callous, and restart.
- Problem: Desiccation – Cause: Excessively dry air or overly thick callous. Solution: Provide gentle ambient humidity.
- Problem: Slow Rooting – Cause: Cool temperatures or insufficient light. Solution: Move to a warmer, brighter location.
Caring for Your New Rare Succulent Plants
Seeing those first tiny roots is a huge victory, but the real work begins now. Your new plant is incredibly vulnerable, and its care is different from a mature succulent. Treat it like a seedling, not a full-grown plant. For a practical start, see our care guide for newly propagated succulents—the aftercare section covers light, watering, and gradual acclimation for healthy growth.
The first time you water your newly rooted plant is critical. I use a small dropper or a spoon to deliver water directly to the root zone. Water very sparingly, just enough to moisten the soil immediately around the new roots, and then let it dry out almost completely before the next tiny drink. Their root systems are too small to handle a full soaking.
Light is another area where I see people make mistakes. That bright, direct sun your mature succulents love can scorch a baby plant in hours. Start your new succulents in bright, indirect light and gradually introduce them to direct sun over 2-3 weeks. Different succulents have different light needs, so it’s worth noting how much light each type actually tolerates. Learning these differences helps prevent stress and keeps them thriving. I keep mine on a shelf that gets morning sun but is shaded during the harsh afternoon.
Hold off on fertilizer for at least the first three months. Their delicate new roots can be burned by concentrated nutrients. Once your plant has established a solid root ball and is showing consistent new growth, you can begin with a diluted, balanced fertilizer at quarter-strength.
- Water with precision: Target the root zone with minimal water until the plant is established.
- Acclimate to light slowly: Protect from harsh direct sun to prevent leaf scorch.
- Delay fertilizing: Wait for robust growth before introducing a weak fertilizer solution.
Resist the urge to repot your successful propagation for a long while. Let the roots completely fill the small starter pot before you even consider moving it to a larger home. A snug pot encourages a stronger, healthier root system and reduces the risk of overwatering.
FAQs

What is the ideal season for propagating rare succulents?
Spring and early summer are best, as the plants are in their active growth phase and root more easily.
How can I protect my cuttings from common pests?
Keep the propagation area clean and use a gentle insecticidal soap if you spot any insects.
When is the right time to repot a newly rooted succulent?
Wait until the roots have filled the small starter pot completely to avoid disturbing the delicate root system.
Do variegated succulents require different propagation techniques?
Yes, they may need brighter indirect light and extra care, as their reduced chlorophyll can make them more sensitive.
Can I store succulent cuttings for later use, and how?
Yes, place them in a dry, shaded area for up to a week, but plant them as soon as possible for better success.
What steps should I take if a cutting fails to root?
Check for proper callusing, ensure it has warm, indirect light, and consider reapplying rooting hormone to stimulate growth.
Your Rare Succulent Propagation Journey Starts Here
Based on my years nurturing succulents, the best way to propagate rare varieties is by using healthy plant material, providing bright indirect light, and watering sparingly until roots form. These same steps apply to transplanting and propagating succulents successfully. When you transplant or pot cuttings, use a clean cut, a fresh well-draining soil mix, and gentle handling to encourage root establishment. Stick to these core methods for consistent results:
- Leaf cuttings for echeverias and similar rosettes
- Stem cuttings for stretched or leggy plants
- Offsets or pups that naturally grow at the base
Keep practicing with these tips, and check out more guides on Hardy House Plants at www.hardyhouseplants.com for ongoing support. Every successful propagation is a rewarding step forward in your plant care skills.
Further Reading & Sources
- Succulent Propagation 101: How to propagate succulents from leaves, cuttings, offsets and divisions
- r/succulents on Reddit: Succulent Leaf Propagation Before and After (6.5 months progress)
- How to Propagate Succulents from Leaves and Cuttings | Succulents and Sunshine
- Propagating Succulents – Needles + Leaves
Lena Greenfield is a passionate horticulturist and plant care expert with over 10 years of experience cultivating and nurturing hardy house plants. With a deep understanding of both indoor and outdoor gardening, Lena shares practical advice on choosing, caring for, and maintaining resilient plants that flourish year-round. Through her knowledge and hands-on approach, Lena helps plant lovers transform their spaces into vibrant, green sanctuaries, no matter their gardening experience.
Propagation Methods