How to Prune Flowering Houseplants for More Blooms
Published on: March 20, 2026 | Last Updated: March 20, 2026
Written By: Lena Greenfield
Are you wondering how to get more flowers from your houseplants? You might be worried that cutting your plant will hurt it, but strategic pruning is the secret to a spectacular bloom show.
I’ll guide you through the simple steps I’ve used for years to turn my shy bloomers into floral powerhouses. You’ll learn the best time to prune, the tools you need, a simple step-by-step method, and common mistakes to avoid.
Why Pruning is Your Secret Weapon for More Flowers
Many plant lovers are hesitant to make the first cut, fearing they’ll hurt their precious plant. I felt the same way with my first flowering Kalanchoe. Pruning is not an act of destruction, but a deliberate redirection of your plant’s energy. Think of it like this: your plant has a finite amount of fuel. By snipping away spent flowers and leggy stems, you are telling the plant to stop wasting energy on maintaining the old and start investing in creating spectacular new blooms.
Beyond just encouraging flowers, regular pruning keeps your plant’s shape full and lush. I’ve rescued many a leggy geranium by giving it a good haircut. A well-pruned plant is a healthier plant, with better air circulation that helps prevent fungal diseases and pest infestations. It’s like giving your green friend a fresh start, and they almost always reward you with a burst of fresh, vibrant growth.
- Directs Energy to Blooms: Removing dead flowers (a process called deadheading) stops the plant from trying to produce seeds and pushes it to make more flowers instead.
- Promotes Bushier Growth: Cutting back a stem often encourages two new stems to grow from just below the cut, creating a denser, more floriferous plant.
- Improves Plant Health: You remove weak, dead, or diseased material that could otherwise sap the plant’s strength or attract problems.
- Controls Size and Shape: You keep your flowering houseplant looking tidy and prevent it from becoming overgrown and scraggly.
The Perfect Time to Prune for Maximum Blooms
Timing your pruning is just as important as the technique itself. Getting this right is the difference between a shy bloomer and a floral powerhouse. The golden rule is to prune just before the plant’s main growth season kicks into high gear. For most flowering houseplants, this is in the spring, as the days get longer and brighter. Pruning for better air circulation helps leaves dry faster and reduces disease risk. It also improves light penetration, so inner growth gets more light.
I always watch for the first signs of new, tiny leaves at the tips of the stems-that’s my green light to get the pruners out. Quick Tip: Never do a major prune in the dead of winter when your plant is semi-dormant; it simply doesn’t have the energy to recover and push out new growth. A light tidy-up of dead leaves is fine, but save the big shaping for spring.
Here’s a simple guide based on plant types from my own collection:
| Plant Type | Best Pruning Time |
|---|---|
| Spring/Summer Bloomers (e.g., Geraniums, Hibiscus) | Early Spring |
| Repeat Bloomers (e.g., African Violets, Peace Lilies) | After each flower fades (deadhead continuously) |
| Orchids (e.g., Phalaenopsis) | After blooms drop; cut the spike according to its condition (green or brown) |
| Holiday Bloomers (e.g., Poinsettia, Christmas Cactus) | After their holiday display is finished, before new growth begins |
Your most powerful tool for timing is observation. Get to know your plant’s specific cycle. If you see a flower starting to wilt and turn brown, that’s your immediate cue to pinch or snip it off. This constant, light maintenance keeps the floral show going for much longer than you might expect.
Gathering Your Pruning Toolkit

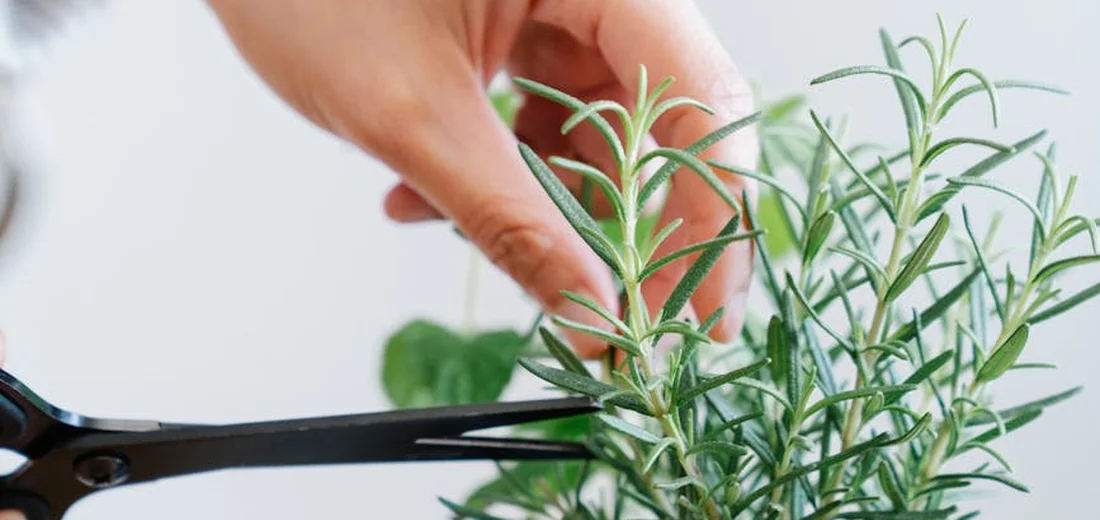
Having the right tools makes pruning feel like a gentle chat with your plant, not a battle. I’ve learned that sharp, clean tools are non-negotiable for healthy cuts that encourage lush blooms. Over the years, my go-to kit has saved many plants from stress and sparked countless flowers.
Start with a pair of bypass pruners for thicker stems; they work like scissors for a clean slice. Keep a small pair of precision snips for delicate flowers, which I use on my orchids to avoid damaging nearby buds. Don’t forget rubbing alcohol and a cloth to wipe blades between cuts-this simple habit prevents disease spread.
- Bypass pruners: Ideal for stems up to pencil thickness.
- Precision snips: Perfect for detailed work on succulents or small blooms.
- Rubbing alcohol: Sterilizes tools quickly-I reuse an old spray bottle for this.
- Soft cloth: Wipes away sap and keeps tools rust-free.
Gloves are a smart add-on if you have sensitive skin or prickly plants. Eco-friendly tip: Opt for tools with replaceable parts to reduce waste, just like I do with my favorite shears. To prevent disease spread, sterilize pruning tools between plants. A quick wipe with rubbing alcohol or a 10% bleach solution keeps blades clean. A well-stocked toolkit turns pruning into a joyful ritual that your plants will thank you for with more color.
A Step-by-Step Guide to Pruning for Blooms
Pruning for blooms is all about timing and technique-I’ve revived many shy flowerers this way. Follow these steps to redirect your plant’s energy into producing stunning flowers instead of leggy growth. It’s easier than you think, and the results are so rewarding.
- Inspect your plant for spent blooms and weak stems. Look for faded flowers or yellowing leaves, which I gently pinch off to spur new buds.
- Make cuts just above a leaf node or bud at a slight angle. This angle helps water run off and prevents rot, a trick I use on my geraniums for bushier growth.
- Remove no more than one-third of the plant at once. Over-pruning can shock it, so I always err on the side of caution to keep blooms coming.
- Clean up fallen debris to deter pests. I compost these trimmings to enrich my soil, closing the loop in a green way.
- Water lightly after pruning to ease stress. Your plant will perk up faster, ready to push out those vibrant flowers you’re aiming for.
For succulents like kalanchoes, focus on deadheading spent flowers to extend blooming. Quick tip: Prune in the morning when plants are hydrated for smoother cuts and quicker recovery. I’ve seen my peace lilies burst with white sails after a mindful trim-it’s like giving them a fresh start. When pruning succulents, make sure to use clean, sharp tools to prevent damage.
After pruning, place your plant in bright, indirect light to fuel new growth. Patience is key; within weeks, you’ll notice tighter buds and fuller shapes. This hands-on care deepens your bond with your green friends and fills your space with life. To prune pothos for optimal growth, cut just above a node on each stem to encourage new shoots. Regularly trimming keeps vines from getting leggy and helps the plant stay full and healthy.
Shaping Your Plant for a Spectacular Flower Show
Think of pruning like giving your plant a fantastic haircut. My goal is always to shape the plant so light and air can reach the center, which is the secret to triggering a massive bloom. I don’t just hack away; I make thoughtful cuts to guide the plant’s energy. For ZZ plants, the best pruning is to trim back leggy stems to a healthy node to encourage bushier growth. Always use clean, sharp shears and avoid removing more than a third of the plant at once.
Start by looking for flowers that are past their prime. These are called spent blooms. Pinching or snipping these off tells the plant to stop making seeds and start making new flower buds instead. I use my fingernails for soft stems and clean, sharp scissors for tougher ones.
My Step-by-Step Shaping Process
- Identify spent blooms and remove them at the base of the flower stem.
- Look for any dead, yellow, or damaged leaves and remove those at the stem.
- Step back and look at the plant’s overall shape. Trim any long, “leggy” stems back to a point just above a set of healthy leaves.
- Thin out dense areas by cutting a few stems from the base to improve air circulation.
For plants like geraniums or African violets, I make my cuts at a 45-degree angle. This angled cut helps water run off if you splash it, preventing the stem from rotting. It’s a small detail that makes a big difference in keeping the plant healthy.
Quick Tip for Bushier Plants
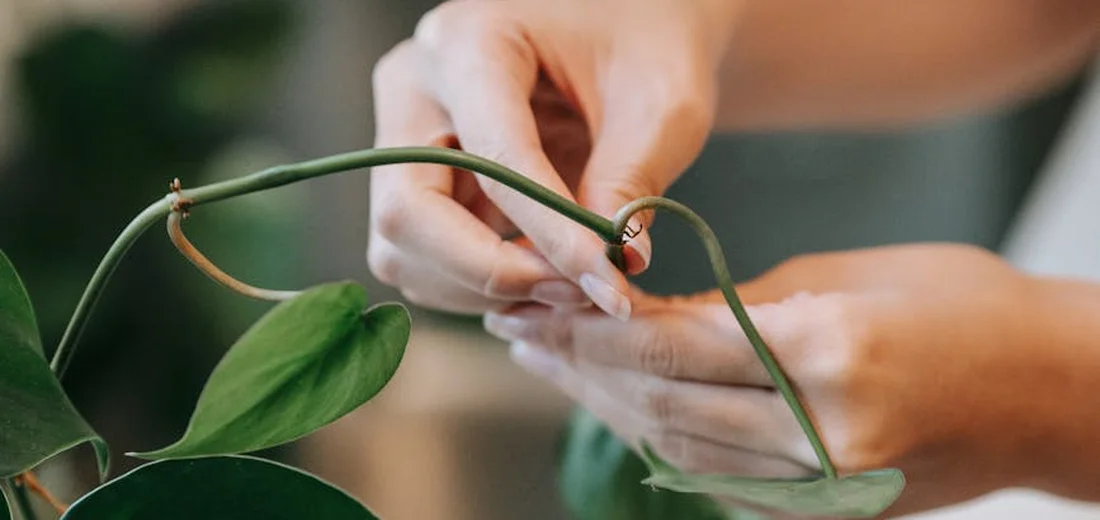
If you want a fuller, bushier plant, pinch off the very top set of leaves on a stem (the tip). This is called “pinching.” Pinching the tip forces the plant to grow two new stems from that spot, creating a much denser, more floriferous display. I do this regularly with my coleus and basil to keep them from getting tall and spindly. It’s a simple way to prune plants to control their size and shape. It helps keep them compact and well-shaped.
Caring for Your Plant After Pruning
After a pruning session, your plant needs a little extra TLC. Think of pruning as minor surgery; your plant uses energy to heal those fresh cuts and push out new growth. The care you give now directly impacts how many flowers you’ll see next.
First, don’t immediately move the plant or change its routine. Keep it in its usual spot with its preferred light levels to avoid adding transplant shock to pruning stress. Consistency is comforting for a plant that’s just had a trim.
Watering and Feeding After a Trim
- Watering: Check the soil moisture. The plant may need slightly less water immediately after pruning since it has less foliage, but don’t let it dry out completely. I stick my finger an inch into the soil; if it’s dry, I give it a drink.
- Fertilizing: This is the key to more blooms! Wait about a week after pruning, then give your plant a balanced, water-soluble fertilizer. I always use a fertilizer labeled for “blooms” or “flowering,” as it has more phosphorus, which is the nutrient that specifically supports bud formation.
I learned the hard way not to fertilize right after cutting. Giving the plant a week to seal its wounds first prevents fertilizer from stressing the fresh cuts and leads to a much healthier recovery. Your patience will be rewarded with vibrant new growth.
Quick Tip: The New Growth Signal
Within a week or two, you should see tiny new leaves or bumps (buds) forming at the spots you pruned. When you see this new growth, it’s your plant’s way of giving you a green thumbs-up, confirming you pruned correctly. This is the most exciting part for me-it’s proof the show is about to begin!
Tailoring Your Technique to Specific Houseplants
Not all flowering houseplants appreciate the same haircut. I’ve learned that matching your technique to the plant’s specific growth habit is the fastest way to a spectacular bloom show. What works for a geranium will stress out an orchid, so let’s look at some of the most common bloomers.
African Violets
These compact beauties need a gentle touch. My go-to method is simply pinching off spent flower stalks at the base with my fingernails as soon as the blooms fade. This encourages the plant to send up new stalks from the center. I also remove any old, outer leaves that look tired or discolored to keep the plant’s energy focused.
Geraniums (Pelargoniums)
Geraniums can get long and leggy if you let them. I’m not shy about giving my geraniums a hard prune, cutting stems back by up to one-third just above a leaf node. I do this after a big flush of flowers starts to slow down. This might feel drastic, but it forces the plant to branch out, becoming bushier and setting the stage for an even bigger bloom display.
Orchids (Phalaenopsis)
Pruning orchids used to intimidate me, but it’s simple once you know what to look for. For Phalaenopsis orchids, I examine the flower spike after the last bloom drops. If it’s still green, I cut it just above a visible “node” (a little triangular bump on the spike). Often, this prompts a secondary spike to emerge from that node, giving you more flowers without the plant having to grow a whole new spike.
Hoyas
This is a critical one! Never, ever cut off the long leafless stems on your Hoya, called peduncles. I made this mistake years ago and it cost me flowers for a whole season. These specialized structures are where the flowers emerge from, year after year. Only prune the actual leafy vines if you need to control size.
Quick Tip
For bushy plants, pinch the very tips of new growth to encourage side-shooting. For single-stemmed plants, focus on removing spent flowers.
Avoiding Common Pruning Mistakes
I’ve made my fair share of pruning blunders, so you don’t have to. Learning what not to do is just as important as learning the right technique. Steer clear of these common pitfalls to keep your plants happy and productive.
Over-Pruning
It’s easy to get carried away. Removing more than one-third of the plant’s foliage at once can send it into shock, halting growth and flowering altogether. Plants need their leaves to photosynthesize and create energy. If you have a plant that needs major renovation, spread the pruning over several sessions a few weeks apart. If you determine the plant is beyond saving, the next step is to remove it and start fresh. We’ll cover safe disposal and how to choose a healthier replacement in the next section.
Pruning at the Wrong Time
Timing is everything. Many flowering houseplants set their bloom buds on new growth, so a heavy prune right before their typical blooming season can mean no flowers. I generally prune right after a plant has finished its main flowering cycle. This gives it the entire subsequent growth period to produce new stems that will bear the next round of buds. Even with proper timing, it’s crucial to consider each species’ specific needs.
Using Dull or Dirty Tools
This seems minor, but it’s a big deal. Crushing a stem with dull scissors creates a ragged wound that is slow to heal and vulnerable to disease. I keep a dedicated pair of sharp, clean floral snips. I also wipe the blades with rubbing alcohol before moving from one plant to another to prevent accidentally spreading any pests or pathogens.
Making the Cut in the Wrong Place
Where you cut matters immensely. Always make your pruning cuts just above a leaf node or a pair of leaves, as this is where new growth will emerge from. Avoid leaving long, barren stubs above a node, as this dead material can rot back toward the main stem. A clean cut close to the node is best.
Quick Tip
When in doubt, prune less. You can always make another cut later, but you can’t reattach a stem once it’s gone.
Common Questions
When is the best time to prune flowering houseplants?
Prune in early spring before the main growth season for most plants, but always after a plant has finished its primary bloom cycle.
What tools do I need to prune flowering houseplants?
You need sharp, clean bypass pruners for thicker stems and precision snips for delicate work, sterilized with rubbing alcohol between cuts.
How do I prune flowering houseplants without damaging them?
Always make clean cuts just above a leaf node or bud at a slight angle to encourage proper healing and new growth.
How much should I prune flowering houseplants?
Remove no more than one-third of the plant’s foliage at once to avoid sending it into shock.
Can pruning flowering houseplants encourage more blooms?
Yes, pruning redirects the plant’s energy from maintaining old growth to producing new flowers and buds.
Do different flowering houseplants require different pruning techniques?
Yes, techniques vary; for example, hoyas should not have their flower spurs (peduncles) cut, while geraniums can handle a hard prune.
Your Path to More Flowers
To get the most blooms, prune your flowering houseplants right after they finish a bloom cycle, using clean, sharp tools to make strategic cuts just above a leaf node. Remember these three simple steps: prune after flowering, always cut above a node, and remove dead or weak growth to redirect your plant’s energy.
You now have the knowledge to help your plants flourish. Go on, grab your pruners with confidence-your plants are more resilient than you think and will reward your care with a spectacular show.
Further Reading & Sources
- How to Prune Houseplants
- How to Prune Houseplants: Why and When to Do It
- How to prune houseplants: an easy guide | Burgon & Ball Journal – Burgon and Ball
- How to Prune Houseplants So They Flourish for Years, According to Gardening Experts
Lena Greenfield is a passionate horticulturist and plant care expert with over 10 years of experience cultivating and nurturing hardy house plants. With a deep understanding of both indoor and outdoor gardening, Lena shares practical advice on choosing, caring for, and maintaining resilient plants that flourish year-round. Through her knowledge and hands-on approach, Lena helps plant lovers transform their spaces into vibrant, green sanctuaries, no matter their gardening experience.
Pruning Techniques