
What is the Best Soil Mix for ZZ Plants?
Choosing the right soil mix for your ZZ plant is the secret to its lush, low-maintenance growth, and after years of nurturing these resilient beauties, I can tell you it all comes down to drainage. You might worry about overwatering or root rot, but a well-balanced soil blend makes those fears vanish.
In this article, I’ll guide you through key soil ingredients, my go-to DIY recipe, common mixing mistakes, and simple care adjustments to keep your ZZ plant thriving.
Why Your ZZ Plant Needs a Special Soil Mix
You might think any old bag of potting soil will do, but I learned the hard way that a ZZ plant’s needs are unique. ZZ plants store massive amounts of water in their potato-like rhizomes and thick roots, making them incredibly prone to rot in standard, moisture-retentive soil. I once lost a beautiful ZZ to root rot because I used a generic, peat-heavy mix that stayed wet for far too long.
Think of your ZZ plant as a camel. It’s built to survive dry spells, not a constant flood. A special, fast-draining mix mimics its natural, rocky habitat in East Africa. This specialized soil is your number one defense against overwatering, which is the single biggest killer of ZZ plants. Getting the soil right means you can water with confidence, knowing your plant’s “feet” won’t be sitting in water. In indoor settings, that usually means you water less often—only after the soil has dried, not on a strict schedule.
The Key Qualities of a Perfect ZZ Plant Soil
The goal is to create a loose, chunky environment that water runs through quickly, while still providing some nutrients and anchorage for the roots. Your perfect ZZ plant soil should feel gritty and crumbly in your hands, not dense or clumpy. If you squeeze a handful and it holds its shape, it’s too heavy for your ZZ. In the ultimate guide to ZZ plant pot size, you’ll learn how to choose a container that fits the roots without staying soggy. The right pot size supports drainage and healthier growth.
Excellent Drainage is Non-Negotiable
Drainage is all about creating escape routes for excess water. I test my mixes by pouring water through a potful; if it doesn’t drain out the bottom almost immediately, I add more gritty material. Quick Tip: Add a handful of perlite to any standard potting mix to instantly improve its drainage for your ZZ plant. For ZZ plants, that same drainage mindset also helps with pruning and upkeep. When you prune, use clean shears and avoid overwatering after trimming.
Ingredients that promote fantastic drainage include:
- Perlite: Those little white pieces create air pockets and prevent soil compaction.
- Coarse Sand: Horticultural sand is sharp and gritty, helping water flow through.
- Pumice: A lightweight volcanic rock that holds some moisture but primarily adds drainage.
The Critical Role of Airflow
Airflow around the roots is just as important as drainage. Oxygen in the soil pockets keeps the roots healthy and actively prevents the anaerobic conditions that root rot thrives in. Chunky, irregular ingredients are the key to creating this vital airy structure. A dense, fine soil will suffocate your ZZ’s rhizomes over time.
My favorite ingredients for boosting airflow are:
- Orchid Bark: The chunky pieces create permanent air channels as they break down slowly.
- Horticultural Charcoal: It not only keeps the mix light but also helps filter impurities and odors from the soil.
- Coco Chips: These provide aeration and a slight, slow-release moisture without becoming soggy.
Your Go-To Guide for a DIY ZZ Plant Soil Mix
Essential Ingredients for Your Mix
Creating your own soil mix for a ZZ plant is like baking a simple, forgiving cake. You need just a few key ingredients to achieve the perfect, well-draining texture that ZZ plant roots crave. I always keep these components in my plant-care cabinet. Light and temperature play a big role too. ZZ plants do best in bright, indirect light with steady temps around 65–75°F.
- Potting Soil: This is your base. Use a standard, all-purpose mix, but avoid any that are labeled as “moisture control” as they retain too much water.
- Perlite: These little white specks are super-heroes for aeration. They create vital air pockets in the soil, preventing it from becoming a dense, soggy brick.
- Orchid Bark: Chunky pieces of bark are a game-changer. They mimic the plant’s natural growing conditions and ensure water flows through the pot quickly.
- Coarse Sand (Optional): If you tend to over-love with water, adding a handful of horticultural sand can provide extra insurance against compaction.
My Simple, Tried-and-True Recipe
After years of trial and error with my own ZZ plants, this is the ratio I swear by. It has never failed me, even in pots without a drainage hole (though I don’t recommend that!).
- Grab a large container or bucket for mixing.
- Pour in two parts of your all-purpose potting soil.
- Add one part perlite. Don’t be shy with it!
- Mix in one part orchid bark. The chunkier, the better.
- Stir everything together thoroughly until it looks uniform. You should see plenty of white perlite and brown bark chunks throughout.
Your final mix should feel light and fluffy in your hands and should not clump together when you squeeze it. If it forms a ball, add a bit more perlite. I use this exact mix every time I repot, and my ZZ plants respond with vigorous, healthy growth.
Choosing a Great Store-Bought Soil for ZZ Plants
Not everyone has the time or desire to mix their own soil, and that’s perfectly okay! The secret to picking a good pre-made mix is right on the bag’s label. Look for keywords that signal fast drainage.
I always steer clear of anything that feels heavy and dense right in the bag. Give the bag a gentle squeeze; it should have some give and not feel like a solid block.
- Succulent & Cactus Mix: This is your best bet. These mixes are specifically formulated to drain rapidly and are an excellent ready-made solution.
- African Violet Mix: This is another fantastic option. It’s typically light and porous, providing the kind of airy environment ZZ plant roots love.
- Orchid Potting Mix: While you can use this, I often find it a bit too chunky on its own. I like to mix it half-and-half with a standard potting soil to balance moisture retention and drainage.
Quick Tip: No matter which bag you buy, you can always improve it by stirring in a handful of extra perlite for guaranteed aeration. This simple step has saved many of my plants from store-bought soil that was a little too moisture-retentive for its own good.
Spotting the Signs of a Bad Soil Situation
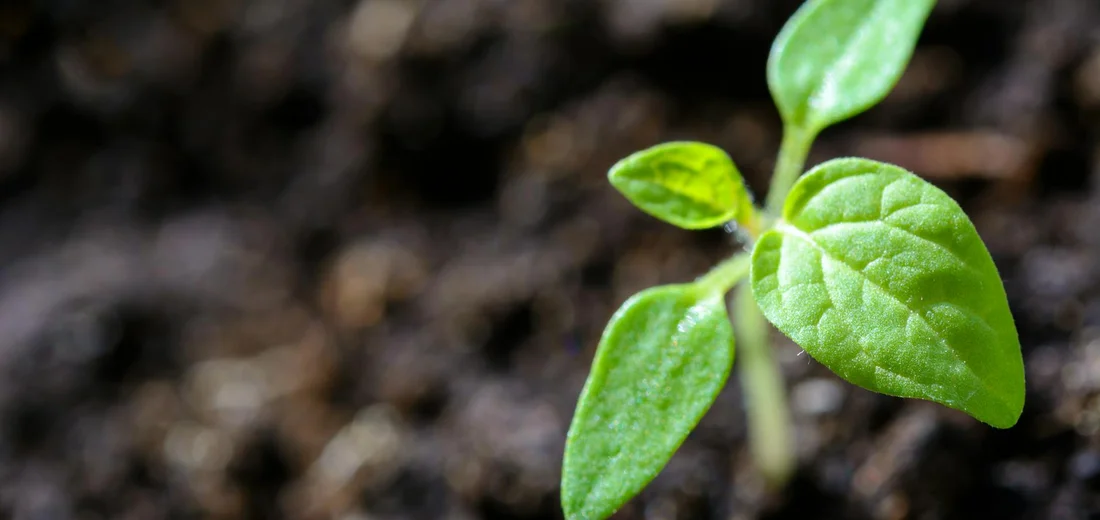
Your ZZ plant is a tough cookie, but it will tell you when it’s unhappy with its soil. Learning to read these signals early is the key to preventing long-term damage. I’ve rescued many a ZZ from the brink by simply paying attention to these specific complaints. When yellow leaves appear, it’s a sign to check moisture and light. You should remove leaves that are fully yellow or dead to help the plant redirect energy.
Yellowing Leaves and Soggy Soil
If you see a yellow leaf, don’t just pluck it and forget it. It’s a major red flag. Yellowing, particularly on the lower, older leaves, almost always points to overwatering and poor drainage. The soil feels wet and clumpy for days, even when you haven’t watered recently.
I made this mistake with my first ZZ. I treated it like a regular houseplant and watered on a schedule. The heavy soil stayed soggy, the roots began to rot, and the plant sent up yellow distress flags. ZZ plants store water in their potato-like rhizomes, so they can handle being dry far better than being constantly wet. Unlike other houseplants, overwatering can cause yellow or brown leaves due to root rot.
Stunted Growth and Soil Compaction
Has your ZZ plant seemingly stopped growing for months, even during the spring and summer? This is a classic sign of soil compaction. Over time, low-quality soil breaks down and becomes dense, like a brick around the roots. The roots can’t breathe, spread out, or absorb nutrients effectively, which can cause issues like growth problems or drooping leaves.
You might also notice the soil pulling away from the edges of the pot. When the soil gets this hard, water often runs straight through without being absorbed, leaving the roots paradoxically both starved for water and suffocated. I check for this by gently poking the soil surface with a chopstick; if it’s difficult to penetrate, it’s repotting time.
When and How to Repot with Fresh Soil
Repotting a ZZ plant is a simple, satisfying task that gives it a new lease on life. The best time to repot is in the spring or early summer, when the plant is entering its active growth phase. This allows it to recover quickly and fill its new home with roots.
When to Make the Move
You don’t need to repot your ZZ every year. They actually enjoy being a little root-bound. Repot when you see one or more of these signs:
- Roots are visibly growing out of the drainage holes.
- The plant is so top-heavy it’s tipping its pot over.
- The soil has become hard, compacted, and doesn’t absorb water.
- It’s been in the same soil for over 2-3 years.
Quick Tip: If you’re unsure, you can gently slide the plant out of its pot to check the root situation. A solid mass of roots circling the bottom means it’s time for an upgrade.
A Step-by-Step Guide to Repotting
- Gather Your Supplies: Have your new pot (only 1-2 inches wider than the old one), fresh well-draining soil mix, and some newspaper ready.
- Remove the Plant: Tip the pot on its side and gently coax the ZZ plant out. You may need to tap the sides of a plastic pot or run a knife around the edge of a ceramic one.
- Inspect and Loosen: Shake off some of the old soil and gently loosen the root ball with your fingers. This is your chance to check for mushy, rotten roots (snip them off with clean scissors).
- Place in New Pot: Add a layer of fresh soil to the bottom of the new pot. Place your ZZ plant in the center, making sure it’s sitting at the same depth as before.
- Fill and Settle: Fill in around the sides with your new soil mix, gently firming it down as you go to eliminate large air pockets.
- The First Water: Give your newly potted ZZ a thorough, deep watering until it runs freely from the drainage holes. This helps settle the soil around the roots.
After repotting, place the plant in a spot with bright, indirect light and resist the urge to water again until the top few inches of soil are completely dry. Your ZZ might take a few weeks to settle in, but it will soon reward you with vigorous new growth.
FAQs
Can I use tap water for watering ZZ plants in this soil mix?
Yes, but if your tap water is hard, it’s better to use filtered or rainwater to prevent mineral buildup in the soil.
How long does a store-bought succulent soil last before degrading?
Store-bought soil typically remains effective for 1-2 years before it compacts and loses its drainage capabilities.
Is it okay to add compost to the soil mix for nutrients?
Adding a small amount of compost can provide nutrients, but too much may retain excess moisture and increase rot risk.
What type of pot works best with the recommended soil mix?
Terracotta or unglazed ceramic pots are ideal because their porosity helps excess moisture evaporate quickly.
How do I prevent pests in the soil mix?
Use a well-draining mix and avoid overwatering to discourage pests like fungus gnats that thrive in damp conditions.
Can I use the same soil mix for other succulents?
Yes, this well-draining soil mix is generally suitable for most succulents and cacti with similar moisture needs. To further improve drainage, you can use aquarium gravel in the mix to craft a gritty succulent soil.
Your ZZ Plant Soil Mix Made Easy
For a thriving ZZ plant, stick with a fast-draining soil mix that prevents soggy roots and mimics their natural habitat. In my years of growing ZZ plants, I’ve seen how the right soil mix can turn a struggling plant into a lush, low-maintenance beauty. A ZZ plant care guide also covers watering, light, and soil needs. Water sparingly and keep the plant in bright, indirect light with a fast-draining, well-aerated soil.
- Use a base of cactus or succulent potting mix.
- Add perlite or coarse sand for extra drainage.
- Ensure your pot has drainage holes to avoid water buildup.
Now, go give your ZZ plant the cozy home it deserves—you’re equipped to care for it with ease and watch it flourish. In its native tropical habitat in Eastern Africa, it grows in shaded, humid conditions with well-draining soil. Match these growing conditions at home—bright indirect light, a loose, well-draining mix, and water only when the soil dries. Trust your green instincts, and you’ll be rewarded with resilient, happy plants that brighten any space.
Further Reading & Sources
- how to care for zamioculcas zamiifolia – Leafy Life
- ZZ plant soil suggestion..
- How to make the best and Easy ZZ plant soil mix recipe
- Amazon.com : Organic ZZ Plant Soil Mix by Gardenera – Cultivate Elegance Excellence with Natural and Nutrient-Rich Formula – 5 Quart : Patio, Lawn & Garden
Lena Greenfield is a passionate horticulturist and plant care expert with over 10 years of experience cultivating and nurturing hardy house plants. With a deep understanding of both indoor and outdoor gardening, Lena shares practical advice on choosing, caring for, and maintaining resilient plants that flourish year-round. Through her knowledge and hands-on approach, Lena helps plant lovers transform their spaces into vibrant, green sanctuaries, no matter their gardening experience.
Soil Types