
How to Replant and Regrow Broken Succulent Pieces
Published on: October 11, 2026 | Last Updated: October 12, 2026
Written By: Lena Greenfield
Did a piece of your favorite succulent just snap off? Don’t panic. That broken piece isn’t a lost cause; it’s the start of a brand new plant.
I’ll walk you through my simple, tried-and-true method. We’ll cover assessing the break, callousing the wound, replanting techniques, and aftercare tips for your new plant baby.
Assessing the Damage: Is Your Broken Succulent Piece Viable?
Before you get your hands dirty, take a moment to inspect the broken piece. Not every broken leaf or stem is a good candidate for propagation, and a quick check now can save you weeks of waiting for nothing. I’ve learned this from experience after trying to prop a stem that was too far gone.
Look closely at the break point. A clean break or snap is actually ideal. A clean wound will callus over much faster and more cleanly than a jagged, crushed, or torn piece. If the break is messy, you can use a clean, sharp knife or scissors to make a neat, straight cut just below the damage.
Next, check the piece itself for health. The leaf or stem should be firm and plump, not mushy, translucent, or shriveled. Mushiness often indicates rot, which will spread and kill the cutting before it has a chance to root. A few wrinkles from being dry are usually okay, but the piece should still feel substantial.
Here’s a quick list of what makes a piece viable:
- Firm, not mushy, texture
- A clean break or a break you can clean up with a sterile cut
- No major black or brown spots spreading from the break
- A good size (a tiny leaf fragment has less stored energy to grow)
Preparing Your Succulent Cuttings for Propagation
Once you’ve selected your champion cuttings, the next step is all about the prep work. Proper preparation is the single biggest factor I’ve seen for successful succulent propagation. Rushing this part is the most common mistake I made when I first started. To avoid common succulent propagation mistakes, take your time with prep and double-check everything before you plant.
The most critical step is allowing the cut or broken end to dry out and form a callus. This is a protective layer of dried tissue that seals the wound. If you plant a fresh, wet cut directly into soil, it will almost certainly absorb too much water and rot. Just place your cuttings in a dry, airy spot out of direct sun. This can take anywhere from a couple of days to over a week, depending on the thickness of the stem and the humidity in your home.
Taking Leaf Cuttings
Leaf propagation is magical-you can grow a whole new plant from a single leaf that fell off! The key is to get a clean pull from the stem, ensuring the base of the leaf (the meristem tissue) is intact. If that part is left on the stem, the leaf might not produce a new plant.
Here is my simple process for leaf cuttings:
- Gently wiggle a healthy leaf from side to side until it snaps off cleanly at the base.
- Lay the leaves on top of dry, well-draining succulent soil. Do not bury them.
- Place them in a spot with bright, indirect light.
- Forget about them! Seriously, no water until you see either tiny pink roots or a new baby plant (a pup) forming.
Patience is your best friend here; some leaves can take months to show any signs of life, while others sprout in just a few weeks. Not every leaf will succeed, and that’s perfectly normal.
Taking Stem Cuttings
Stem cuttings are fantastic when you have a “leggy” succulent that has grown a long, bare stem. This method lets you restart with a compact, beautiful plant and gives you multiple new plants from the original cutting. I do this every spring to refresh my overgrown echeverias. After flowering, many succulents also throw offshoots that you can propagate offshoots that you can propagate. If you spot these offsets, you can separate and root them to grow additional plants and maintain a tidy, fuller look.
Follow these steps for stem cuttings:
- Using sterile pruning shears or a sharp knife, make a clean cut on the stem. You can take a large portion or just the top rosette.
- Remove the lower leaves from the bottom few inches of the stem. This gives you a clean section to plant and you can try to propagate those removed leaves too!
- Let the cutting callus over for several days until the cut end is completely dry and hard.
- Once callused, you can stick the bare stem lightly into dry succulent soil. It doesn’t need deep planting.
Hold off on watering until you feel some resistance when you give the cutting a gentle tug, which indicates that roots have formed. This usually takes a few weeks. Before that, the plant is living off the water stored in its leaves.
The Callusing Process: Why and How to Let Cuttings Dry

Think of a fresh succulent break like a scraped knee-it needs a protective scab to form before it can safely get wet again. This scab, or callus, is your cutting’s best defense against rot, sealing the wound so it can handle soil and water. I’ve learned this the hard way; rushing this step led to mushy, lost cuttings early in my plant journey. Proper watering of succulent cuttings is crucial once the callus has formed.
Place your clean cuttings on a dry paper towel or a empty tray. I often use a windowsill that gets bright, indirect light. A good callus feels dry and looks slightly tougher or shriveled at the break point, which typically takes 2-4 days. Resist the urge to plant them until every cut surface is completely dry to the touch.
Propagating Leaf vs. Stem Cuttings: Step-by-Step Methods
Leaf Propagation Steps
This is my favorite method for creating a whole new plant from a single, healthy leaf. It feels like pure magic.
- Gently twist a plump leaf from the stem, ensuring you get the entire base. A clean break is vital.
- Let the leaf callus over for a few days on dry soil.
- Lay the callused leaf on top of a well-draining succulent mix. Do not bury it.
- Place the pot in bright, indirect light and mist the soil lightly only when it is completely dry.
- Wait patiently! In a few weeks, you should see tiny pink roots and a miniature rosette forming.
Quick tip: The original “mother leaf” will eventually shrivel up-this is normal! It’s providing energy to the baby plant.
Stem Propagation Steps
Use this method when you have a long, “leggy” stem or a broken piece with multiple leaves still attached.
- Using clean, sharp scissors, make a clean cut on the stem.
- Remove the lower leaves to expose about an inch of bare stem. You can propagate those removed leaves separately!
- Allow the stem cutting to callus over completely, just like a leaf.
- Once callused, stick the bare stem into moist (not soggy) succulent soil. It should be able to stand upright on its own.
- Water only when the soil is fully dry, and provide plenty of bright light.
Stem cuttings often establish roots faster than single leaves, giving you a more mature-looking plant sooner.
Essential Care for New Succulent Propagations
Recommended Soil Mixes
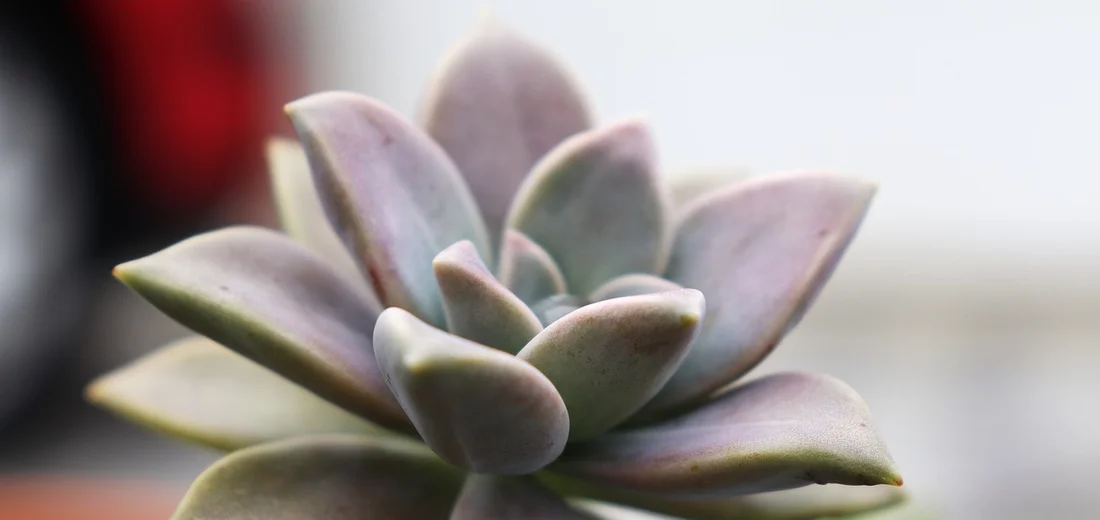
Baby succulents are extra sensitive to wet feet. Regular potting soil holds too much moisture. I always make my own mix for propagations: two parts potting soil to one part perlite and one part coarse sand. This creates the perfect airy, fast-draining environment new roots crave. For succulents, the best soil amendments are those that improve drainage—like your mix of two parts potting soil to one part perlite and one part coarse sand. A pre-mixed cactus and succulent soil also works well in a pinch.
Lighting and Watering Needs
New propagations need bright, indirect light. A south or east-facing windowsill is perfect. Direct, hot afternoon sun can scorch their delicate new growth, so I provide some gentle shade during the harshest part of the day.
For watering, the “soak and dry” method is your best friend. I wait until the soil is bone dry, then give it a thorough watering until it runs out the drainage holes, and then I let it dry out completely again. This encourages strong, deep root growth without risking rot. In the beginning, you might only need to water every 2-3 weeks.
When and How to Transplant Rooted Succulents
Seeing those first tiny roots is incredibly exciting, but patience is your best tool here. I always wait until the new roots are at least an inch long and look sturdy before I even think about soil. A few wispy threads aren’t enough to sustain a plant on its own.
You’ll also notice the mother leaf, the original piece you propagated from, will start to shrivel. This is a fantastic sign! It means the baby plant is successfully drawing nutrients and water from it. Don’t remove it until it’s completely dry and papery; it’s still providing a free meal.
Your Step-by-Step Transplanting Guide
- Gather Your Supplies: You’ll need a small pot with a drainage hole, a fresh succulent & cactus potting mix, and a small tool like a spoon or chopstick.
- Prepare the New Pot: Fill your pot most of the way with dry potting mix. Don’t pack it down; succulents love loose, airy soil.
- Make a Gentle Landing Spot: Use your finger or the spoon handle to create a small, shallow indentation in the center of the soil.
- Place the Pup: Carefully pick up your propagated succulent by the mother leaf, not the fragile new stem or roots. Lower the root system into the indentation.
- Anchor Gently: Lightly sprinkle more soil around the base to cover the roots and provide support. The plant should be able to stand upright on its own.
Here’s my biggest tip: do not water your newly transplanted succulent for at least a week after repotting. This gives any tiny, damaged roots time to heal and callous over, which prevents rot. Place it in bright, indirect light and let it settle into its new home. After that first week, start watering sparingly and only after the soil has dried completely. Resume normal watering slowly as the plant adjusts.
Troubleshooting Common Propagation Problems
Not every leaf or stem cutting makes it, and that’s perfectly normal. I’ve had my share of failures, and they taught me more than my successes. Let’s fix the most common issues.
The Dreaded Rot
If your leaf cutting turns to mush or gets black and slimy, it’s rotting. This almost always means it got wet. Leaves should be calloused and placed on dry soil; misting them directly is a surefire way to invite rot. If you see rot, toss that leaf and start fresh. There’s no saving it.
No Roots, No Problem?
Sometimes a leaf looks perfectly healthy but just sits there for months, doing nothing. I’ve found that leaves with a clean, complete break from the stem have the highest success rate. If there’s no progress, the leaf might not have enough of the growth cells needed. Be patient, and if nothing happens after several months, it’s likely a dud.
All Roots, No Baby
You see a healthy network of roots but no little rosette forming. Don’t give up! This happens. Ensure the leaf is getting plenty of bright, indirect light. Sometimes the plant is just focusing its energy underground first. As long as the leaf is still plump and the roots are white, there’s still hope.
Pests on Propagations
Your tender new plants can attract fungus gnats or mealybugs. I check my propagations every time I water my other plants. If I see pests, I immediately isolate the affected plant. A drop of isopropyl alcohol on a cotton swab dabbed directly on a mealybug will eliminate it instantly. For fungus gnats, letting the soil dry out completely between waterings breaks their life cycle.
The Mother Leaf Won’t Die
If the mother leaf stays plump and healthy long after the baby is growing, you can gently twist it off once the baby is well-established in its own pot. The baby is clearly self-sufficient, and removing the leaf allows more light to reach the base of the new plant.
FAQs
Can every type of succulent be regrown from broken pieces?
Most succulent varieties can be propagated from leaves or stems, though some may root more slowly or have lower success rates. A common method is propagating succulents from leaf cuttings. After removing a healthy leaf and letting it callous, place it on well-draining soil to root and form a new plant.
What is the best temperature range for succulent propagation?
Keep propagations in a warm spot with temperatures between 65-75°F (18-24°C) to encourage healthy root development. For succulents, this range is generally close to their optimal temps, as they thrive in warm, dry conditions. Sudden temperature changes should be avoided to prevent stress during propagation.
Is water propagation effective for succulents?
Water propagation can work for some succulents, but soil propagation is generally safer to prevent rot and mimic natural conditions. So, which is better: water vs soil propagation for succulents? We’ll compare the pros and cons to help you decide.
How can I increase the success rate of my succulent cuttings?
Use sterile tools for clean cuts, allow full callusing, and provide consistent bright indirect light with infrequent watering.
What are the signs that a propagation is failing?
Look for persistent mushiness, discoloration, or a complete lack of roots or new growth over several months.
When should I give up on a propagation attempt?
Discard the cutting if it remains shriveled, rotten, or shows no progress after 3-6 months under proper care.
Your Succulent Rescue Mission
In my years of nurturing succulents, I’ve found that successfully regrowing a broken piece boils down to proper callousing, smart planting, and gentle care to spark new roots and growth. To save a broken succulent, act fast to let the cut end callous. With careful handling, you can revive it and keep it thriving.
- Let the broken end dry and form a callus for a day or two.
- Stick it in well-draining cactus or succulent soil.
- Water lightly only after roots appear, and keep it in bright, indirect light.
Go ahead and try it with your own plants-you’ve got the knowledge to turn those broken bits into thriving new succulents with ease and confidence. With careful transplanting, you can propagate succulents successfully. Just be sure to use proper soil, drainage, and light as they establish.
Further Reading & Sources
- How to Propagate Succulents from Leaves and Cuttings | Succulents and Sunshine
- Propagating Succulents – Needles + Leaves
- Growing and Propagating Succulents – Artemis Flower Farm
- r/succulents Wiki: Propagating Succulents
Lena Greenfield is a passionate horticulturist and plant care expert with over 10 years of experience cultivating and nurturing hardy house plants. With a deep understanding of both indoor and outdoor gardening, Lena shares practical advice on choosing, caring for, and maintaining resilient plants that flourish year-round. Through her knowledge and hands-on approach, Lena helps plant lovers transform their spaces into vibrant, green sanctuaries, no matter their gardening experience.
Propagation Methods