How to Sterilize Soil for Succulents (Safe Methods)
You want to sterilize soil for your succulents to keep them free from pests and diseases, but you might be nervous about accidentally harming your plants with the wrong approach. I’ve been there with my own collection, and I can assure you that gentle, effective methods exist to protect your succulents without stress.
In this guide, I’ll walk you through the steps I use, covering oven baking, solarization, microwave techniques, and chemical-free options to ensure your soil is clean and safe.
Why Sterilizing Soil Protects Your Succulents
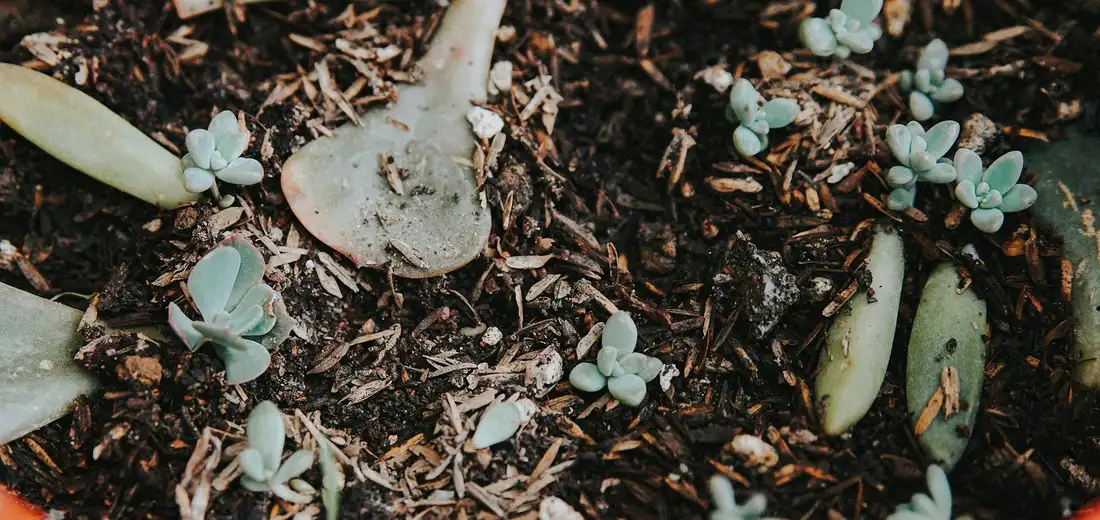
I learned the importance of sterile soil the hard way. I once lost a beautiful echeveria to a fungus gnat infestation that started in a bag of seemingly fine potting mix. Sterilizing your soil is the single most effective way to create a clean, safe home for your succulent’s roots. It’s like giving them a brand-new, pest-free apartment instead of moving them into a place with previous tenants’ problems.
Fresh bagged soil, even from reputable brands, can harbor tiny insect eggs, fungal spores, and bacteria. These threats are invisible to the naked eye but can explode in population once you water your plant. Sterilization wipes the slate clean, eliminating these hidden dangers before they can harm your plant. Your succulents, with their shallow root systems and low water needs, are especially vulnerable to pathogens and pests that thrive in damp conditions.
Think of it as preventative medicine for your plants. By starting with sterile soil, you drastically reduce the risk of:
- Root Rot: The number one killer of succulents, often caused by water-loving fungi like Pythium.
- Fungus Gnats: These annoying little flies lay eggs in moist soil, and their larvae munch on delicate roots.
- Damping Off: A disease that causes seedlings to collapse and die, which sterile soil can prevent.
- Weed Seeds: Why waste your succulent’s resources on competing with random weeds?
Identifying common succulent pests early and applying the right treatment and prevention measures helps keep plants healthy. Regular inspections for signs of trouble allow quick intervention before infestations spread.
Understanding the Trade-Offs of Soil Sterilization
While I’m a huge advocate for sterilization, it’s not a perfect process. The main trade-off is that the heat that kills the bad guys also wipes out the beneficial microorganisms and mycorrhizal fungi present in healthy soil. This creates a biologically “blank” environment, which means you are solely responsible for reintroducing life to the soil over time.
Here’s a quick breakdown of the pros and cons to help you decide:
- Pros: Eliminates pathogens, pests, and weed seeds. Provides a guaranteed clean start, especially vital for seedlings, cuttings, and plants recovering from disease.
- Cons: Kills beneficial soil life. The soil can become temporarily “hydrophobic” or water-repellent if overheated. It requires a bit of extra time and effort upfront.
I see sterilized soil as a temporary, controlled foundation. Your goal after planting is to rebuild that beneficial ecosystem through good long-term care. Over time, with proper watering and maybe a bit of compost tea, the good microbes will naturally recolonize.
If you’re hesitant about killing all the soil life, consider a more targeted approach. For established plants that seem healthy, you might simply solarize the top layer of soil on a hot, sunny day to deter surface pests. A light dusting of cinnamon on the soil surface can act as a natural, mild antifungal, which I use often as a maintenance step. It smells wonderful and helps keep things in check without nuking the entire microbial world. Even when using natural methods, it’s important to know how to deal with soil-borne pests and prevent reinfestation.
Comparing Top Sterilization Methods for Succulent Soil
I’ve tested all the common soil sterilization methods in my own gardening, and each one has its own perfect use case. The best method for you depends entirely on how much soil you need to treat and what tools you have on hand.
Here’s my personal breakdown of the top contenders:
- Oven Sterilization: My go-to for small to medium batches. It’s incredibly thorough, using dry heat to wipe out pathogens and pests. The main drawback is the distinct, earthy smell it creates in your kitchen, so good ventilation is a must.
- Microwave Sterilization: The fastest method for very small amounts of soil, like for a single plant repot. It works by heating the water molecules inside the soil. I find it’s fantastic for speed but easy to overdo and create “hot spots” that can damage the soil structure if you’re not careful.
- Solarization: This is the most natural, energy-free method. You seal moist soil in a clear plastic bag and let the sun do the work over 4-6 weeks. It’s excellent for large volumes but requires patience and strong, direct sunlight, which isn’t always practical.
- Boiling Water Treatment: A quick and chemical-free fix. Simply pouring boiling water through the soil in a heat-proof container can kill many surface pests and weed seeds. In my experience, it’s less reliable for deep-seated pathogens but great for a last-minute, small-scale treatment.
Quick Tip: For most home gardeners, the oven provides the best balance of effectiveness and control.
Oven Sterilization: Step-by-Step Heat Treatment
This is the method I use most often for my succulent collection. It feels a bit like baking a very strange cake, but it works wonders. Oven sterilization gives you precise temperature control, ensuring you kill unwanted guests without turning your soil into a toxic, burnt mess. These are essential care tips to avoid killing your succulents. Pair sterilization with proper watering and good light.
Equipment and Setup for Oven Sterilization
Gathering your gear beforehand makes the whole process smooth and safe. You don’t need any fancy equipment, just common kitchen and garden items.
- An Oven-Safe Pan: A roasting pan, glass or metal baking dish, or even a deep cookie sheet with raised edges works perfectly. I always line mine with aluminum foil for super easy cleanup.
- Aluminum Foil: To tightly cover your pan and trap the heat and steam inside the soil.
- A Meat or Oven Thermometer: This is non-negotiable for me. Oven thermostats are often inaccurate, and you need to know the soil’s internal temperature, not the air temperature in the oven.
- Your Potting Mix: Ensure the soil is slightly damp. Bone-dry soil can burn easily, and soaking wet soil will take forever to heat up.
- Oven Mitts: For handling the very hot pan safely.
Quick Tip: Slightly moist soil heats more evenly and is less likely to scorch than completely dry soil.
Executing the Oven Sterilization Process
Once you’re set up, the actual process is straightforward. Follow these steps carefully for perfectly pasteurized soil.
- Preheat your oven to 200°F (93°C). This low and slow temperature is the sweet spot for killing pathogens without damaging the soil’s beneficial properties.
- Spread your slightly moist soil evenly in your foil-lined pan. The layer should be no more than 4 inches deep to ensure the heat penetrates all the way through.
- Insert your oven thermometer right into the center of the soil mass. This is how you’ll monitor the real temperature.
- Cover the entire pan tightly with another layer of aluminum foil, creating a sealed environment.
- Place the pan in the preheated oven and set a timer for 30 minutes.
- After 30 minutes, carefully check the thermometer. Your goal is to maintain an internal soil temperature of 180°F (82°C) for the full 30 minutes. If it hasn’t reached that temp, recover it and check every 10 minutes until it does, then time 30 minutes from that point.
- Once the time is up, turn off the oven, crack the oven door open, and let the soil cool down completely inside the oven. This slow cooling prevents a rush of contaminated air from being sucked into the warm soil.
Let the soil cool completely in the oven before you use it; warm soil can still harbor contaminants and can be harmful to plant roots.
Microwave Sterilization: Quick and Controlled
I’ve used my microwave to sterilize small batches of succulent soil for years. It’s my go-to method when I need clean soil fast for a repotting project. The microwave offers precise control over the sterilization time, making it perfect for treating a few cups of soil at a time.
Preparing Soil for Microwave Treatment
Proper preparation is the key to effective and safe microwave sterilization. I never skip these steps.
- Moisten the soil until it feels like a well-wrung-out sponge. Dry soil can be a fire hazard in the microwave.
- Place the damp soil in a microwave-safe bowl or container. I always use a glass container with a loose-fitting lid or a cover of microwave-safe plastic wrap.
- Poke a few small holes in the plastic wrap if you use it. This allows steam to escape and prevents pressure from building up.
- Create a small “steam vent” by placing a small, microwave-safe item, like a clean glass ramekin, upside down in the center of the soil. This helps distribute heat evenly.
Microwave Sterilization Steps
Follow these steps carefully for a successful sterilization cycle.
- Place your prepared soil container in the microwave.
- Heat the soil on high for 2 to 3-minute intervals. I always set my microwave for 2 minutes and 30 seconds.
- After each interval, carefully remove the container (it will be hot!) and stir the soil thoroughly. This ensures all particles are exposed to the heat.
- Return the soil to the microwave and repeat the heating and stirring process. For most home microwaves, a total of 5 to 10 minutes of heating time is sufficient.
- You’ll know it’s working when you see steam and smell a distinct, earthy aroma. This is normal.
- Once finished, leave the container covered and let the soil cool completely before using it. This can take a few hours.
Quick Tip: To create a simple steam vent, place a small, clean ramekin upside down in the center of your soil before microwaving.
Steam Sterilization: Gentle Pathogen Elimination
When I need to sterilize a larger quantity of soil without the risk of overheating it, I turn to steam. This method uses moist heat, which is exceptionally effective at killing pests and pathogens while being gentle on the soil’s structure. Steam sterilization is fantastic because it thoroughly penetrates the soil without baking it, preserving more of the beneficial texture your succulents love. Speaking of succulents, many growers ask what the best soil amendments are for them. For succulents, the top amendments tend to be inorganic materials that improve drainage and aeration—such as pumice, perlite, or coarse sand—over rich organic compost. You can find a detailed list of these amendments here.
Tools for Steam-Based Sterilization
You likely have everything you need for this method already in your kitchen.
- A large stockpot with a tight-fitting lid
- A metal steamer basket or colander that fits inside the pot
- Aluminum foil
- A candy or meat thermometer (optional, but very helpful)
- Oven mitts for handling hot items
Steam Sterilization Procedure
This process is like steaming vegetables, but for your soil. It’s straightforward but requires some patience.
- Pour a few inches of water into the bottom of your large stockpot. The water level should be below your steamer basket.
- Place the steamer basket inside the pot.
- Fill the basket with the soil you wish to sterilize. Do not pack it down tightly; you want the steam to circulate freely.
- Cover the top of the soil-filled basket loosely with aluminum foil to help trap the steam.
- Place the lid on the pot and bring the water to a rolling boil over high heat.
- Once boiling, reduce the heat to a steady simmer. Let the soil steam for 30 minutes.
- After 30 minutes, turn off the heat. Do not remove the lid. Let the pot sit, undisturbed, for another 30 to 60 minutes to allow the heat and steam to finish their work as everything cools down.
- Only when the pot is cool to the touch should you remove the lid and take out your freshly sterilized soil.
Let the pot cool completely with the lid on after steaming; the residual heat continues to sanitize the soil.
Solar Sterilization: Harnessing Natural Heat
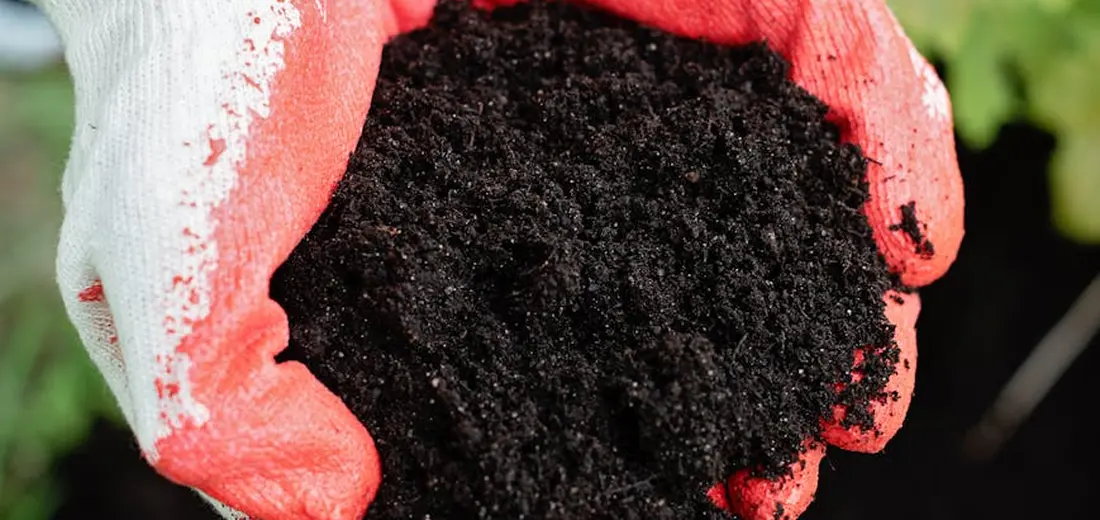
I love using the sun’s power to clean my soil-it’s free, effective, and completely chemical-free. Solar sterilization, or solarization, uses trapped solar heat to bake harmful pathogens, pests, and weed seeds right out of your potting mix. It’s my go-to method for large batches because it feels so satisfyingly natural.
Materials and Setup for Solarization
You don’t need fancy equipment for this. I’ve done this on my apartment balcony and in a small backyard with equal success.
- Black plastic bags: The thicker, the better. I use heavy-duty contractor bags because they don’t tear easily.
- Your moist potting soil: The soil must be damp, not soggy. Think of a wrung-out sponge.
- A sunny spot: You need a location that gets at least 6-8 hours of direct, blazing sun.
- A twist tie or sturdy string to seal the bag tightly.
The key is creating a mini greenhouse effect; the sun heats the moist soil, and the sealed bag traps that heat, raising the temperature enough to sterilize it. I always wear gloves when handling used soil, just to be safe.
Solar Sterilization Steps
Follow these simple steps, and you’ll have beautifully clean soil in about 4-6 weeks during the hottest part of the year.
- Moisten your soil mix thoroughly until it’s evenly damp all the way through.
- Fill the black plastic bags about two-thirds full with the damp soil. Don’t overfill them.
- Squeeze out any excess air from the bag and seal it tightly with the twist tie.
- Place the sealed bags in your sunniest, hottest spot-asphalt or concrete works great as it radiates extra heat.
- Leave the bags undisturbed for a minimum of four weeks. I usually leave mine for a full six weeks in the peak of summer to be sure.
Quick tip: If you’re short on time, you can speed up the process by using a clear plastic bag on top of a black one, which creates an even more intense heat trap. You’ll know it’s working when you see condensation forming on the inside of the bag. Once the time is up, let the soil cool completely before using it.
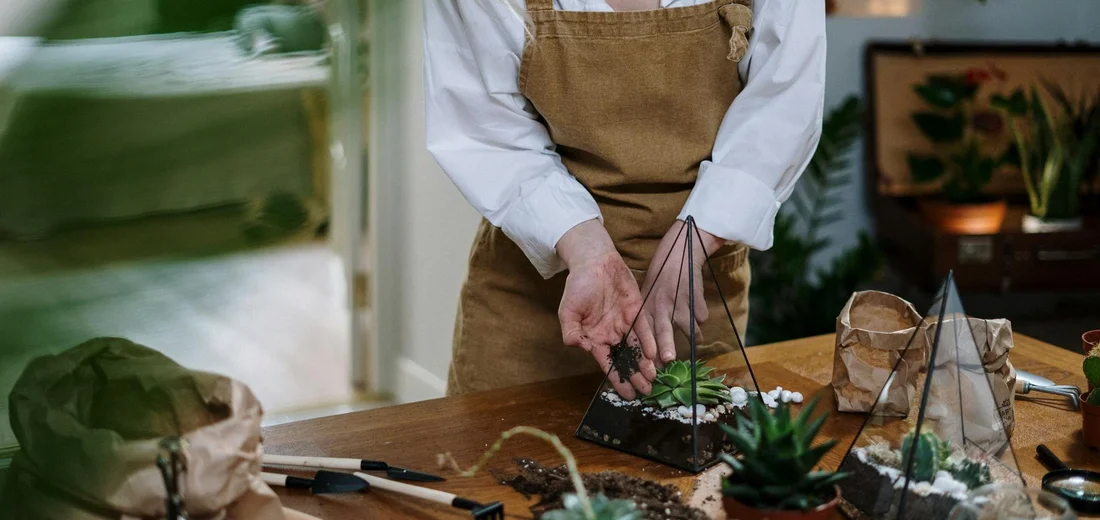
Preparing and Using Sterilized Soil Effectively
Your soil is now a clean slate, but it’s also a blank canvas. Sterilization wipes out the bad guys, but it also eliminates the beneficial microbes that help plants thrive. I learned this the hard way with a batch of succulents that just didn’t take off after repotting.
You must recharge the soil before planting. Here’s my simple routine:
- Let the sterilized soil cool down to room temperature after treatment.
- Mix in a slow-release, succulent-specific fertilizer according to the package directions.
- For an extra boost, I always add a soil inoculant or a handful of worm castings to reintroduce those good bacteria and fungi.
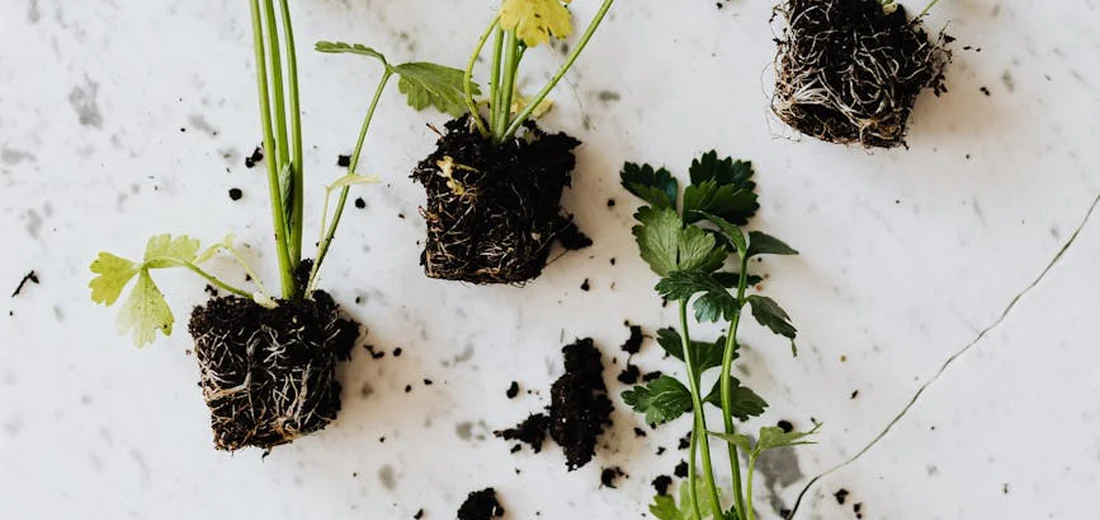
The best time to use your freshly sterilized soil is right after it has cooled and you’ve amended it. Don’t let it sit in an open bag for weeks, as new airborne spores can contaminate it again. I use mine immediately for repotting or for starting new succulent cuttings.
Quick tip: Always water your succulents lightly after repotting them in sterile soil to help settle the roots without shocking them. Wait a full week before giving them a thorough watering to encourage strong root growth as they search for moisture. After this initial period, water again only when the soil is dry to the touch. Then resume a regular, light watering schedule based on the plant’s needs and your environment.
## Quick Answers
Does sterilizing soil also kill beneficial nutrients for my succulents?
No, the sterilization process primarily affects living organisms, not the mineral-based nutrients already present in the soil.
What is the easiest and safest soil sterilization method for a beginner?
Using a microwave for small batches or solarization for larger amounts are generally the easiest and safest methods for beginners.
Can I use my regular kitchen oven for soil sterilization without causing a mess?
Yes, by lining your pan with aluminum foil and ensuring the soil is slightly moist, you can effectively contain any mess.
How long should I wait to use the soil after it has been sterilized?
You should wait until the soil has cooled completely to room temperature before using it for your succulents.
Is it necessary to sterilize brand-new, store-bought succulent soil?
While not always mandatory, it is a highly recommended precaution as bagged soil can still harbor pests, fungus gnats, or pathogens.
Do I need to add anything back to the soil after it has been sterilized?
Yes, it is beneficial to mix in a slow-release, succulent-specific fertilizer to replenish the soil’s growing potential. In our best fertilizer for succulents complete guide, we break down top formulas, feeding schedules, and tips to keep roots healthy. This helps you choose the right mix for your plants and avoid common missteps.
Give Your Succulents a Fresh, Clean Start
Sterilizing your soil is a simple, proactive step to protect your succulents from pests and disease, ensuring they have the best possible foundation for growth. My go-to methods, based on years of trial and error, are using the oven, the microwave, or a hydrogen peroxide drench. Proper watering and a well-draining soil mix are essential to prevent succulent diseases. Pair sterilization with careful watering habits for best results.
- Oven baking for large batches
- Microwaving for speed and small amounts
- Hydrogen peroxide soak for an already-potted plant
You’ve got this! Armed with these safe techniques, you can confidently prepare a sterile, happy home for your plants. Remember to quarantine any new succulents for a couple of weeks and inspect for pests or disease before introducing them to your collection. Treat new acquisitions as a precaution to prevent disease spread and protect your whole succulent family. Your careful attention now will pay off with a thriving, resilient succulent collection for years to come.
Further Reading & Sources
- How to Sterilize Soil | Succulent Simplicity
- How To Sterilize Soil
- Potting mix soil – Why STERILIZE it? || Reasons why PROS do so || Succulents for Beginners – YouTube
- r/succulents on Reddit: sterilising soil by microwaving it?
Lena Greenfield is a passionate horticulturist and plant care expert with over 10 years of experience cultivating and nurturing hardy house plants. With a deep understanding of both indoor and outdoor gardening, Lena shares practical advice on choosing, caring for, and maintaining resilient plants that flourish year-round. Through her knowledge and hands-on approach, Lena helps plant lovers transform their spaces into vibrant, green sanctuaries, no matter their gardening experience.
DIY Projects