How to Propagate Succulents from Leaves and Cuttings
Published on: May 16, 2026 | Last Updated: May 16, 2026
Written By: Lena Greenfield
You want more of your beautiful succulents but are nervous about accidentally killing them during the process. I’ve been there, and I can tell you that propagating your own plants is surprisingly simple and incredibly rewarding.
In this guide, I’ll walk you through everything you need to know, from my own hands-on experience. You’ll learn the difference between leaf and stem propagation, the exact steps for rooting, and how to care for your new baby plants.
An Introduction to Succulent Propagation
Propagating succulents is like getting free plants from your favorite green friends. I’ve found that the magic happens when you understand one simple principle: these plants are survival experts designed to regrow from small parts. A single leaf or a small piece of stem contains all the energy and instructions needed to create a whole new plant.
I remember my first successful propagation was a jade plant leaf that fell off while I was repotting. I left it on a tray of dry soil, and a few weeks later, tiny pink roots appeared. That moment of pure joy is what keeps me propagating today. The process teaches you patience and gives you a deeper connection to the life cycle of your plants. You’re not just growing a plant; you’re witnessing a tiny miracle on your windowsill.

Choosing Your Propagation Method: Leaves vs. Stem Cuttings
Think of leaf and stem propagation as two different paths to the same wonderful destination. Your choice depends entirely on the type of succulent you have and its current condition.
Leaf propagation is perfect for succulents with plump, fleshy leaves that detach cleanly from the stem. It’s a slower, more delicate process that feels incredibly rewarding. I use this method when a plant drops a healthy leaf or when I want to create many new babies from one “mother” plant without causing it much stress.
Stem cuttings are my go-to for leggy, overgrown plants that need a fresh start. If you have a succulent that’s grown tall and lost its compact shape, taking a stem cutting allows you to “reset” it. You get a new, well-proportioned plant from the top cutting, and often the original stem will sprout new growth as well. It’s a win-win for plant aesthetics.
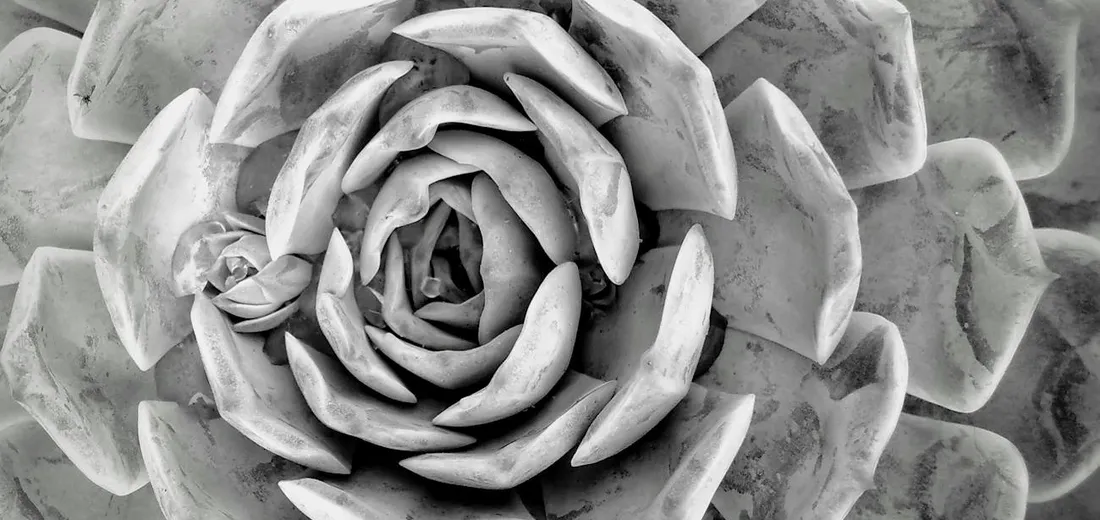
Best Succulents for Leaf Propagation
Not every succulent will cooperate with leaf propagation. Through trial and error, I’ve found these types are the most reliable and generous with their leaves. With so many succulent varieties out there, a comprehensive overview helps you see which ones are best for propagating and what to expect. This quick guide highlights the most propagation-friendly types.
- Echeveria: Their beautiful rosette shapes are made of ideal propagation leaves. Gently wiggle a lower, healthy leaf side-to-side until it snaps off cleanly.
- Sedum (Stonecrop): Many sedums have leaves that pop off with the slightest touch. I’ve had nearly a 100% success rate with the common Sedum rubrotinctum (Jelly Bean Plant).
- Graptopetalum (Ghost Plant): These are propagation champions. Their leaves callous quickly and send out roots and baby plants with impressive speed.
- Kalanchoe: Species like the Kalanchoe daigremontiana (Mother of Thousands) are famous for this, but even common Flaming Katy (Kalanchoe blossfeldiana) leaves can root easily.
Quick Tip: Always choose a leaf that is plump and firm, not wrinkled or discolored. A healthy parent leaf means a healthy baby plant.

Best Succulents for Stem Cutting Propagation
Stem cuttings are the best solution for succulents that grow vertically or become “leggy” as they search for more light.
- Crassula ovata (Jade Plant): This is a classic for stem propagation. A piece of stem will readily root and grow into a sturdy new tree-like plant.
- Sempervivum (Hens and Chicks): While they propagate themselves with offsets, you can also cut the main “hen” and replant it if it becomes too tall.
- Aeonium: These rosettes on long stems are perfect for cutting. You can behead the top and plant it, and the remaining stem will often produce new rosettes.
- Sansevieria (Snake Plant): While you can propagate their leaves, using a stem cutting with a bit of the rhizome (the underground stem) attached is a much faster and more reliable method.
- Euphorbia: Many cactus-like euphorbias propagate excellently from stem sections. Just be cautious of their milky sap, which can be a skin irritant.
The golden rule for stem cuttings is to use a sharp, clean knife or scissors. A clean cut heals faster and is less susceptible to rot than a ragged, crushed one. I always let my stem cuttings dry and form a callus over the cut end for a few days before planting.
Gathering Your Propagation Toolkit
You don’t need a fancy lab to propagate succulents, just a few simple items you likely have at home. Having the right tools ready makes the entire process smoother and dramatically increases your success rate. I keep a small basket with these supplies so I’m always prepared for a spontaneous propagation session. In my complete guide to propagating specific succulent varieties, you’ll find step-by-step methods tailored to each type. This quick primer sets you up to dive into the full guide with confidence.
- A Sharp, Clean Knife or Scissors: I use a simple hobby knife for precision. Clean cuts are vital to prevent crushing the stem and introducing disease.
- Shallow Trays or Small Pots: Any shallow container works. I’ve upcycled old takeout containers with drainage holes poked in the bottom.
- Well-Draining Potting Mix: Regular potting soil holds too much moisture. I always use a dedicated cactus and succulent mix for my propagations.
- A Small Spray Bottle: This is for lightly misting the soil, not the leaves, once the process begins.
- Tweezers: These are a game-changer for handling tiny, delicate pups and roots without damaging them.
Quick Tip: Always disinfect your cutting tool with rubbing alcohol before you start to prevent spreading any plant pathogens.
The Step-by-Step Guide to Leaf Propagation
Leaf propagation feels like pure magic. You’re creating a whole new plant from what is essentially a scrap. This method works beautifully for succulents like Echeveria, Graptopetalum, and Sedum. I find it incredibly rewarding and a perfect project for beginners. Look for signs your propagation is successful: tiny roots starting to appear. You’ll also see new leaves unfurling as the plant settles in.
Step 1: Selecting and Removing Healthy Leaves
Your success starts with choosing the right leaf. Look for plump, firm leaves from the bottom half of a healthy plant. Avoid any that are discolored, shriveled, or damaged. To remove the leaf, gently wiggle it from side to side until you hear a faint snap. You want the entire base to come off cleanly. I never pull straight down, as that can tear the stem and ruin the leaf’s chances.
Step 2: The Crucial Callus Formation Wait
This is the most commonly skipped step, and it’s the one I see cause the most failures. Place your harvested leaves in a dry, shaded spot for 1-3 days until the broken end forms a dry, hard callus. This scab is essential-it seals the wound and prevents the leaf from absorbing too much moisture and rotting when it touches the soil. Patience here is non-negotiable.
Step 3: Laying Leaves for Root Development
Fill your shallow tray with dry succulent mix. Simply lay the callused leaves on top of the soil; do not bury the ends. I arrange them like little sunbathers with space between each one. Place the tray in a spot with bright, indirect light. A windowsill that gets morning sun is my favorite location.
Step 4: The Waiting Game and First Roots
Now, you wait. Resist the urge to water! After a week or two, you’ll see tiny pink or white roots emerging from the callused end, searching for moisture. This is your cue to start a light misting routine. Use your spray bottle to moisten the soil around the roots every few days when the soil feels completely dry. The mother leaf will slowly shrivel as it provides energy for the new baby plant, or pup.
Quick Tip: If a leaf turns to mush or grows mold, remove it immediately to protect the healthy ones.
The Step-by-Step Guide to Stem Cutting Propagation
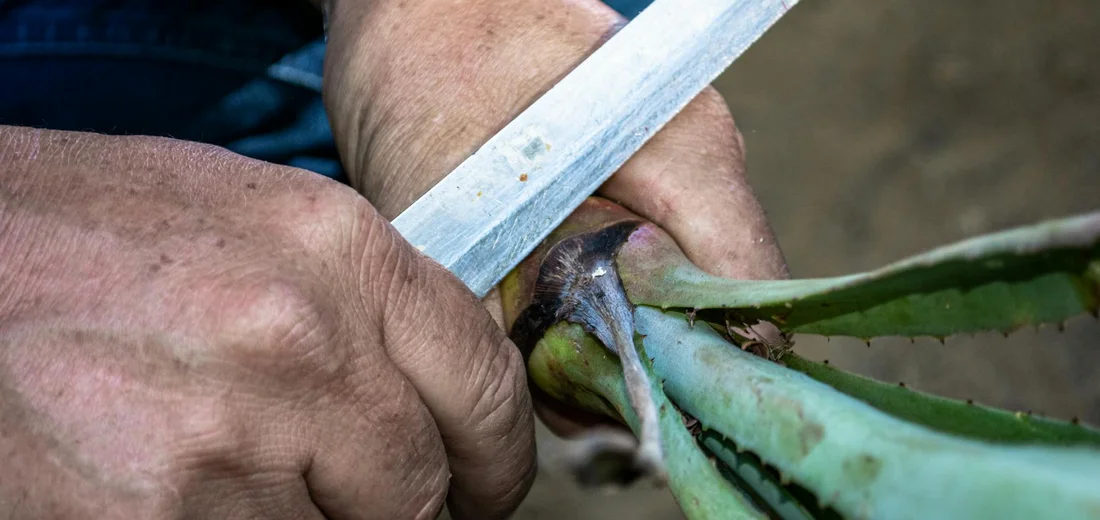
Step 1: Taking a Perfect Stem Cutting
I always use a pair of clean, sharp scissors or pruning shears for this job. Sterilizing your tool with rubbing alcohol prevents bacteria from getting into the fresh cut, which is a common cause of failure. Look for a healthy, firm stem on your mother plant, one that’s not flowering. Make a clean cut about three to five inches from the tip, just above a leaf node. This encourages the mother plant to branch out and get bushier. You want a cutting with several sets of leaves.
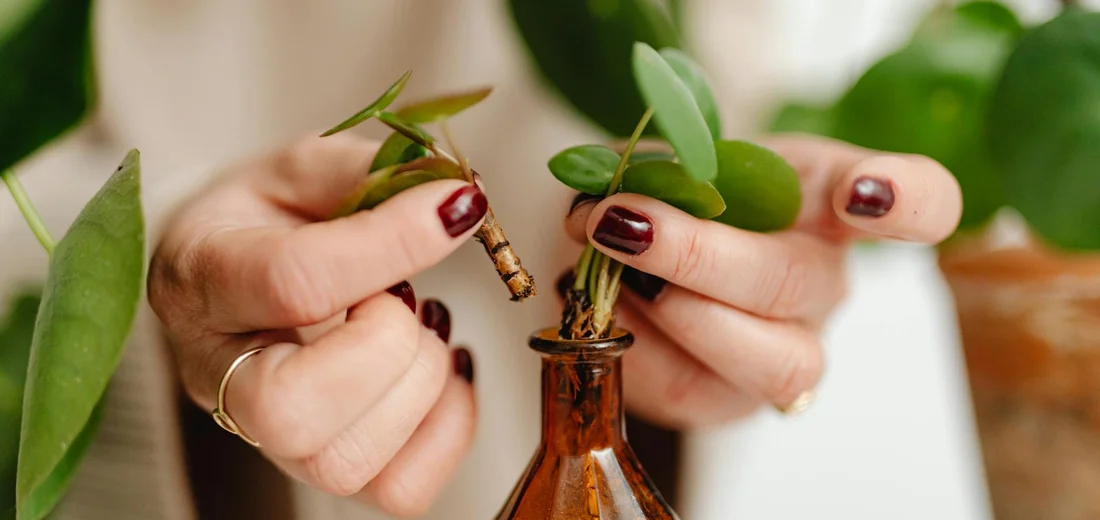
My favorite trick is to take cuttings in the morning when the plant is most hydrated. Gently remove the bottom two or three leaves from your cutting by wiggling them side-to-side until they snap off cleanly. This exposes a section of bare stem that we’ll plant, and those leaves can be used for leaf propagation-a fantastic two-for-one deal!
Step 2: Callusing Your Stem Cutting
This is the step I see most beginners skip, and it’s the reason their cuttings turn to mush. You must let the cut end of the stem dry out and form a protective layer called a callus before you even think about soil. A fresh, wet wound will just rot if you put it directly into damp potting mix. I lay my stem cuttings on a paper towel on a tray and leave them in a spot with bright, indirect light.
Patience is your best friend here. Depending on the thickness of the stem and your home’s humidity, a good callus can take anywhere from two days to a full week to form. The end should look and feel dry, sealed over, and maybe a little rough or scab-like. Don’t rush it. I once lost a whole batch of echeveria cuttings because I got impatient and planted them after just one day.
Step 3: Planting and Supporting Your Stem Cutting
Once your cutting has a solid callus, it’s time to plant. Fill a small pot with a very well-draining succulent mix; I often make my own with two parts potting soil to one part perlite. Do not use a large pot, as the excess soil will hold too much moisture for the small, developing root system. Make a small hole in the center of the soil with your finger or a pencil.
Place the callused end of the stem into the hole and gently firm the soil around it to hold it upright. If your cutting is top-heavy and keeps falling over, you can use small rocks or decorative pebbles as props to keep it stable. Do not water it yet! The cutting has no roots to drink with, so watering now would only encourage rot. The existing leaves hold all the water and energy it needs to start growing new roots.
Caring for Your New Succulent Propagations
Mastering Moisture Control for Baby Roots
Watering is the trickiest part of succulent propagation. You only want to introduce moisture once you see the first signs of new root growth, which can take a few weeks. I look for tiny pink or white nubs emerging from the callused stem. At that point, I use a spray bottle to lightly mist the soil around the base of the cutting, just enough to dampen the top layer. The goal is to encourage the roots to seek out water without drowning them. Watering succulent cuttings and propagations requires patience and care.
I’ve learned to treat my propagations like tiny, thirsty birds. Your watering routine should be a gentle “sip, not a soak,” gradually increasing the amount of water as the root system becomes more established. Let the soil dry out completely between these light waterings. If the parent leaf or stem starts to look shriveled, it’s a sign the baby is using its stored water and is likely putting out roots.
Providing the Perfect Light and Warmth
Your baby succulents need bright, indirect light to thrive. A spot a few feet back from a south or east-facing window is the sweet spot I’ve found for encouraging strong, compact growth. In our complete guide to growing outdoor succulents indoors, this light placement helps you recreate outdoor sun indoors. It’s a core tip for translating outdoor care to an indoor window. Direct, hot afternoon sun will scorch their delicate tissues, while too little light will cause them to stretch out and become weak and leggy, a condition called etiolation.
Warmth is a secret ingredient for faster root development. Propagations root best in consistent, cozy temperatures, ideally between 65°F and 75°F (18°C – 24°C). I avoid placing them on cold windowsills in winter or in drafty hallways. Think of providing a warm, bright, and stable nursery environment, and your little plant babies will reward you with vigorous growth.
Transplanting Your Rooted Succulents
Seeing those tiny pink roots is so exciting, and it’s tempting to move your baby plant right away. I always wait until the original leaf has shriveled into a crispy, paper-thin shell before I even think about transplanting. That leaf is the pup’s entire food supply, and disturbing it too early is the fastest way to stunt its growth.
When that mother leaf is spent, here’s my simple, no-fuss process for giving your new succulent a permanent home:
- Choose a tiny pot with a drainage hole. I use 2-inch terracotta pots because they help wick away extra moisture.
- Fill it with a fresh, well-draining succulent and cactus mix. Don’t reuse old soil from other plants.
- Make a small, shallow indentation in the center of the soil with your finger or a pencil.
- Gently place the new roots into this hole and lightly cover them with soil. Don’t bury the new rosette!
- Wait a full week before you give it the first sip of water. This allows any tiny root breaks to heal and prevents rot.
Quick Tip: Use a spoon to gently lift your propagated succulent from its propagation tray to avoid damaging those delicate new roots. After lifting, return the plant to its tray and follow our care for newly propagated succulents guide. Keep it in bright, indirect light and water only when the soil is completely dry to encourage healthy root establishment.
Your newly potted succulent will need bright, indirect light. A south or east-facing windowsill is perfect. I keep mine in a spot that gets morning sun but is protected from the harsh afternoon rays, which can scorch the tender new growth. Different succulents require varying amounts of light, so it’s important to research the specific needs of your plant.
Troubleshooting Common Propagation Problems
Not every leaf turns into a new plant, and that’s completely normal. Over the years, I’ve seen every propagation hiccup you can imagine. Here are the most common issues and how to fix them.
The Leaf or Cutting is Rotting
If your leaf turns to a black or brown mushy mess, it’s almost always a water issue.
- Cause: The leaf was sitting on wet soil or was misted too frequently.
- Fix: For leaf propagation, I don’t water at all until the mother leaf shrivels. For stem cuttings, I let the cut end callus for 2-3 days before placing it on dry soil.
Always lay leaves on top of dry soil, not buried in it, and resist the urge to mist them. They get all the moisture they need from the air and the mother leaf itself.
No Roots or Pups Are Appearing
This is a test of patience! Sometimes a leaf just takes its sweet time.
- Cause: Not enough indirect light, the wrong time of year (they root best in spring/summer), or it’s just a dud leaf.
- Fix: Move your propagation tray to a brighter location. Ensure the broken end of the leaf has full contact with the soil or air. If nothing happens after 8 weeks, the leaf may not be viable.
The Mother Leaf is Shriveled but the Pup Has No Roots
This one can be nerve-wracking. The pup is growing, but it has no way to drink water on its own.
- Cause: The leaf provided energy for the pup but not for root growth.
- Fix: Don’t remove the shriveled leaf yet-it’s still providing some stability. Place the base of the pup directly on the soil and give it a light watering with a dropper right at the base every 10-14 days to encourage the roots to seek out moisture.
Roots Have Grown, but No Pup
It feels backwards, but this is very common! The plant is establishing a root system first to support the new growth.
- Cause: The plant is prioritizing its foundation. It’s a good sign!
- Fix: Keep doing what you’re doing. Ensure it gets bright light and leave it completely alone. The pup will almost always appear once the roots are well-established.
The New Growth is Stretched and Leggy
If your succulent pup looks like it’s reaching for something, it is-it’s reaching for more light.
- Cause: Insufficient light. This is called etiolation.
- Fix: Gradually move your propagation setup to a brighter spot. Once the plant is larger, you can behead the stretched part and re-root it to create a more compact plant.
## Common Questions
Can you propagate a succulent from just one leaf?
Yes, a single healthy leaf can produce roots and eventually grow into a completely new succulent plant.
Is it better to propagate succulent leaves in water or soil?
Soil propagation is generally more reliable as it mimics the plant’s natural conditions and presents a lower risk of rot.
Can you propagate succulent leaves that have fallen off?
You can propagate fallen leaves as long as they are intact, plump, and not mushy or translucent from damage.
Do you have to put succulent leaves in soil to propagate?
No, you simply lay the leaves on top of dry soil until they sprout roots and a new pup begins to form.
How long does it take to propagate a succulent from a leaf?
It typically takes a few weeks for roots to appear and several months for a sizable new plant to develop.
Where can I find a video tutorial on propagating succulents from leaves?
Search on YouTube using terms like “succulent leaf propagation guide” or “growing succulents from leaves” for visual step-by-step instructions. For rare succulents, look for videos that address species-specific tips. With careful adaptation, you can propagate them successfully.
Ready to Multiply Your Succulent Collection?
In my years of nurturing succulents, I’ve found that successful propagation boils down to mimicking their natural dry habitat and giving them time to root. This mindset also helps when transplanting or propagating. Keep cuttings dry, let wounds callous, and use well-draining soil. Stick to these simple steps for the best results:
- Let leaves or cuttings callous over before planting in well-draining soil.
- Provide bright, indirect light and water only when the soil is bone-dry.
- Be patient-new growth can take a few weeks to appear!
I encourage you to start with a leaf or cutting from your healthiest plant and enjoy the rewarding process of watching new life emerge. With these tips, you’ll confidently grow your indoor garden and share the joy of thriving succulents with others. Be sure to give them the right care and conditions they need to thrive.
Further Reading & Sources
- Succulent Propagation 101: How to propagate succulents from leaves, cuttings, offsets and divisions
- How to Propagate Succulents from Leaves and Cuttings | Succulents and Sunshine
- Propagating Succulents – Needles + Leaves
- 4 Basic Ways of Propagating Succulents – Leaf & Clay
Lena Greenfield is a passionate horticulturist and plant care expert with over 10 years of experience cultivating and nurturing hardy house plants. With a deep understanding of both indoor and outdoor gardening, Lena shares practical advice on choosing, caring for, and maintaining resilient plants that flourish year-round. Through her knowledge and hands-on approach, Lena helps plant lovers transform their spaces into vibrant, green sanctuaries, no matter their gardening experience.
Propagation Methods