What Tools Do You Need for Successful Plant Repotting?
Published on: January 4, 2026 | Last Updated: January 4, 2026
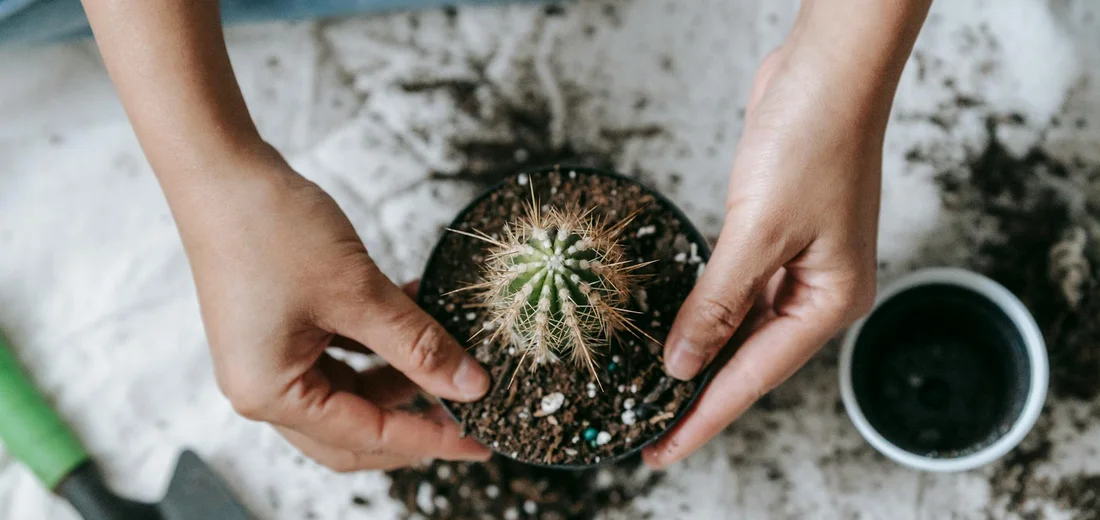
Written By: Lena Greenfield
Repotting your plants might seem daunting, but having the right tools turns it into a smooth and satisfying experience.
You might be concerned about root damage or a messy cleanup, yet I’ve found that a few key items eliminate those worries completely.
Drawing from my years of nurturing indoor gardens, I’ll guide you through essential tools, step-by-step techniques, and budget-friendly tips to ensure your plants thrive in their new homes.
Your Core Toolkit for a Smooth Repotting Session
Choosing the Right Trowel and Scoop
I learned the hard way that using a giant garden trowel for my tiny succulents was a recipe for disaster. Your hand trowel should feel like a natural extension of your arm, not a clunky shovel. For most houseplants, a narrow, pointed trowel is perfect for wiggling into tight root balls. I keep a dedicated, sturdy metal one that’s about the size of my hand.
Don’t forget a simple scoop! A large, plastic measuring cup or a dedicated soil scoop makes filling the new pot incredibly easy and mess-free. Using a scoop instead of pouring from the bag gives you way more control over where the soil lands. I ruined a white rug once by being overzealous with a bag of potting mix-trust me on this one.
The Importance of a Good Pair of Gloves
Gloves are your first line of defense, and I don’t just mean against dirt. A quality pair of gloves protects your hands from sharp thorns, rough pot edges, and skin-irritating sap. Some plants, like euphorbias, have sap that can cause a nasty rash.
I prefer nitrile-coated gloves because they offer a fantastic grip, even when wet, and they’re thin enough that I can still feel what I’m doing. That tactile feedback is crucial for gently handling delicate roots and stems without causing damage. Thick, clumsy gloves can make you heavy-handed, so find a pair that balances protection with dexterity.
Selecting the Perfect Pot and Potting Mix
Finding the Ideal Pot Size
The biggest mistake I see new plant parents make is choosing a pot that’s way too big. Upsizing by just 1-2 inches in diameter is the sweet spot for most houseplants. A pot that’s too large holds excess soil that stays wet for too long, leading to root rot. When you repot, choose a pot that’s only slightly larger than the root ball, just enough room for growth. This helps the soil dry out between waterings and keeps roots healthy.
Here’s my simple rule of thumb: look at the root ball of your plant. The new pot should allow for about an inch of fresh soil to surround the entire root system. This gives the roots room to grow without drowning them in a huge volume of damp soil. For a plant in a 4-inch pot, move to a 6-inch pot, not an 8-inch one.
Understanding Potting Mix and Drainage
Regular garden soil is a death sentence for indoor plants—it’s too dense and holds far too much water. A good potting mix is specifically designed to be light and airy, providing oxygen to the roots while allowing excess water to drain away. I always look for a mix that contains ingredients like perlite (those little white bits) or bark for aeration. When choosing soil for indoor plants, pick a mix that drains well. Prepare the soil by pre-moistening it and adjusting with a little perlite if needed.
Drainage is non-negotiable. Your pot must have at least one drainage hole in the bottom to let water escape. I’ve tried the “layer of rocks at the bottom” trick, and it simply doesn’t work; it actually raises the water table inside the pot. If you fall in love with a pot with no hole, use it as a decorative cache pot and keep your plant in a plain plastic nursery pot inside it.
Specialized Tools for Root Care and Pruning
This is where you transition from a simple pot-swapper to a true plant doctor. Gently working with the roots is the single most important step for a successful repot, and the right tools make it safe and simple. To help you master the process, follow this properly repot snake plant step-by-step guide. It walks you through pot selection, soil mix, and careful root prep for a healthy transplant.
Using a Root Rake and Pruning Shears
I used to just wiggle my fingers in the root ball, often tearing healthy roots in the process. A root rake, with its gentle curved tines, was a game-changer for me. It combs through the roots without causing damage, loosening the old soil and untangling any minor circling.
- Root Rake: Perfect for teasing apart dense root balls on plants like peace lilies or pothos. I use it to gently loosen the outer layer of roots, encouraging them to grow outward into their new soil.
- Chopsticks or a Pencil: Don’t own a root rake? A simple chopstick is my go-to hack for smaller plants and succulents. It’s surprisingly effective for poking into the root mass and carefully loosening things up.
For pruning, you need a clean, sharp tool. Dull blades crush and damage plant tissue, opening the door for disease. What are the essential tools needed for proper plant pruning.
- Bypass Pruning Shears: These work like scissors and give a clean cut. I use them for any root thicker than a pencil lead.
- Sharp, Clean Scissors: A dedicated pair of sharp scissors is perfect for trimming finer roots on most houseplants and for giving the foliage a little haircut to balance the root loss.
When you prune roots, you’re signaling the plant to produce fresh, healthy roots that are perfectly positioned to absorb water and nutrients.
Here is my simple process for root pruning:
- Gently loosen the root ball with your rake or chopstick.
- Identify any roots that are black, mushy, or smell bad-these must be cut away.
- Look for long, circling roots and trim them back to encourage a more balanced growth pattern.
- Make clean, confident cuts. Hesitant, jagged snips can do more harm than good.
Helpful Extras for a Clean and Organized Workspace
Repotting doesn’t have to be a messy, soil-on-every-surface ordeal. A few simple extras turn a chaotic chore into a pleasant, contained project. I learned this after sweeping potting mix out of my kitchen grout for the third time.
Your workspace setup is your first line of defense against mess.
- A Large Tray or Rimmed Baking Sheet: I do all my repotting inside a large plastic nursery tray. The raised edges contain spills and make cleanup a breeze.
- Newspaper or a Disposable Tablecloth: Laying down newspaper is my classic, no-cost method for catching stray soil and water drips. Just roll it up and toss it when you’re done.
- Small Bowls or Containers: I keep a few small bowls nearby to hold the plant’s original pot, any decorative rocks I’m reusing, and my tools. This keeps everything within reach and organized.
Having materials ready for the final touch-up makes the whole process feel professional.
- A Soft Brush or Makeup Brush:
- A small, dry paintbrush or a large makeup brush is perfect for gently brushing stray soil off plant leaves and the rim of the new pot.
- Watering Can with a Long, Narrow Spout: This allows you to water the soil directly after repotting without drenching the leaves or creating a muddy splash zone.
- Damp Cloth or Paper Towels: Keep these on hand for a quick wipe-down of the pot and your workspace once you’re finished.
Taking five minutes to set up a clean workspace saves you twenty minutes of cleaning later and makes the entire experience more enjoyable.
Tool Maintenance: Cleaning and Sanitizing
I learned the hard way that dirty tools can spread trouble from one plant to another. Think of your pruners and trowels like kitchen knives; you wouldn’t cut vegetables after handling raw chicken without washing up. A quick clean after each use keeps your plant family safe from hidden fungi and bacteria.
My go-to method is simple. I fill a bucket with warm, soapy water and scrub all my tools with a stiff brush to remove caked-on soil and sap. After a good rinse, I spray them down with isopropyl alcohol and let them air dry completely. Sterilizing pruning tools between plants is essential to prevent disease spread and protect the health of your collection. This routine takes just a few minutes but protects your collection from preventable outbreaks.
For a super-fast clean between plants, I always keep a pack of alcohol wipes in my gardening apron. Giving your scissors a quick swipe before moving from one succulent to the next is a fantastic habit. It’s the plant care equivalent of using hand sanitizer, and it makes a world of difference when you’re cleaning succulents.
Knowing When to Replace Your Tools
Even the best tools don’t last forever. I’ve held onto pruners long past their prime, only to have them crush a stem instead of making a clean cut. A clean, sharp cut heals quickly, while a ragged, crushed one is an open invitation for disease. Knowing when to retire a tool is just as important as knowing how to use it.
Here are the clear signs it’s time for a replacement:
- Rust that you can’t scrub off, especially on the cutting blades or hinges.
- Blades that no longer stay sharp, no matter how much you hone them.
- Handles that are cracked, splintered, or wobbly, making the tool unsafe to use.
- Pruners or snips that no longer align properly, leaving a gap when closed.
I had a favorite trowel that finally gave out after years of service. The metal blade bent while I was trying to loosen a root ball, and that was its final farewell. Using a compromised tool often means you have to use more force, which increases the risk of damaging your plant or injuring yourself. If a tool feels like it’s fighting you, it’s probably time to let it go.
Test your pruning shears on a piece of scrap paper. If they glide through smoothly, they’re still good. If they catch and tear the paper, it’s time for a new pair. This simple paper test never lies and has saved many of my plants from a bad haircut.
FAQs
What are the essential tools for plant repotting?
Essential tools include a hand trowel, soil scoop, gloves, pruning shears, and a root rake for safe and efficient repotting. For beginner plant parents, having these basics on hand helps simplify plant care as your collection grows. With the right tools, you can confidently tackle potting, pruning, and repotting tasks along the way. You can find more about these supplies in our guide on essential tools.
Which trowel is best for small repotting jobs?
A narrow, pointed metal trowel about the size of your hand is ideal for precise work with small plants and tight root balls.
How do you choose a potting scoop for root ball handling?
Select a scoop with a comfortable grip and a size that allows controlled soil placement without spilling, like a large plastic measuring cup.
Do you need pruning shears for repotting?
Yes, pruning shears are necessary for trimming damaged or overgrown roots to encourage healthy new growth during repotting, especially after root rot.
What kind of gloves are good for repotting plants?
Nitrile-coated gloves offer excellent grip, protection from irritants, and enough dexterity for handling delicate roots and stems.
How should you sanitize tools before repotting?
Sanitize tools by spraying them with isopropyl alcohol and letting them air dry to prevent spreading diseases between plants.
Your Repotting Toolkit: Wrapping It Up
Based on my years of nurturing house plants and succulents, the secret to stress-free repotting is gathering a few key tools and handling your green friends with care. Start with a pot that has drainage holes, fresh well-draining soil, and basic tools to make the process smooth. Here’s a quick recap of what you need: If you’re new to repotting succulents, this beginner-friendly, step-by-step guide will walk you through the process. We’ll break it down into simple steps so you can repot with confidence.
- A new pot slightly larger than the old one
- Quality potting mix suited to your plant
- A trowel or small shovel for easy soil handling
- Gloves to keep your hands clean and protected
For more helpful guides and tips, keep following our website—I’m always sharing from my own plant care journey. To truly match indoor plants to your lifestyle and care commitment, pick varieties that fit your routine and space. You’ve got this, and your plants will reward you with lush growth and vibrant health!
Further Reading & Sources
- Potting Tools | Indoor Plant Care | The Fernseed
- Repotting Toolkit to Rehome Your Indoor Plants | Bloomscape
- Amazon.com: Repotting Kit
- How to Repot a Plant – Transplant Indoor Plants in 5 Steps
Lena Greenfield is a passionate horticulturist and plant care expert with over 10 years of experience cultivating and nurturing hardy house plants. With a deep understanding of both indoor and outdoor gardening, Lena shares practical advice on choosing, caring for, and maintaining resilient plants that flourish year-round. Through her knowledge and hands-on approach, Lena helps plant lovers transform their spaces into vibrant, green sanctuaries, no matter their gardening experience.
Repotting Guidelines