What’s the Best Method for Cleaning Indoor Plant Leaves?
Published on: March 22, 2026 | Last Updated: March 22, 2026
Written By: Lena Greenfield
You’ve noticed a layer of dust on your plant’s leaves, and you’re wondering if it’s harming them and what you can safely use to wipe them clean. I’ve been there too, and after years of trial and error with my own collection, I can assure you that cleaning them is simpler than you think and makes a huge difference.
In this guide, I’ll walk you through the safest cleaning methods, what common household products to avoid, and how often you should be doing it. A quick wipe-down not only makes your plants look gorgeous but also helps them breathe and soak up more light for healthier growth.
Why Bother Cleaning Your Plant’s Leaves?
You might think a little dust is no big deal, but for your plant, it’s like trying to sunbathe in a thick sweater. That layer of dust directly blocks the sunlight your plant needs to create its own food through photosynthesis. I’ve seen plants perk up dramatically after just one good cleaning, with new growth appearing much faster.
Beyond the hunger issue, clean leaves are healthy leaves. Dust and grime can clog the tiny pores, called stomata, that plants use to breathe. Keeping these pores clear allows your plant to respirate properly and helps regulate its internal moisture. It makes a huge difference in their overall vitality.
From my own experience, a regular cleaning routine is also your first line of defense against pests. Spider mites, in particular, love dusty, neglected leaves. Wiping leaves down weekly lets you spot the early signs of an infestation before it becomes a full-blown crisis. It’s so much easier to manage one or two bugs than a whole colony. For indoor plants, this routine doubles as a prevention against spider mites. If you notice any signs, treat promptly with insecticidal soap or horticultural oil.
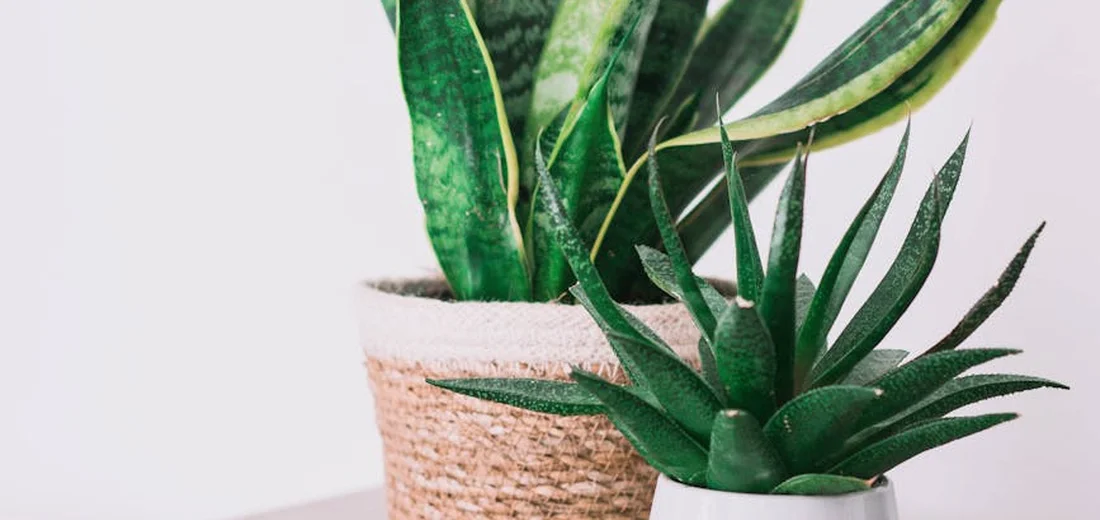
Let’s be honest, a clean plant is also just a prettier plant. A glossy, dust-free Monstera or a sparkling Snake Plant makes your entire space feel more vibrant and cared-for. It’s a simple act of care that rewards you with a more beautiful living environment.
The Best Tools for a Gentle Cleaning
You don’t need fancy products to get your plants sparkling. In fact, the best tools are often already in your home. The golden rule is to be gentle-you’re giving your plant a spa day, not scrubbing a pot. Avoid any harsh chemicals or rough sponges that could damage the delicate leaf surface.
Your Go-To Cleaning Kit
Over the years, I’ve settled on a few favorite tools that work for almost every plant in my collection. These tools are essential for plant health monitoring and care. By keeping them ready, I can quickly assess moisture, light, and overall vigor. Here’s what I always have on hand:
- A soft, microfiber cloth: This is my absolute top pick. It’s soft enough for even the most delicate succulents and grabs dust without needing any cleaning solution.
- A soft-bristled paintbrush or makeup brush: This is perfect for plants with fuzzy leaves, like African Violets, or cacti and other succulents with spines. The brush gently flicks dust away without rubbing.
- A spray bottle with distilled or filtered water: Tap water can leave unsightly mineral spots on the leaves. For a light dusting, a simple mist and gentle wipe is all you need.
- A drop of mild liquid soap: For stubborn, sticky grime (like from honeydew residue), I add one tiny drop of castile or dish soap to a bowl of water. A little soap goes a very long way, so always use a highly diluted solution.
Quick Tip: For large, smooth-leaved plants like Fiddle Leaf Figs, using one hand to support the back of the leaf while you wipe the front prevents tearing. This simple technique has saved many of my own leaves from accidental damage.
Step-by-Step: How to Wipe Down Leaves
This is my go-to method for plants with large, sturdy leaves like Monsteras and Fiddle Leaf Figs. Regular wiping not only keeps leaves photosynthesizing efficiently but also lets you inspect for early signs of pests. I do this about once a month for my collection.
Here is my simple, effective process:
- Prepare your cleaning solution. I use a simple mix of one quart of lukewarm water with a drop or two of mild liquid soap, like castile soap.
- Dampen a soft, lint-free cloth (an old t-shirt or microfiber cloth works perfectly) in your solution. Wring it out thoroughly so it’s only damp, not dripping wet.
- Gently support the back of the leaf with one hand to prevent tearing. With your other hand, wipe the top of the leaf from the base (where it meets the stem) out towards the tip, following the leaf’s natural growth direction.
- Flip the leaf over and give the underside a quick, gentle wipe. This is where pests like spider mites like to hide, so don’t skip it.
- Use a dry part of the cloth to gently buff the leaf surface to a subtle shine, removing any soapy residue.
For plants with fuzzy leaves, like African Violets, skip the liquid and wipe them gently with a soft, dry paintbrush. Moisture can damage their delicate, fuzzy leaves and lead to rot.
The Quick Shower Method for Larger Plants
When you have a large plant or a group of smaller ones, taking them to the shower is a huge time-saver. I do this seasonally for my big Bird of Paradise and it always looks incredible afterward.
Follow these steps for a successful plant shower:
- Move your plant to a bathtub or shower. Protect the soil surface by covering it with a plastic bag or cling wrap to prevent it from becoming waterlogged.
- Adjust your showerhead to a gentle, lukewarm spray setting. Avoid using cold water, as it can shock the plant.
- Spray the plant from top to bottom, making sure to hit the undersides of the leaves. Let the water run over the foliage for a minute or two to rinse away all the dust.
- Leave the plant in the tub to drain completely before returning it to its decorative pot and sunny spot. Good drainage is critical here to prevent root rot.
Special Care for Succulents and Cacti
Cleaning these drought-loving plants requires a much lighter touch. Over the years, I’ve learned that getting water trapped in their rosettes is the fastest way to cause rot.
For most succulents, a soft makeup brush or a can of compressed air is your best friend. Gently brush the dust from the leaves, working from the center of the plant outward. This avoids pushing debris into the tight center where new growth emerges. Cleaning succulents regularly removes dust and dirt safely, helping leaves stay vibrant and breathable. This simple practice keeps plants healthy with less fuss.
If your succulent has gotten really grimy, you can use a damp cotton swab (Q-tip) to spot-clean individual leaves. Just be certain to let the plant dry fully in a spot with good air circulation afterward. This gentle cleaning is part of essential care tips to avoid killing your succulents. Keep the cleaning gentle and avoid excess moisture to support healthy growth.
For cacti, I always use a pair of kitchen tongs to hold a soft cloth. This protects my fingers from the spines while I carefully wipe down each cactus rib. A soft paintbrush is also fantastic for dusting between those sharp spines.
Quick Tip: Always clean your plants in the morning so they have the entire day to dry, reducing the risk of fungal issues.
When a Simple Mist Isn’t Enough

I’ve found that misting is a great start, but it often just moves dust around instead of removing it. For a truly clean leaf that can photosynthesize at its best, you need to physically wipe away the grime. This is especially true for plants with large, smooth leaves like Monsteras or Fiddle Leaf Figs.
My Go-To Method: The Damp Cloth Wipe-Down
This is my most trusted technique for general cleaning. I use a soft, lint-free microfiber cloth dampened with lukewarm water. Gently support the back of the leaf with one hand while you wipe the top surface with the other.
- Why it works: It physically lifts dust, pollen, and light residue without clogging the leaf’s pores.
- Best for: Most houseplants with sturdy, non-fuzzy leaves.
- My tip: Use a fresh part of the cloth for each plant to avoid spreading any potential pests.
For Stubborn, Sticky Residue
If you see shiny, sticky spots, you might have honeydew from pests like aphids or scale. A simple water wipe won’t cut it. In my experience, a drop of mild, liquid Castile soap in a bowl of water creates a gentle but effective cleaning solution. Dip your cloth, wring it out well, and wipe. Always follow with a quick rinse using a cloth with plain water to remove any soap film.
- Mix 1 quart of lukewarm water with 1/4 teaspoon of liquid Castile soap.
- Dampen your cloth and wring it out thoroughly.
- Wipe the leaf gently, then immediately wipe it again with a water-only cloth.
The Gentle Shower Technique
When I’m short on time or dealing with a plant with many small leaves, I take it to the sink or shower. Giving your plants a lukewarm shower rinse is a fantastic way to clean them thoroughly and simulate a natural rainfall. Just ensure your pot has good drainage so it doesn’t sit in water afterward.
- Use lukewarm water pressure, not cold or hot.
- Let the plant drip dry in the sink or tub before returning it to its spot.
- Keep plants out of direct, hot sun until the leaves are completely dry to avoid sunburn.
Making Cleaning Part of Your Plant Care Routine
Cleaning leaves isn’t a separate chore; it’s a core part of keeping your plants healthy. I like to pair it with my watering schedule so I never forget.
I always do a quick visual inspection and light dusting every time I water my plants. This helps me spot early signs of pests or disease while I’m already tending to them. I also check for early warning signs of pest infestations on my plants so I can act quickly if needed. It becomes a mindful, five-minute task instead of a big, dreaded project.
Creating a Simple Cleaning Schedule
Here’s the basic schedule I follow for my own collection. It keeps my plants looking vibrant without feeling overwhelming. With a diverse collection, I tailor the watering schedule to different plant types. This keeps each group hydrated and avoids overwatering.
- Weekly: While watering, give large-leaved plants a quick wipe with a dry microfiber cloth to keep dust from building up.
- Monthly: Do a more thorough cleaning for all your plants. This is when I use the damp cloth or shower method.
- Seasonally: In spring and fall, I do a deep clean, checking the undersides of leaves and cleaning the pots themselves.
Why This Routine is a Game-Changer
Integrating leaf cleaning into your regular care does more than just make your plants look pretty. Clean leaves are healthy leaves, and healthy leaves are better at converting light into energy for new growth. You’ll often see a growth spurt after a good cleaning session because the plant can finally “breathe” and eat properly.
I’ve noticed my Spider Plants and Pothos get noticeably perkier and start pushing out new vines within days of a thorough leaf cleaning. It’s one of the simplest ways to give your plants a direct health boost.
Troubleshooting Common Leaf Issues
Sometimes, a simple wipe isn’t enough because the leaf itself is the problem. Learning to read your plant’s leaves is like learning a new language; they’ll tell you exactly what they need. Here are the most common issues I’ve encountered and how I handle them.
Stubborn Dust and Grime Buildup
If your plant has been collecting dust for months, a dry cloth won’t cut it. I have a large Fiddle Leaf Fig that once looked like it belonged in a dusty attic. For a deep clean, I use a solution of lukewarm water with a tiny drop of mild, liquid Castile soap. Dip a soft cloth in the solution, wring it out thoroughly so it’s just damp, and gently wipe each leaf. Rinse your cloth in plain water and do a quick pass to remove any soapy residue.
Sticky, Shiny Residue on Leaves
Finding a sticky film on your plant’s leaves is a classic sign of an uninvited guest: pests like aphids or scale. I first spotted this on my orchid collection. This sticky substance is called honeydew, and it’s a waste product from sap-sucking insects. Your cleaning routine needs to become a rescue mission. Isolate the affected plant immediately. Wipe every leaf, top and bottom, with a cotton ball soaked in 70% isopropyl alcohol. This kills the pests on contact and cuts through the residue.
White, Chalky Spots or Film
Those white spots aren’t a new type of leaf pattern. They’re usually mineral deposits from hard tap water. I see this all the time on the tough leaves of my Snake Plants after I’ve been lazy and used the spray hose. To remove these deposits, wipe the leaf with a cloth dampened with a 50/50 mix of water and white vinegar. The mild acid dissolves the minerals without harming the leaf. Always do a final wipe with plain water afterward.
Dealing with Powdery Mildew
Powdery mildew looks like someone dusted your plant with white flour. It’s a fungus that thrives in poor air circulation. I battled this on my Begonias one humid summer. It can creep onto succulents too, so start by identifying the powdery white coating on leaves and stems. Early identification on succulents lets you treat with milk spray or baking soda before it spreads. My go-to solution is one part milk to two parts water, sprayed onto the leaves every few days until it clears. The compounds in milk are surprisingly effective at controlling the fungus. For a stronger option, a baking soda spray (1 teaspoon per quart of water) also works well.
Quick Action Plan for Problem Leaves
- Identify the issue: Is it dust, stickiness, white spots, or a powdery substance?
- Isolate the plant if you suspect pests or fungus to prevent spreading.
- Mix your cleaning solution based on the problem (soapy water, vinegar, alcohol, or milk).
- Test your solution on one leaf first and wait a day to ensure no damage occurs.
- Gently clean all affected leaves, supporting them from underneath with your hand.
FAQs
What is indoor plant cleaning spray?
Indoor plant cleaning spray is a gentle, diluted solution, typically made with water and a small amount of mild soap, designed to safely remove dust and residue from leaves without causing damage.
Why is my indoor plant leaning to one side?
Your indoor plant is likely leaning to one side because it is growing towards a light source to optimize photosynthesis, often due to uneven lighting in the room.
Why are indoor plants leaning towards the windows?
Indoor plants lean towards windows due to phototropism, a natural response where plants grow toward the brightest available light to produce more energy. That means when you’re selecting plants, consider your room’s light levels—bright, medium, or low. Choose indoor plants whose light needs match your home’s conditions to help them thrive.
How to rotate indoor plants leaning into the light?
Rotate your indoor plant a quarter turn every one to two weeks to promote even growth and prevent it from leaning permanently toward the light. If you notice leggy growth or pale leaves, that can indicate too little light. Conversely, leaf scorch or crispy edges can signal too much light. For more information, check out the Signs of light level issues.
Why is my indoor plant leaking black?
Black leakage from an indoor plant often signals root rot or a bacterial infection, usually resulting from overwatering or poorly draining soil.
Why is my indoor plant leaking water?
Your indoor plant may be leaking water due to guttation, a process where excess moisture is released through leaf pores, commonly caused by overwatering or high humidity.
Your Guide to Gleaming Plant Leaves
In my years of caring for houseplants and succulents, I’ve found that the best way to clean indoor plant leaves is by using gentle, natural methods that mimic rain and avoid damaging their delicate surfaces. These same gentle methods also support natural aphid control indoors on indoor plants and succulents. If aphids appear, try a mild soap-and-water spray or a neem oil treatment, applied carefully. Stick to these simple steps for best results:
- Wipe leaves with a soft, damp cloth to lift dust and grime.
- Use lukewarm, distilled water to prevent mineral spots.
- Clean during the growing season for a quick, healthy response.
Your plants are ready for a refresh, and you’re fully equipped to make them shine. Give it a try today-you’ll feel more connected to your green friends and see them perk up with gratitude.
Further Reading & Sources
- How to Clean Plant Leaves Correctly
- How I Clean the Leaves of My Plants | Maintenance | AmieSue.com
- The Right Way to Clean Plant Leaves for Healthier Houseplants
- What are the best methods for cleaning indoor plant leaves? | Houseplant UK
Lena Greenfield is a passionate horticulturist and plant care expert with over 10 years of experience cultivating and nurturing hardy house plants. With a deep understanding of both indoor and outdoor gardening, Lena shares practical advice on choosing, caring for, and maintaining resilient plants that flourish year-round. Through her knowledge and hands-on approach, Lena helps plant lovers transform their spaces into vibrant, green sanctuaries, no matter their gardening experience.
Common Growth Issues