
Can You Reuse Succulent Soil? A Simple Safety Guide
Published on: May 8, 2026 | Last Updated: May 8, 2026
Written By: Lena Greenfield
Yes, you can often reuse succulent soil, but it’s not as simple as just scooping it back into the pot. Many plant lovers worry about hidden pests, diseases, or depleted nutrients harming their new succulents.
Drawing from my own gardening mishaps and successes, I’ll walk you through the safe way to do this, covering when it’s safe to reuse, how to sterilize soil properly, signs it’s time to toss it, and my favorite tips for boosting old soil.
The Quick Answer on Soil Reuse
Yes, you can often reuse succulent soil, but you absolutely cannot just dump it from an old pot into a new one. Think of it like refreshing a bed-you need to strip the old sheets, fluff the mattress, and add clean linens before it’s ready for a new sleeper. From my own potting bench, I’ve successfully reused soil many times, but it always involves a little bit of work to make it safe and nutritious for the next plant.
You’ll need to sift out old roots, amend it with fresh ingredients, and sometimes even sterilize it. Reusing soil is a fantastic way to be eco-friendly and save money, but doing it incorrectly can cause more problems than it solves.
When Reusing Soil is a Bad Idea: The Risks
While I’m a big fan of reducing waste, I’ve also learned the hard way that there are times when reusing soil is a straight path to plant disaster. Using compromised soil is one of the fastest ways to introduce hidden problems to a healthy new succulent, especially when it’s time to repot them. It’s simply not worth the risk in these scenarios.
- A Plant Died from Disease: If your previous succulent succumbed to root rot, a fungal infection, or any mysterious illness, that soil is now a biohazard. The pathogens that killed the first plant are likely still thriving in the potting mix, waiting for a new host.
- A Major Pest Infestation: Had a bad case of fungus gnats, mealybugs, or soil mites? Toss the soil. Insect eggs and larvae can persist in the soil for a surprisingly long time, and you do not want to gift those to your next plant.
- The Soil is Very Old and Compacted: Over time, organic matter in the soil breaks down completely. What’s left is often a dense, hard, brick-like material that suffocates roots and holds way too much water-the exact opposite of what succulents need.
- It’s Depleted of All Nutrients: After supporting a plant for a year or two, the soil is often nutritionally exhausted. While you can add fertilizer, it’s sometimes more work to perfectly re-balance it than to just start with a fresh, nutrient-rich mix.
Spotting Contaminated Soil
Your senses are your best tools here. Before you even think about reusing a batch of old soil, give it a thorough inspection. I always do a quick “look, smell, and feel” test on any soil I’m considering reusing.
- Look: Spread the soil out on a newspaper or tray. Do you see any white, fuzzy mold? Any tiny flying insects? Are there lots of old, decaying roots that you can’t easily sift out? These are all visual red flags.
- Smell: Take a good whiff. Healthy soil should have an earthy, pleasant scent, like a forest after rain. If it smells sour, musty, or like rotten eggs, that’s a sign of anaerobic bacteria and decomposition-toss it immediately.
- Feel: Squeeze a handful. Does it clump together and feel slimy or overly wet long after watering? That indicates poor drainage and potential rot. Does it feel like dry, cement-like dust? That means it’s lost all its good structure.
When in doubt, throw it out. It’s better to lose a few cups of soil than to lose a prized succulent to a preventable disease. I’ve had to make this call myself, and while it feels wasteful in the moment, your plants will thank you for it. If you must part with an unwanted succulent, consider ethical disposal options like gifting it, donating it, or swapping with fellow plant lovers. If disease or contamination is involved, follow local guidelines for safe disposal to prevent spreading problems.
Inspecting Your Old Potting Mix
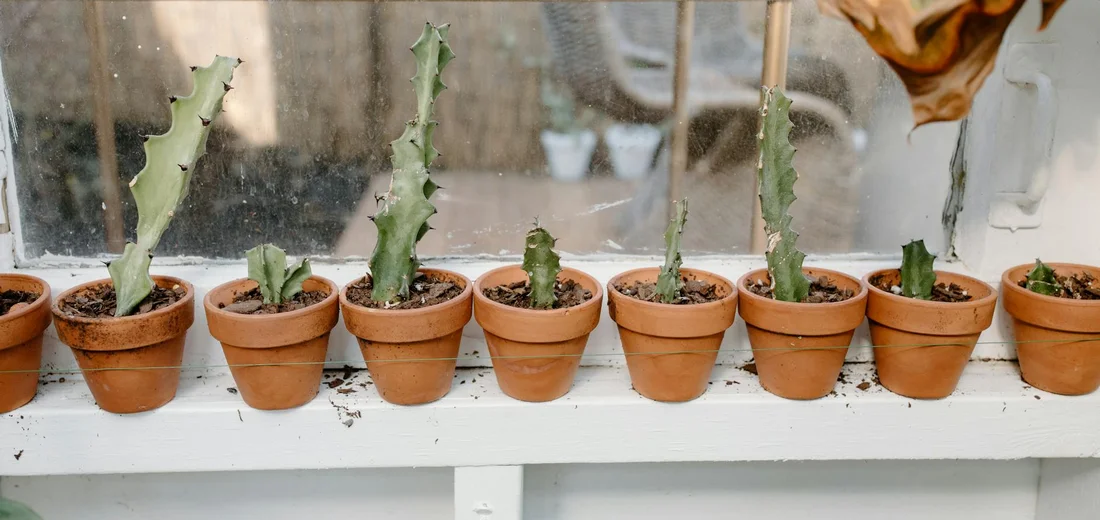
Before you decide to reuse that soil, you need to give it a thorough check-up. I always dump the old soil onto a newspaper or a large tray so I can see everything clearly. This gives you the best view of what you’re working with.
Testing for Proper Drainage and Aeration
Succulents absolutely despise wet feet, so drainage is non-negotiable. Over time, soil breaks down and becomes compact, losing the air pockets roots need to breathe. Test your succulent soil’s proper drainage to make sure it drains quickly and doesn’t stay soggy. A quick pinch test or watching how long water sits in a pot can reveal whether the mix needs amending.
Here is my simple, hands-on test I’ve used for years:
- Take a handful of the dry, old soil and squeeze it firmly in your fist.
- Open your hand. If the soil stays in a tight, muddy clump, it’s too compacted and should be retired.
- If the soil crumbles apart easily with a gentle poke, it still has good structure.
Healthy succulent soil should feel gritty and loose, never dense or clay-like. You want it to fall apart, not hold its shape. Common succulent soil problems include poor drainage and compacted soil. Fix them by adding gritty amendments like perlite, pumice, or coarse sand to restore porosity.
Also, look closely for any white, crusty buildup on the soil surface or the pot itself. That’s a sign of salt and mineral accumulation from tap water and fertilizer, which can harm new plants.
How to Sanitize Succulent Soil
If your soil passes the inspection, the next critical step is sanitization. Reusing soil without killing any lurking pests, mold, or fungus is a recipe for disaster. I learned this the hard way early on with a nasty case of fungus gnats.
My Go-To Sterilization Method
After trying solarization, microwaving, and chemical rinses, I always come back to the oven method. It’s the most reliable way to ensure your soil is truly clean and ready for a new plant.
Here is my step-by-step process:
- Preheat your oven to 200°F (about 95°C). You don’t need a blazing hot temperature.
- Spread your inspected old soil in a thin, even layer in an oven-safe dish or on a baking sheet.
- Place the dish in the oven and let it bake for 30 minutes. This low-and-slow heat is enough to kill pathogens without burning organic matter.
- You might notice an “earthy” smell-this is normal! Just make sure your kitchen is well-ventilated.
- Remove the soil and let it cool completely before you even think about potting.
Never use hot soil for repotting, as it can literally cook your plant’s delicate roots. Let it sit overnight to be safe.
While the microwave can be faster, I find it heats the soil unevenly, leaving pockets of live bacteria. The oven provides a consistent, gentle heat that treats the entire batch uniformly.
Refreshing Your Potting Mix for Reuse
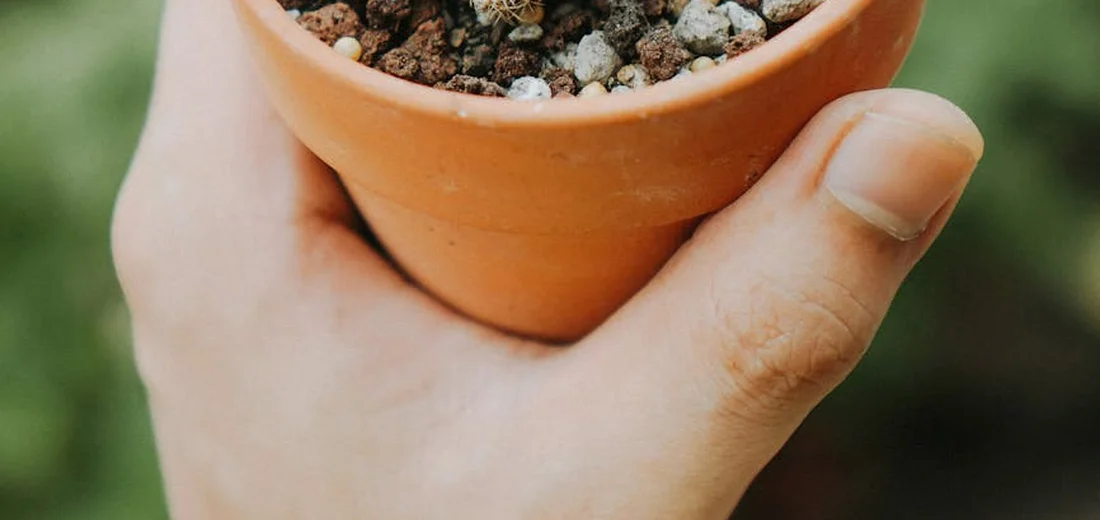
When I find a batch of old succulent soil that’s still in decent shape, I give it a second life by amending it. Think of old potting mix like a depleted pantry-it needs a fresh stock of ingredients to become nutritious again. For succulents, the best amendments for succulents are those that improve drainage and aeration, such as perlite, pumice, or coarse sand.
Essential Amendments for Drainage
Over time, soil breaks down and becomes compact, losing the airy texture succulents adore. These are signs that the soil quality is poor for succulents. I always add fresh components to restore that crucial drainage.
- Perlite or Pumice: I mix in a generous amount, aiming for about one part amendment to two parts old soil. This instantly recreates those vital air pockets.
- Coarse Sand: Horticultural sand or poultry grit is my go-to for weight and grittiness. It prevents the soil from clumping and improves water flow.
- Fresh Potting Mix: Blending in a small amount of new, sterile succulent soil helps reintroduce a balanced structure and a bit of slow-release nutrients.
I mix everything thoroughly in a large tub until it looks and feels light and crumbly. A quick test is to squeeze a handful; it should fall apart easily and not form a dense ball.
What to Do With Unsalvageable Soil
Sometimes, soil is just too far gone. If it’s slimy, has a foul smell, or is matted with dense roots, it’s best to retire it from succulent duty. But don’t just throw it away!
I repurpose this soil in my garden or flower beds. Unsalvageable potting mix makes a fantastic addition to compost piles or as a filler for the bottom of large outdoor planters.
Another great use is for non-container gardening. I’ll mix it into the native soil when planting a shrub or tree. The existing organic matter can still benefit the plant, just not in the precise, drainage-critical environment a succulent pot requires. When it comes to succulents, drainage is often more important than organic matter. A mix with inorganic drainage additives (perlite, pumice, or coarse sand) and only light organic matter helps prevent soggy roots, even in native soil.
Never use old, moldy, or pest-infested soil for your precious succulents-the risk of root rot and disease is far too high. It’s better to be safe and find another purpose for it around your home and garden, especially since succulents require special soil.
FAQs
How many times can I reuse the same succulent soil?
You can typically reuse succulent soil 2-3 times if it’s properly refreshed and sterilized each time.
Can I reuse soil if I only used it for a short time?
Yes, soil from a briefly used pot can often be reused after inspection and minor amendments.
What is the best way to store old soil before reusing?
Store dry, sifted soil in a sealed container in a cool, dry place to prevent contamination.
Is reusing soil better for the environment?
Yes, reusing soil reduces waste and conserves resources, making it an eco-friendly practice.
Can I add new soil to old soil without refreshing it?
No, you should always refresh old soil with amendments like perlite to ensure proper drainage.
What are the most common mistakes when reusing succulent soil?
Skipping sterilization or using compacted soil are common errors that can harm new plants.
Your Succulent Soil Reuse Checklist
You can absolutely reuse succulent soil, provided you give it a thorough inspection for pests and disease, and revitalize it with fresh amendments. Always check for these three things before reusing: the health of the previous plant, any signs of pests, and the soil’s texture and structure. In general, succulent soil is often changed every 1–2 years to refresh drainage and prevent salt buildup. If drainage or root issues recur, consider changing the soil sooner.
Now you’re equipped with the knowledge to make an eco-friendly choice for your plant family. Go on, feel that soil between your fingers, trust your judgment, and give your succulents the refreshed home they’ll thrive in. Know what succulents need to thrive before repotting to ensure their health.
Further Reading & Sources
- Succulent Soil: What Every Gardener Needs to Know
- Can You Reuse Cactus Soil For Other Types Of Plants And Flowers? Here’s What We Know
- r/houseplants on Reddit: Do you reuse your soil? I have a bunch of leftover succulent, and houseplant soil and I just can’t bring myself to waist it. Is there anything else I can do with it?
- || CAN YOU REUSE THE SOIL WHICH ROTTED YOUR SUCCULENT BY OVERWATERING || – YouTube
Lena Greenfield is a passionate horticulturist and plant care expert with over 10 years of experience cultivating and nurturing hardy house plants. With a deep understanding of both indoor and outdoor gardening, Lena shares practical advice on choosing, caring for, and maintaining resilient plants that flourish year-round. Through her knowledge and hands-on approach, Lena helps plant lovers transform their spaces into vibrant, green sanctuaries, no matter their gardening experience.
Repotting Guidelines