
How to Water Air Plants: Your Simple Soaking Guide
Published on: May 20, 2026 | Last Updated: May 20, 2026
Written By: Lena Greenfield
Watering air plants can feel confusing if you’re used to potted plants, but a thorough soak is the key to keeping them happy and hydrated.
If you’re worried about overwatering causing rot or underwatering leading to crispy leaves, I’ve been there too-and I’ll help you get it right every time.
Using my years of experience growing air plants at home, I’ll guide you through proper soaking techniques, ideal watering frequency, drying methods, and common mistakes to avoid so your plants stay lush and healthy.
Understanding Air Plant Soaking
What Soaking Does for Your Tillandsia
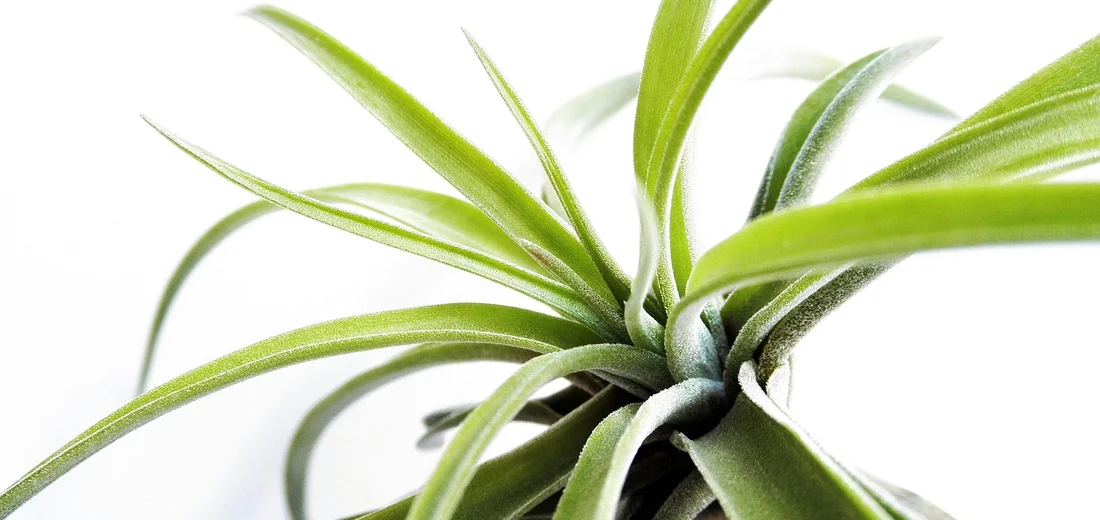
Soaking is like a full-body hydration session for your air plant, reaching every part of its leaves. I’ve found that a good soak is the only way to ensure the plant’s tiny, silvery scales, called trichomes, can fully absorb the water they need. These trichomes are the plant’s lifeline, and a quick spray often just wets the surface without letting the plant drink deeply. When you submerge your Tillandsia, you’re giving it a chance to truly quench its thirst from the inside out.
In my own collection, I see the biggest growth spurts and the most vibrant colors after a consistent soaking routine. A well-soaked air plant will feel heavier and its leaves will appear plumper and more open, a clear sign it’s happily hydrated. This method mimics the heavy dew or tropical downpours these plants would experience in their natural habitats, providing a much more effective drink than our dry indoor air ever could.
Why Soaking Beats Misting for Hydration
While misting is fine for a quick humidity boost, it simply doesn’t provide enough moisture for your plant to thrive long-term. Think of misting like licking an ice cream cone versus soaking, which is like drinking a full glass of water—one is a treat, the other is essential sustenance. Healthy indoor plants thrive when humidity is controlled, not just misted. Use a humidifier, humidity trays, or group plants to keep moisture steady. I used to rely heavily on misting, but I noticed my plants were often dehydrated at their cores, with leaf tips browning and new growth stunted.
Soaking is far more efficient and reliable. Misting evaporates quickly in our climate-controlled homes, often before the trichomes can even process the moisture. A thorough soak ensures every single leaf gets saturated, preventing the slow decline I’ve seen from misting-dependent care. For truly healthy plants that bloom and produce pups, soaking is the non-negotiable foundation.
Your Step-by-Step Soaking Guide
Gathering Your Supplies
You don’t need anything fancy, just a few simple items you likely already have at home. Keeping your tools simple makes this routine easy to stick with every week. Here’s what I always have ready:
- A clean bowl, sink, or container large enough to fully submerge your plants.
- Lukewarm tap water. I avoid cold water, as it can shock the plant, and I never use softened water because the salts can clog those delicate trichomes.
- A clean towel or a dish rack for drying. This is crucial!
The Soaking Process
Follow these steps for a perfect, hydrating bath every single time. Getting this process right is the difference between a thriving plant and a rotting one. My method has never failed me:
- Fill your container with enough lukewarm water to completely cover your air plants.
- Gently place your plants in the water. It’s okay if they float a bit at first; they will sink as they absorb water.
- Let them soak for 20 to 60 minutes. I typically do 30 minutes for most of my plants, but I’ll go up to an hour for very thirsty, curly-leaved varieties like Xerographica.
- After soaking, gently lift them out and give them a soft shake upside down to dislodge water from the base.
Drying: The Most Critical Step
This is where most people go wrong, and I learned this lesson the hard way with my first rotting Tillandsia. Proper drying is even more important than the soak itself because air plants are highly susceptible to crown rot if water sits in their center. You must get all the excess water out.
I always turn my plants upside down and place them on a towel in a spot with good air circulation, like near a fan or an open window. To speed up drying of overwatered soil, gently blot the surface and tilt the pot to improve airflow. This helps dry the soil quickly and safely without stressing the roots. Let them dry completely for at least 3-4 hours before you even think about putting them back in their display. Never return a damp plant to a terrarium or a tight-fitting holder, as this traps moisture and invites rot. A bone-dry plant is a happy plant.
Creating Your Soaking Schedule
How Often to Submerge Your Plants
I water my own air plant collection every single week, and that’s the schedule I recommend for most homes. Think of your air plants like little houseguests who need a regular drink to feel at home. Your specific schedule depends heavily on your home’s environment. If your air is very dry from heating or air conditioning, you might need to soak them twice a week. In a humid bathroom, you could stretch it to every ten days. This is part of a general guide on how often to water indoor plants. Different indoor plants have different needs based on light, humidity, and growing medium, so tailor the schedule accordingly.
Here’s a quick guide based on your home’s conditions:
- Hot & Dry Home (Winter with heat on, sunny room): Soak every 5-7 days.
- Average Home (Moderate humidity): Soak every 7-10 days.
- Humid Home (Bathroom, kitchen, or terrarium): Soak every 10-14 days.
I keep my plants in a bright room with average humidity, and the weekly soak has never failed me. For a diverse plant collection, I tailor watering strategies to each group and observe how they respond. The best tip I can give you is to watch your plant, not the calendar, and adjust as you learn its needs.
How Long Should Each Soak Last?
For a thorough drink, I submerge my air plants for a solid 30 to 60 minutes. A long, leisurely soak allows the plant to fully hydrate through its trichomes, the tiny silver scales on its leaves. Some people recommend quick 10-minute dunks, but in my experience, that’s just not enough time for a deep watering. It’s like taking a sip when you’re actually parched. If you’re branching into succulents, bottom watering techniques offer a clean, effective way to hydrate without standing water on foliage. Our bottom watering techniques succulents complete guide walks you through the method step by step.
If your plant has been looking particularly thirsty or has tightly curled leaves, you can even give it an overnight bath. I’ve done this with severely dehydrated plants I’ve rescued, and it works wonders. Just remember, this is a special treatment, not a regular routine!
Troubleshooting Watering Problems
Spotting Signs of Overwatering
Overwatering is the quickest way to lose an air plant, and I’ve learned this the hard way. The most telling sign is a soft, mushy base or brown, rotting leaves that pull away easily. It feels sad and squishy, not firm and resilient. If the center of the plant (the crown) turns black or dark brown, that’s often a fatal sign of rot.
You might also notice a foul, musty smell coming from the plant. Healthy air plants don’t smell. To prevent this, I always shake my plants upside down after their bath to get rid of water trapped in the base. Good air circulation is their best friend, so never put a sopping wet plant in a closed terrarium. In a terrarium or greenhouse, balance humidity and maintain steady air flow to keep the air fresh and prevent mold. Regularly check for damp spots and adjust vents or humidity as needed.
Identifying an Underwatered Tillandsia
An underwatered air plant is much easier to save than an overwatered one. The leaves will feel crispy to the touch and the tips will turn brown and dry. The whole plant might start to curl its leaves inward excessively, like it’s trying to hug itself to conserve moisture. In severe cases, the leaves will become very light and papery.
When I see this in my collection, I give the plant a good, long soak. A thirsty Tillandsia will often feel lighter in weight and look paler in color than a well-hydrated one. After its drink, it should plump back up and feel firmer within a few hours. If the brown tips bother you, you can neatly trim them with sharp scissors, but avoid cutting into the healthy green leaf tissue.
Advanced Soaking Tips and Adjustments
Once you’ve mastered the basic soak-and-shake, a few small tweaks can make a huge difference in your plant’s vitality. I’ve found that dialing in these details is what separates thriving air plants from those that merely survive.
The Best Water for Healthy Plants
Not all water is created equal for your air plants. The type you use can directly impact their ability to absorb nutrients.
I always recommend rainwater, pond water, or aquarium water first. These are naturally soft and contain beneficial minerals that act like a gentle, all-natural fertilizer for your plants. I collect rainwater in a barrel for my plant care, and the difference in growth is noticeable. For succulents, I prioritize rainwater or dechlorinated water, since they prefer soft water. Avoid hard tap water, which can lead to mineral buildup and stress the roots.
If you’re using tap water, let it sit out in an open container for at least 24 hours first. This allows the chlorine to dissipate. In many areas, tap water is “hard,” meaning it’s high in minerals like calcium and magnesium. Over time, these can build up on the leaves, clogging the trichomes (those tiny, silvery scales) that the plant uses to drink. If you see a white, crusty film on your plants, that’s likely hard water residue.
Filtered or distilled water is a safe, reliable option. It’s free of the chemicals and heavy minerals found in some tap water. Quick tip: If you only have tap water, leaving it out overnight is the easiest way to make it safer for your air plants.
Seasonal Care and Soaking Adjustments
Your air plant’s thirst changes with the seasons, just like yours. Sticking to one rigid watering schedule all year is a common mistake I see.
During the warm, bright summer months, your plants are in active growth mode. The air is drier, and water evaporates faster. This is when I increase my soaking frequency, sometimes giving my sun-loving Tillandsia a good drink every week. I also make sure they dry completely within 4 hours to prevent rot. For succulents during hot summer months, stick to deep, infrequent watering and ensure excellent drainage so the soil dries between waterings. This helps prevent rot and keeps them thriving in high heat.
Winter is their rest period. Growth slows way down, and our heated homes create very dry air. It seems like they’d need more water, but the opposite is true. Because they aren’t growing, they use less water, and the cooler temperatures mean they take much longer to dry. I switch to a lighter soak (maybe just 20-30 minutes) every two to three weeks in the winter, and I’m extra vigilant about shaking out water and providing good air circulation.
Spring and fall are transitional periods. Pay close attention to your home’s specific conditions. Is your heater or air conditioner running often? That dries the air. Is it a particularly rainy, humid week? Your plants will need less from you. Let the plant and your environment be your guide, not just the calendar. For a practical seasonal plan, check our care guide for mixed indoor plant collections. It offers quick tips on adjusting light, watering, and humidity as the seasons change.
For any season, if the leaves start to curl inward tightly or feel especially crispy, it’s a cry for more frequent soaks. If the base of the plant feels soft or looks dark, you need to back off and let it dry out thoroughly.
Common Questions
What is air plant soaking?
Air plant soaking is the process of fully submerging your Tillandsia in water for 20-60 minutes to ensure it gets a deep, thorough drink.
How often should I soak my air plant?
For most homes, a weekly soak is ideal, but you should adjust the frequency based on your home’s humidity and temperature.
What type of water is best for soaking air plants?
Rainwater, pond water, or filtered water is best, but you can also use tap water that has been left out for 24 hours to dissipate the chlorine.
Why is drying my air plant after soaking so important?
Proper drying is critical to prevent crown rot, which occurs if water is left sitting in the plant’s base.
What are the signs of an overwatered air plant?
An overwatered air plant will have a soft, mushy base and may show brown, rotting leaves that pull away easily.
What does an underwatered air plant look like?
An underwatered air plant will have crispy, brown leaf tips and its leaves will curl inward excessively as it tries to conserve moisture.
Your Air Plant Watering Routine
To keep your air plants thriving, remember that a weekly soak for about 30 minutes, followed by a thorough upside-down drying session, is the golden rule. This simple soak-and-dry cycle mimics the tropical downpours and breezes they naturally love.
- Soak for 20-60 minutes weekly.
- Dry upside down completely.
- Adjust for your home’s humidity and light.
You now have all the knowledge to confidently quench your air plants’ thirst. Go give your Tillandsia a good soak and watch them reward you with vibrant, healthy growth-you’ve got this!
Further Reading & Sources
- Air Plant Watering: The Soaking Method
- Keep Air Plants Thriving Like a Pro with This Simple Guide
- Air Plant Care: How To Care For Air Plants, Aeriums, Tillandsia Mounts – Pistils Nursery
- How to Properly Water Air Plants – Garden Therapy
Lena Greenfield is a passionate horticulturist and plant care expert with over 10 years of experience cultivating and nurturing hardy house plants. With a deep understanding of both indoor and outdoor gardening, Lena shares practical advice on choosing, caring for, and maintaining resilient plants that flourish year-round. Through her knowledge and hands-on approach, Lena helps plant lovers transform their spaces into vibrant, green sanctuaries, no matter their gardening experience.
Watering Techniques