How to Revive Frozen Succulents
Published on: January 29, 2026 | Last Updated: January 29, 2026
Written By: Lena Greenfield
Seeing your favorite succulent turn soft and discolored after a cold snap is heartbreaking. I’ve been there too, and I can tell you that many frozen succulents can be saved if you act quickly and correctly.
In this guide, I’ll walk you through exactly what to do, drawing from my own experience nursing dozens of plants back to health. We’ll cover what causes cold damage, your immediate action steps, how to spot signs of recovery, and my best tips for preventing this in the future.
Assess the Frost Damage on Your Succulent
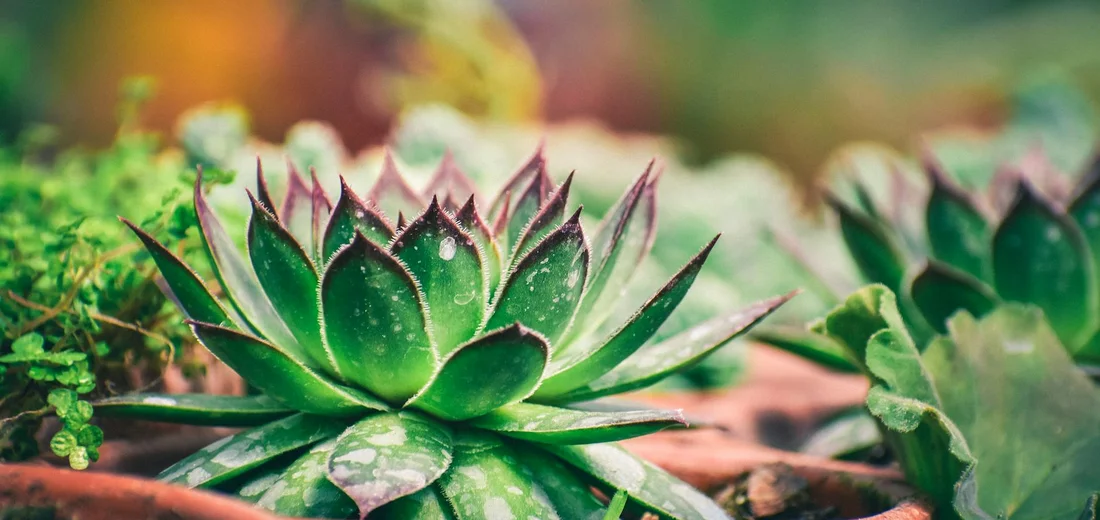
Before you do anything, take a deep breath and gently examine your plant. The first step is a visual and tactile inspection to understand the extent of the cold’s bite. Look for leaves that have turned translucent, mushy, or dark, almost black. This is a clear sign that the water inside the plant’s cells has frozen and expanded, rupturing the cell walls.
In my own greenhouse, I’ve learned that not all damage is a death sentence. Light damage often looks like slight discoloration or wilting on the outer, most exposed leaves. The plant’s center and stem often remain firm and green, which is a fantastic sign. Severe damage, however, affects the entire plant, making it feel soft and squishy all over, like overripe fruit.
- Encouraging Sign: Only the outermost leaves are damaged, and the central growth point (the rosette) is still firm and its original color.
- Concerning Sign: The main stem is soft or oozing, or the majority of the leaves are translucent and collapsing.
Take Immediate Action to Thaw and Rescue
Once you’ve assessed the situation, it’s time for a calm, methodical rescue mission. Rushing this process can cause more harm than good, shocking the plant further. If a succulent is broken, you can still save it with careful trimming, callus formation, and the right placement. These small repairs can make all the difference. I’ve revived many succulents by following these exact steps, giving them the best possible chance at a full recovery.
Step 1: Relocate to a Stable Environment
Move your frozen succulent to a consistently cool, dry, and shaded spot indoors. Avoid the temptation to place it directly in bright sunlight or on a hot radiator, as the sudden temperature swing will shock its already stressed tissues. I usually put mine in a spare room or on a shelf away from direct windows for the first 24-48 hours. A stable temperature between 50-60°F (10-15°C) is ideal for this initial thawing period. Succulents have their own optimal temperature ranges. Keeping them within a stable, moderate range supports recovery and long-term health.
Step 2: Hold Off on Hydration
This is the step that feels most counterintuitive, but trust me on this. Do not water a frozen succulent. The damaged, waterlogged cells cannot process the extra moisture, and it will quickly lead to rot. Your plant is in a state of trauma, and adding water is like pouring fuel on a fire. Let it focus on healing its cellular structure first.
Quick Tip: Resist the watering can! The biggest mistake you can make now is watering. Wait until the plant shows signs of new growth.
Step 3: Observe for Thawing Progress
Over the next several days, just watch and wait. Patience is your most powerful tool here. The damaged leaves will likely shrivel, turn brown, and dry out as the plant seals them off. This is a normal part of the healing process. You’re looking for the core of the plant to remain firm and for any signs of new, tiny leaves emerging from the center. This can take a week or two, so don’t be discouraged if nothing happens immediately.
- Day 1-2: The plant may look worse as damaged tissue becomes apparent.
- Day 3-7: Damaged leaves will dry and crisp up. Healthy tissue should remain firm.
- Week 2+: Look for new growth from the center as the signal that the worst is over.
Prune and Repot for Root Health
Identifying Parts to Remove
You must become a plant detective after a freeze, carefully examining every leaf and stem. Gently squeeze the leaves and stems; anything that feels mushy, translucent, or looks water-soaked is damaged beyond repair and must go. I always use my fingernail to lightly scratch a stem-if the tissue underneath is green and firm, it’s a survivor, but if it’s brown or black, it’s a goner.
Here is my personal checklist for what to remove:
- Leaves that detach with a light touch
- Stems that bend easily without any spring-back
- Any part that has turned dark brown or black
- Areas that are leaking fluid or have a foul odor
It can feel heartbreaking to cut away so much of your plant, but this is a crucial step. Leaving dead tissue invites rot and fungal diseases that can finish off the weakened plant. I’ve learned through trial and error that being ruthless now leads to a stronger plant later.
Repotting with Proper Drainage
Once the damaged parts are pruned, the roots need a fresh, safe home. Gently tip the plant out of its pot and inspect the root ball for any signs of rot, which will look dark, slimy, and smell bad. Healthy succulent roots are typically white or light tan and feel firm.
For the new pot, I always follow this simple rule: Unglazed terracotta pots are my top choice because they breathe, pulling excess moisture away from the soil. Make sure whatever pot you use has at least one large drainage hole—this is non-negotiable for succulent survival. Are these the best pots for container succulents? In most cases, breathable, well-draining containers—like unglazed terracotta—are the best bet for thriving succulents.
Your soil mix is just as important as the pot. I create my own blend to ensure perfect drainage:
- Two parts potting soil
- One part perlite
- One part coarse sand or poultry grit
This combination creates air pockets and prevents water from pooling around the stressed roots. When you repot, wait at least a week before giving the plant its first sip of water to allow any damaged roots to callous over. This patience prevents a secondary rot crisis.
Nurture Long-Term Recovery with Care Adjustments
Balancing Hydration and Drainage
A frozen succulent is in a fragile state, and its watering needs change dramatically. The safest method is the “soak and dry” technique-water deeply until it runs out the drainage hole, then let the soil dry out completely before even thinking about more water. I stick my finger two inches into the soil; if I feel any moisture at all, I walk away. This method is especially important after repotting succulents.
Your plant will tell you when it’s truly thirsty. Look for these subtle signs:
- The remaining healthy leaves feel less firm and may have slight wrinkles
- The plant’s overall color might look slightly dull
- The soil is bone-dry and pulls away from the edges of the pot
In winter, I sometimes go three or four weeks between waterings for my recovering succulents. It’s far better to underwater than to overwater a plant that’s already endured the trauma of freezing temperatures. In summer I water more often, since heat and bright sun dry the soil quickly. The key is to adjust watering to the season: less in winter, more in summer.
Optimizing Light and Temperature
Light is medicine for a recovering plant, but you have to administer the right dose. Place your succulent in a spot with plenty of bright, indirect light—an east-facing window is often perfect for this delicate stage. Ensure gentle airflow around the plant as well, since light and airflow prevent diseases by drying moisture on the leaves. Together with the right light, this reduces the risk of mold and rot. Avoid intense, direct afternoon sun for the first few weeks, as it can scorch the tender new growth that’s trying to emerge.
Temperature stability is your new best friend. Keep your plant in a room that maintains a consistent temperature between 65-75°F (18-24°C), far away from drafty windows, heating vents, or air conditioning units. I keep a small digital thermometer near my plant shelf to monitor this easily.
If you’re using a grow light, position it about 12 inches above the plant and provide 10-12 hours of light daily. Watch for signs of happiness-a slight blush of color on the leaves and the emergence of tiny new growth in the center are the best rewards. These small victories mean your care adjustments are working.
Prevent Future Freezing with Proactive Measures
Choosing the Right Location
I learned the hard way that a sunny windowsill isn’t always a safe haven. South and west-facing windows are typically the warmest, but be wary of single-pane glass, which can create a surprisingly cold microclimate right where your plant sits. I once lost a beautiful echeveria to a drafty window I didn’t even notice.
For outdoor succulents in pots, mobility is your greatest asset. Place them on a wheeled plant caddy so you can effortlessly roll them to shelter when a cold snap is forecast. This simple trick has saved my container garden more times than I can count. For optimal growth, move succulents outside only after the risk of frost has passed and daytime temperatures stay consistently warm. Start with a gradual sun acclimation to prevent sunburn and stress.
Always think about thermal mass. A spot against a warm, south-facing brick or stone wall will absorb heat during the day and radiate it back at night, offering your plants a few precious degrees of protection. Avoid low-lying areas in the garden where cold air settles, as these are the first places frost will form.
Seasonal Preparation Tips
My autumn ritual involves more than just pulling out sweaters. I stop fertilizing my succulents by late summer to discourage tender new growth that is highly susceptible to cold damage. This allows the plant to harden off and enter a natural dormancy.
Watering habits must change with the seasons. I let the soil dry out completely between waterings in the winter, as wet soil freezes much faster and deeper than dry soil, putting the roots in extreme danger. A dry root ball is a warmer root ball.
When a frost warning hits, I spring into action. Here’s my quick-prep routine:
- Move all portable pots into a garage, shed, or even just against the house under an eave.
- Drape a breathable frost cloth or even an old bedsheet over in-ground plants and sturdy containers.
- For a small, prized succulent, a simple upturned cardboard box placed over it at night can be a lifesaver.
Never use plastic sheeting directly on the plants, as it can trap moisture and freeze to the leaves, causing more harm than good. If you must use plastic, create a tent structure so it doesn’t touch the foliage.
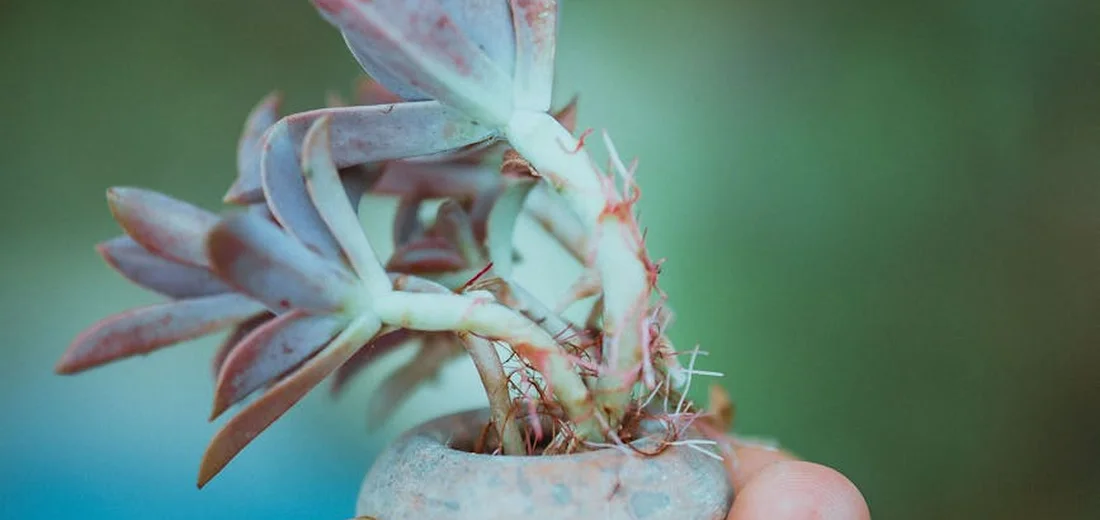
Rescue and Propagate from Healthy Cuttings
Don’t despair if part of your plant is a lost cause. Even a severely frozen succulent often has hidden life in its stem or a few upper leaves that were protected. I’ve brought back many plants that looked like soggy, translucent disasters.
Your first task is to perform “surgery.” Use a clean, sharp knife or scissors to cut well above the visibly mushy, damaged tissue, moving up the stem until you see clean, green, and firm flesh. This is the healthy part you can work with.
Propagation is your path to a brand-new plant. Follow these steps:
- Take your healthy cutting and set it in a dry, airy spot out of direct sun for several days. This allows the cut end to callous over completely, which is non-negotiable to prevent rot.
- Once calloused, place the cutting on top of dry, well-draining succulent soil. Do not bury it.
- Wait for roots to appear, which can take a few weeks. Only then should you begin to water lightly, directing water to the soil near the new roots.
Leaf cuttings are a popular option too. Remove a healthy leaf, let the cut end callous, and lay the leaf on the surface of dry, well-draining soil until roots and a new plant appear.
If the main stem is gone, gently twist off any plump, undamaged leaves that remain; these can often be propagated individually to grow a whole new generation of plants. It’s a wonderful way to turn a plant tragedy into a triumph.
FAQs
When should I start watering my frozen succulent after the initial thaw?
Wait until you see new growth emerging from the center before giving any water.
How can I tell if my succulent is dead or just dormant after freezing?
A dead succulent will have completely mushy, black stems and leaves, while a dormant one may retain some firm, green tissue. To tell if your plant is dying versus just dormant, watch for any signs of new growth during the growing season. If there is no response after a reasonable recovery period, it’s likely dead.
Is it safe to use a heater or hairdryer to warm up a frozen succulent?
Avoid using direct heat sources as they can shock the plant and cause further damage.
What should I do if the roots are damaged but the leaves look okay?
Prune any rotten roots and repot the plant in fresh, well-draining soil to encourage recovery.
Can I propagate from a frozen succulent that has no healthy leaves left?
Check the stem for any firm, green sections that can be cut and calloused for propagation.
How long does it typically take for a frozen succulent to show new growth?
New growth may appear within 2-4 weeks if the plant receives proper care and stable conditions.
Your Succulent’s Road to Recovery
Based on my hands-on experience reviving chilled succulents, the key is to act promptly with gentle, step-by-step care to prevent further stress. These are essential care tips to avoid killing your succulents. By following them, you can keep your plants healthy and thriving.
- Inspect for soft or discolored leaves and prune carefully.
- Gradually warm the plant in indirect light-no sudden heat.
- Hold off on watering until the soil feels dry to avoid rot.
For more rescue tips and plant care insights, explore our guides at Hardy House Plants, and remember-I’ve nursed many frozen succulents back to health, so don’t lose hope!
Further Reading & Sources
- How To Revive Frozen Succulents | THE NEXT GARDENER – Thenextgardener
- How To Revive Frozen Succulents – Protecting Succulents From Frost | Gardening Know How
- Oh No, My Succulents Froze! – Debra Lee Baldwin
- How to Revive Frostbitten Succulents – Succulents Box
Lena Greenfield is a passionate horticulturist and plant care expert with over 10 years of experience cultivating and nurturing hardy house plants. With a deep understanding of both indoor and outdoor gardening, Lena shares practical advice on choosing, caring for, and maintaining resilient plants that flourish year-round. Through her knowledge and hands-on approach, Lena helps plant lovers transform their spaces into vibrant, green sanctuaries, no matter their gardening experience.
Stress Symptoms