Should You Remove Dead Leaves from Succulents? Simple Best Practices
Published on: February 16, 2026 | Last Updated: February 16, 2026
Written By: Lena Greenfield
Yes, you should remove dead leaves from succulents to prevent mold and pests from harming your plant. I’ve nurtured many succulents over the years, and timely leaf removal keeps them looking vibrant and healthy.
I’ll guide you through my proven methods, covering why removal matters, the best times to do it, a safe step-by-step process, necessary tools, and common errors to skip.
Why Removing Dead Leaves Benefits Your Succulents
Preventing Rot and Fungal Issues
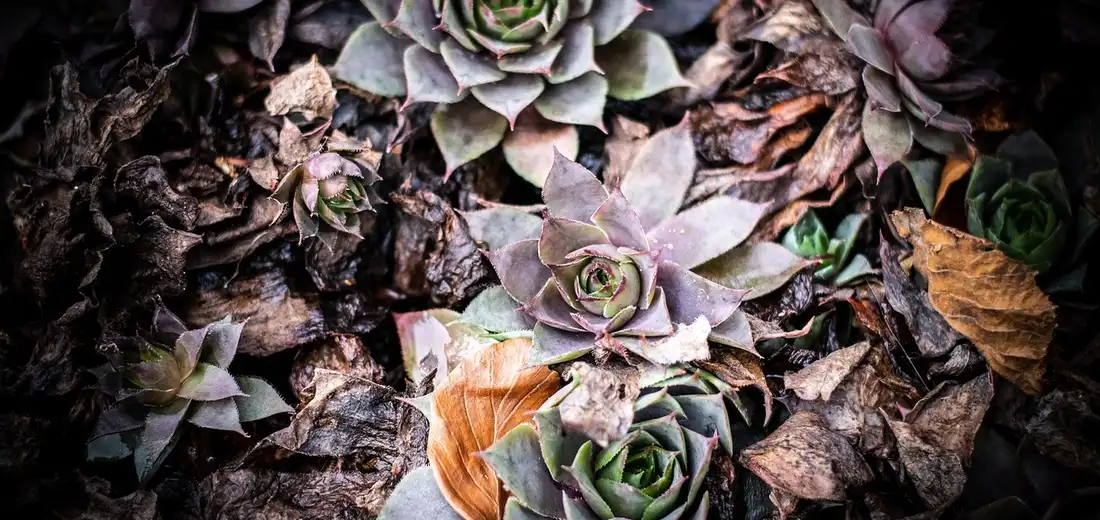
Leaving dead leaves attached is like leaving wet laundry in a heap-it creates a perfect, damp environment for mold and bacteria to thrive. I’ve learned from my own collection that a single decaying leaf pressed against a healthy stem can quickly lead to stem rot, a fast-moving problem that can kill a plant. The trapped moisture can’t evaporate properly, inviting fungal gnats and other pests to the party.
By clearing away this debris, you dramatically improve air circulation around the base of your plant. Good airflow is one of the simplest and most effective ways to prevent the common fungal issues that plague succulents kept in humid or low-light conditions. Think of it as giving your plant room to breathe, which is just as important as proper watering. A light, steady breeze around the plant helps keep foliage dry and reduces the risk of fungal disease. This gentle airflow is a key factor in preventing succulent diseases.
Enhancing Plant Appearance and Growth
A clean succulent is a happy and efficient succulent. When you remove dead leaves, you’re not just tidying up; you’re redirecting your plant’s energy away from maintaining dying tissue and toward pushing out vibrant new growth. I always notice a growth spurt in my echeverias and haworthias a week or two after a good cleanup session.
Beyond the health benefits, it simply makes your plant look cared for and beautiful. Aesthetics matter, and a succulent free of crispy, brown leaves allows you to fully appreciate its unique form, color, and symmetry. It’s like wiping a smudge off a piece of art—the true beauty suddenly shines through. Seasonal changes can alter a succulent’s color, but proper care helps maintain vibrant hues. A mindful routine keeps health and color in harmony.
Identifying When a Leaf is Ready for Removal
Signs of Natural Leaf Shedding
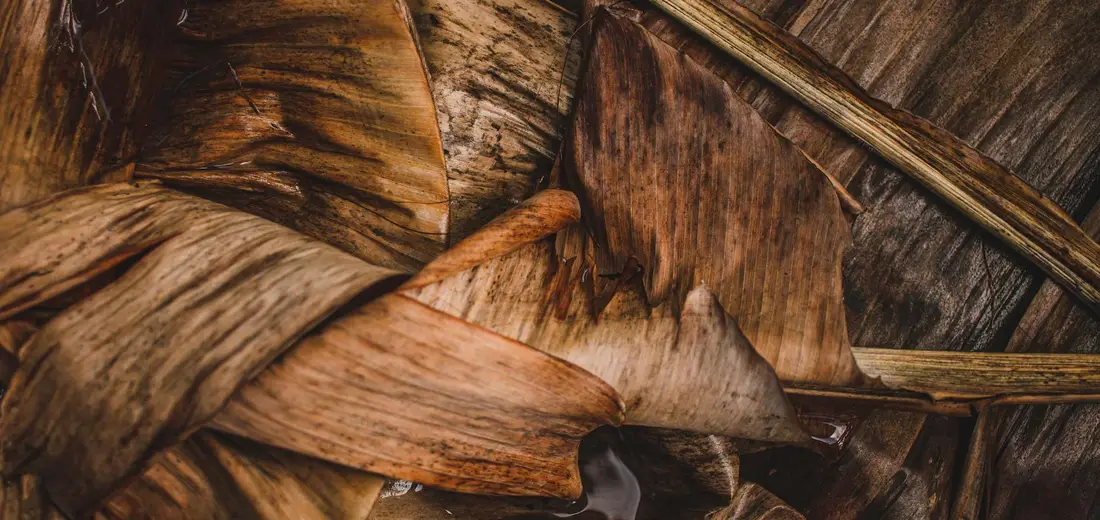
Succulents naturally reabsorb their lower, older leaves to fuel new growth from the center. A leaf that is ready for a gentle removal will be completely dried out, papery thin, and often crispy to the touch. Its color will have faded to a tan or light brown, and it will typically detach with the slightest tug, coming away cleanly without any force. When pruning for health and aesthetics, remove only those dead leaves to keep the plant tidy and encourage even growth. Use clean, sharp tools and make small, clean cuts to minimize damage and preserve the plant’s appearance.
- It is completely dry and crispy, not soft or mushy.
- The color is a uniform light brown or tan.
- It pulls away from the stem with zero resistance.
- It often looks “empty” or flattened.
Quick Tip: If a leaf doesn’t pop off with a gentle touch, it’s not ready. Leave it for another week or two to let the plant finish reabsorbing its nutrients.
Differentiating Between Healthy and Unhealthy Leaves
This is where a keen eye saves your plant from potential trouble. A healthy succulent leaf is firm, plump, and firmly attached. An unhealthy leaf that needs removal often tells a story of overwatering, sunburn, or disease, and it feels soggy, translucent, or shriveled in a deflated way. If your succulent leaves are wrinkly, soft, or squishy leaves, that’s a telltale sign something’s off with watering or moisture. Recognizing this helps you troubleshoot whether to adjust watering, drainage, or light. Here’s a quick comparison from my own troubleshooting:
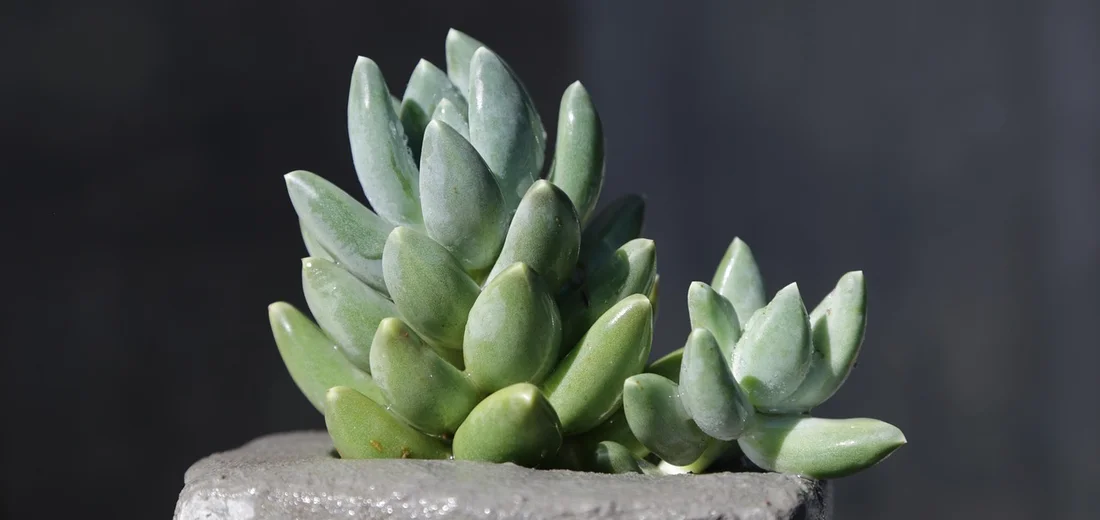
- Healthy Leaf: Firm, taut skin, vibrant color, securely attached.
- Overwatered/Unhealthy Leaf: Mushy, translucent yellow or black, falls off easily with a squish.
- Underwatered Leaf: Wrinkled, thin, and crispy, but higher on the plant (not just the bottom leaves).
- Sunburned Leaf: Shows bleached, white, or brown scorched marks that are dry and scarred.
The key is texture: a ready-to-remove leaf is dry and papery, while a problematic leaf is often wet, mushy, or oddly discolored. When in doubt, err on the side of leaving it attached; a healthy plant will naturally jettison a truly dead leaf on its own schedule.
Essential Tools and Preparation for Safe Removal
Choosing the Right Equipment
You don’t need a full workshop, but a couple of key tools make this job much cleaner and safer for your plant. My go-to toolkit consists of a pair of sharp, pointed-tip tweezers and a pair of micro-tip pruning snips. The tweezers are fantastic for precisely plucking tiny, papery leaves from dense rosettes without jamming your fingers in there. I’ve found that bypass pruners or small, sharp scissors are perfect for cleanly snipping any leaves that are partly dead or awkwardly positioned. Using your fingers is fine for easily accessible leaves, but tools give you surgical control.
Sanitizing Your Tools Properly
This is the step I never, ever skip. Introducing bacteria into a fresh wound on your succulent is a fast track to rot. I keep a small spray bottle filled with 70% isopropyl alcohol right in my plant care caddy for this exact purpose. Before I touch any plant, I thoroughly spray down the blades of my snips and the tips of my tweezers, wiping them clean with a paper towel. It takes 30 seconds and gives me complete peace of mind that I’m not accidentally passing an infection from one plant to another. When I bring home new succulents, I quarantine them for a couple of weeks to catch any issues before they join the main collection. This extra step helps prevent disease spread to the rest of the plants.
Step-by-Step Guide to Removing Leaves Without Damage
Gentle Twisting and Pulling Methods
Patience is your best tool here. For a leaf that is fully dead, dried out, and crispy, the goal is to remove it without harming the stem or any healthy leaves. Gently hold the base of the dead leaf between your thumb and forefinger and give it a soft, wiggling side-to-side motion. A ready leaf will pop right off with almost no effort. If it doesn’t release immediately, it’s not ready to go-forcing it can strip a piece of the stem’s outer skin, creating an open wound. I always work from the bottom of the plant up, as those are the oldest leaves and most likely to be spent.
What to Do If a Leaf Resists
When a leaf puts up a fight, your plant is telling you something. Resistance almost always means the leaf is still partially connected to the stem’s vascular system and is not fully abscised, or naturally ready to drop. My first move is to simply leave it alone for another week or two; nature will often finish the job on its own. If the leaf is mostly dead but stubbornly attached at one small point, that’s when I reach for my sanitized snips. I make one clean, quick cut as close to the base as possible without nicking the main stem, leaving a tiny dried bit attached. This is far safer than ripping and causing collateral damage.
Using Removed Leaves for Propagation
One of my favorite parts of cleaning up my succulents is that it gives me free plants. Those dead or dying leaves you remove are often perfect candidates for propagation. I’ve filled entire windowsills with baby succulents started from leaves I was just going to toss. Propagating succulents from leaf cuttings is a simple, satisfying way to turn those leftovers into new plants. Let the cut ends callus briefly, then lay the leaves on well-draining soil and keep them lightly moist until roots appear.
Selecting the Best Leaves for Propagation
Not every leaf is a winner, and learning to pick the right ones will save you a lot of disappointment. I look for leaves that are plump and full, not shriveled or mushy.
- Choose leaves that come off with a clean, gentle twist. If you have to yank it, it’s not ready.
- Avoid leaves with any black spots, tears, or significant damage. A small blemish is usually fine, but major damage can lead to rot.
- Look for larger, mature leaves from the lower part of the plant. They have more stored energy to create a new baby.
I always give a potential propagation leaf a gentle squeeze. It should feel firm, not hollow or squishy. A healthy, full leaf has the best shot at success.
Drying and Planting Propagated Leaves
Patience is the absolute key here. Rushing this process is the number one reason new propagations fail.
- Lay your healthy leaves on a dry paper towel or tray. Do not put them in soil or water yet.
- Place them in a spot with bright, indirect light. I use a shelf near a sunny window.
- Wait for the broken end to form a hard, dry callus. This can take 2 to 4 days and is a non-negotiable step to prevent rot.
- Once calloused, place the leaves on top of well-draining succulent soil. Do not bury them.
Resist the urge to water until you see tiny pink roots searching for moisture. This can take weeks. I just mist the soil very lightly around the roots once they appear. The mother leaf will provide all the water and nutrients the baby needs.
Avoiding Common Mistakes in Leaf Cleanup
I’ve made every mistake in the book, so you don’t have to. A little care during cleanup prevents a lot of stress for both you and your plant.
Overhandling or Removing Healthy Leaves
It’s tempting to give your plant a “full makeover,” but this can do more harm than good. Healthy leaves are the plant’s food factories.
- Never pull leaves that are still firmly attached. If it doesn’t come off with the slightest touch, it’s not ready to go.
- Avoid twisting or yanking. This can tear the stem and create an open wound that invites disease.
- Don’t remove wrinkled leaves that are still plump. They are often just thirsty and will plump back up after watering.
I use small, sharp, sterilized scissors for any leaf that doesn’t pop right off. A clean cut is far better than a ragged tear. Your plant will thank you for the gentle treatment.
Ignoring Plant Stress Signals
Your plant is always talking to you. The state of its leaves is a direct line to its health. A sudden leaf drop is a major cry for help.
- If leaves are falling off en masse and feel mushy, you are likely overwatering. Let the soil dry out completely.
- If leaves are shriveling rapidly from the bottom up, the plant is severely underwatered and needs a deep soak.
- If leaves are developing brown, crispy spots, the plant might be getting sunburned and needs a location with less intense direct light.
When you see a problem, don’t just remove the evidence-diagnose the cause. Fixing the underlying issue, like your watering schedule or light exposure, is what truly saves the plant.
Handling Leaves After Removal: Disposal and Composting

Once you’ve gently twisted off those dead leaves, you have a few options. I always see this as a moment to make an eco-friendly choice for my plant family and garden. You can give those leaves a second life or know when it’s safest to just let them go.
Composting Dead Succulent Leaves
Composting is my go-to method for healthy, pest-free leaves. Succulent leaves break down beautifully, adding valuable organic matter to your compost pile. Their high water content actually helps maintain the moisture balance in a dry compost bin. For safety, compost only healthy, uncontaminated succulents. Avoid treated or diseased leaves.
In my own backyard compost, I follow a simple routine:
- Let the leaves dry out for a day or two on a paper towel first. This prevents them from getting slimy and clumping together.
- Mix them well with “brown” materials like dried leaves or shredded cardboard to keep the pile aerated.
- Turn the compost pile regularly to speed up decomposition.
You’ll be amazed at how quickly they transform into rich, dark compost. This homemade “plant food” is perfect for feeding your other garden plants or enriching potting soil.
When to Discard Instead of Reuse
While I love to reuse everything I can, some leaves need to go straight into the trash. It’s a matter of plant health and safety. Composting a diseased leaf can spread that same problem throughout your entire garden later on. I have a strict “no” list for my compost bin.
I immediately discard any leaf that shows these signs:
- Signs of mold or fungus: A fuzzy white or black coating means spores are present.
- Evidence of pests: Tiny bugs, webbing, or sticky residue are big red flags.
- Squishy, rotten texture: This indicates bacterial rot that can contaminate your compost.
For these, I seal them in a small bag before tossing them out. This simple step helps contain any issues and protects the rest of your plant collection. It’s always better to be safe than sorry when it comes to plant diseases.
FAQs
What is succulent leaf removal and why is it done?
Succulent leaf removal is the gentle process of detaching dead or dying leaves to prevent mold, pests, and redirect energy toward healthy growth.
When is the best time to remove leaves from a succulent?
Remove leaves when they are completely dry, crispy, and detach easily with a light touch to avoid damaging the plant.
Which leaves should be removed from a succulent for propagation?
Choose healthy, plump leaves that come off cleanly without force and show no signs of damage or disease for propagation.
What tools are needed to remove succulent leaves safely?
Use sharp, sanitized tools like tweezers or micro-tip pruning snips to ensure precise and safe leaf removal.
How do you remove a leaf without damaging the plant?
Gently wiggle the leaf side to side until it pops off cleanly, applying no force to prevent stem tears or wounds.
How do you know a leaf is ready to be removed?
A leaf is ready when it is dry, papery, and detaches with minimal resistance, showing it has been fully reabsorbed by the plant.
Your Succulent Care Routine
Ultimately, removing dead leaves keeps your succulents healthy and looking their best. Gently pull away only the leaves that are completely dry, crispy, and come off with a light tug, always using clean hands or sterilized tools to prevent spreading disease. If a leaf has fallen or is broken, remove it promptly to prevent disease or rot. Fallen or damaged leaves should be discarded rather than left on the soil surface. Remember to:
- Check your plants every time you water.
- Clear away debris from the soil surface.
- Leave slightly soft or discolored leaves alone to let the plant reabsorb them.
Stick with these simple habits, and your succulents will thrive. Don’t stress over a few imperfect leaves-it’s all part of the journey, and your plants are more resilient than you think. These essential care tips help you avoid killing your succulents. They cover watering, light, and soil to keep them thriving. For more straightforward plant care tips, be sure to check out the other guides on our website.
Further Reading & Sources
- r/succulents on Reddit: Does it matter if I remove these dead leaves? Does it hurt? Does it help? I’m in the habit of picking them all off, but only when they’re completely crispy. Thoughts?
- “Help! My Succulent is dying, it has dead leaves”!
- Pruning and Maintaining a Succulent Arrangement | Succulents and Sunshine
- If the lower leaves of my succulent are wilting/dead, should I pull them off? – Quora
Lena Greenfield is a passionate horticulturist and plant care expert with over 10 years of experience cultivating and nurturing hardy house plants. With a deep understanding of both indoor and outdoor gardening, Lena shares practical advice on choosing, caring for, and maintaining resilient plants that flourish year-round. Through her knowledge and hands-on approach, Lena helps plant lovers transform their spaces into vibrant, green sanctuaries, no matter their gardening experience.
Pruning Techniques