Understanding Succulent Death Blooms: What They Mean and How to Respond
You might have noticed an unusual, dramatic bloom on your succulent and worried it’s a death bloom signaling the plant’s end. While this can be true for some species, it’s often a natural process that you can manage with the right care.
Drawing from my years of growing succulents, I’ll explain: what a death bloom is, why it happens, how to identify it, and simple steps to care for your plant during this time.
Defining the Succulent Death Bloom
In my years of collecting succulents, the term “death bloom” always sends a little shiver through new plant parents. A death bloom is precisely what it sounds like: a magnificent, final flowering where the plant directs all its remaining energy into producing one spectacular bloom stalk before the main plant dies. It’s the plant’s grand finale, its last act of reproduction.
I’ve witnessed this firsthand with several of my beloved sempervivums (hens and chicks). The entire process feels bittersweet. The central “hen” will suddenly push up a tall, often bizarre-looking flower stalk. The flowers can be stunning, but as they fade, so does the main rosette. This is a natural, programmed life cycle for certain monocarpic succulents, not a sign of your failure as a plant owner. The plant isn’t sick; it’s simply completing its biological destiny.
Spotting the Signs: Is It a Death Bloom or Something Else?
Don’t panic at the first sign of a flower stalk! Many succulents bloom happily for years without any issue. Telling the difference is key to managing your expectations and your plant’s care. Understanding when and why succulents bloom—their flowering cycles—helps you anticipate blooms and tailor care. Different species have different triggers and schedules, so recognizing the signs can guide you.
Look for these specific signs of a true death bloom:
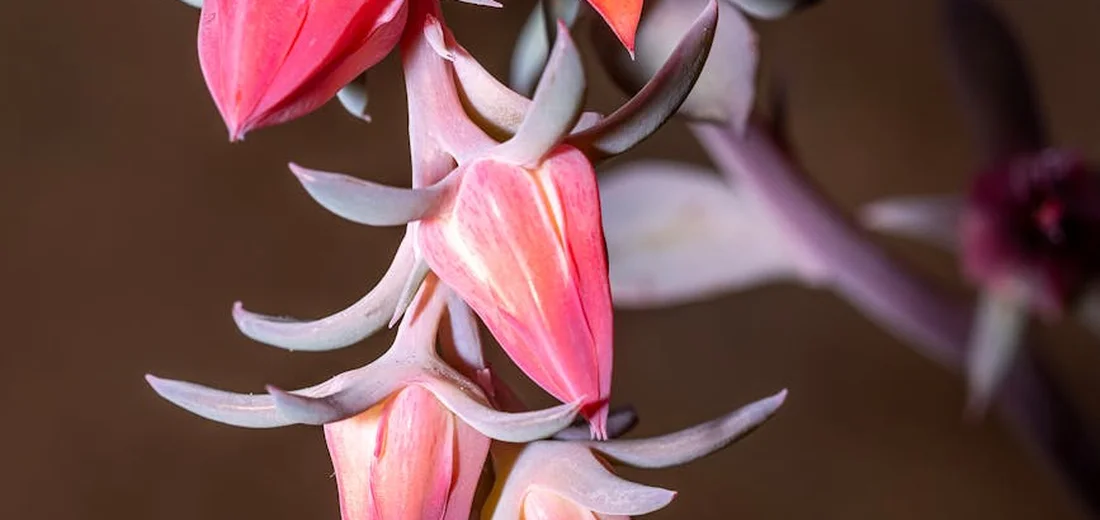
- The bloom stalk emerges from the very center of the main rosette. This is the biggest clue. The plant’s central growth point, its “heart,” is now dedicated solely to flowering and will not produce new leaves.
- The entire plant is involved. In a death bloom, you’ll see the main rosette begin to look tired and may even start to close up as it channels all its resources into the stalk.
- It occurs on known monocarpic species. If you own an Aeonium, Sempervivum, Agave, or some types of Kalanchoe, a central bloom is a strong indicator of a death bloom.
Compare this to a regular, non-fatal bloom:
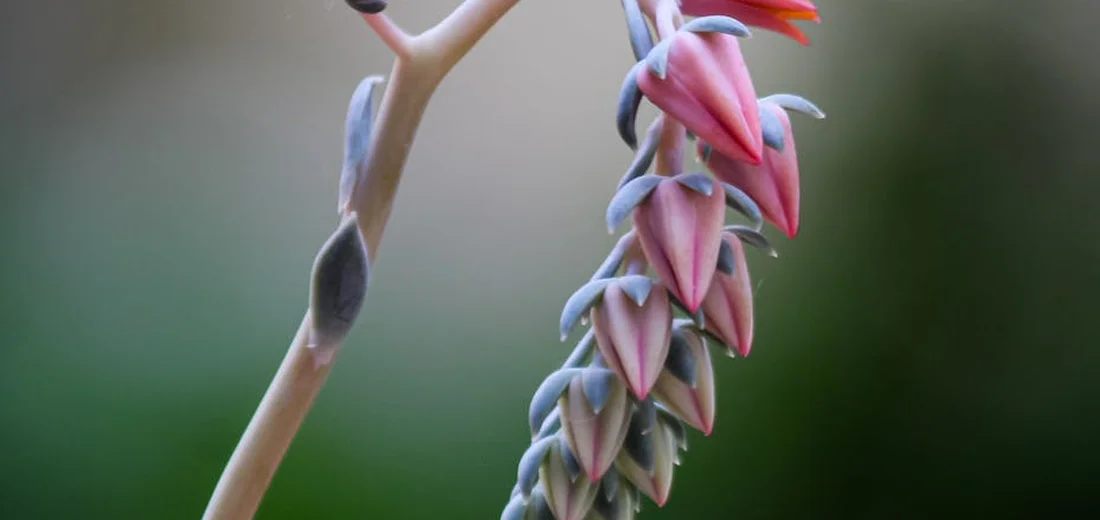
- The flower stalk grows from the side of the plant, between leaves or from a lateral branch. The main growing point remains untouched and continues to produce new growth.
- The plant itself remains healthy and vibrant. The leaves stay plump and firm, and the overall structure of the plant is unchanged aside from the new flower stalk.
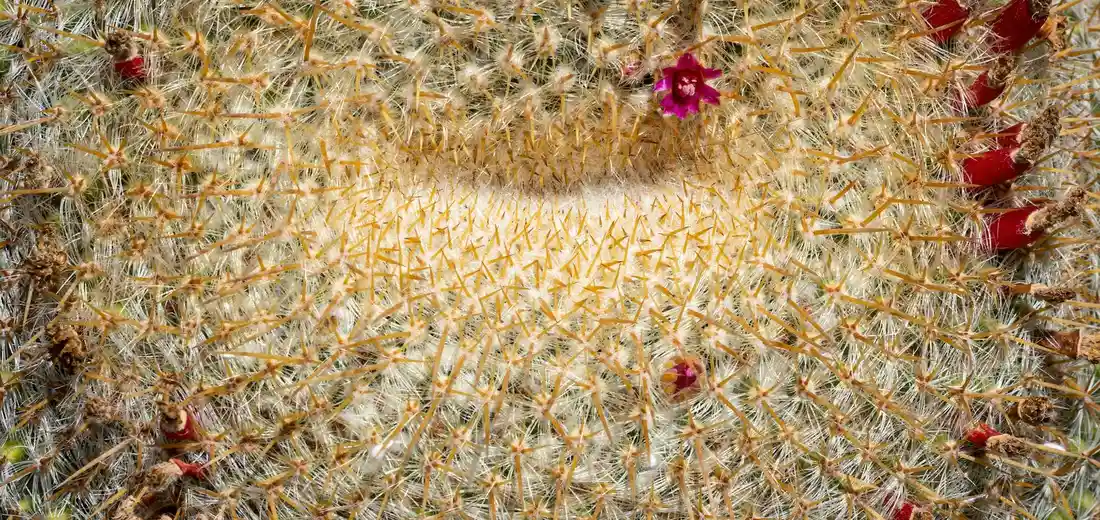
- It happens on polycarpic species. Echeverias, Sedums, and most Crassulas can flower every year without any harm to the mother plant.
Quick Tip: If the flower stalk is coming from the dead center of the plant, prepare to say goodbye to that specific rosette. If it’s coming from the side, just sit back and enjoy the show!
I once had a beautiful Echeveria that sent up a stunning pink bloom from its side. I watered it a bit more frequently during that time, and after the flowers faded, I simply snipped the stalk off. The main plant is still thriving on my windowsill years later. It’s a completely different experience from my Agave that flowered from its core and was done.
Why Your Succulent Produces a Final Flower
Seeing that tall flower spike shoot up can feel like a proud plant parent moment, but it’s also bittersweet. Your succulent is putting all its remaining energy into one spectacular reproductive effort before it dies. I’ve watched this happen in my own collection, and it’s a powerful reminder of their unique biology.
Natural Lifecycle vs. Stress-Induced Flowering
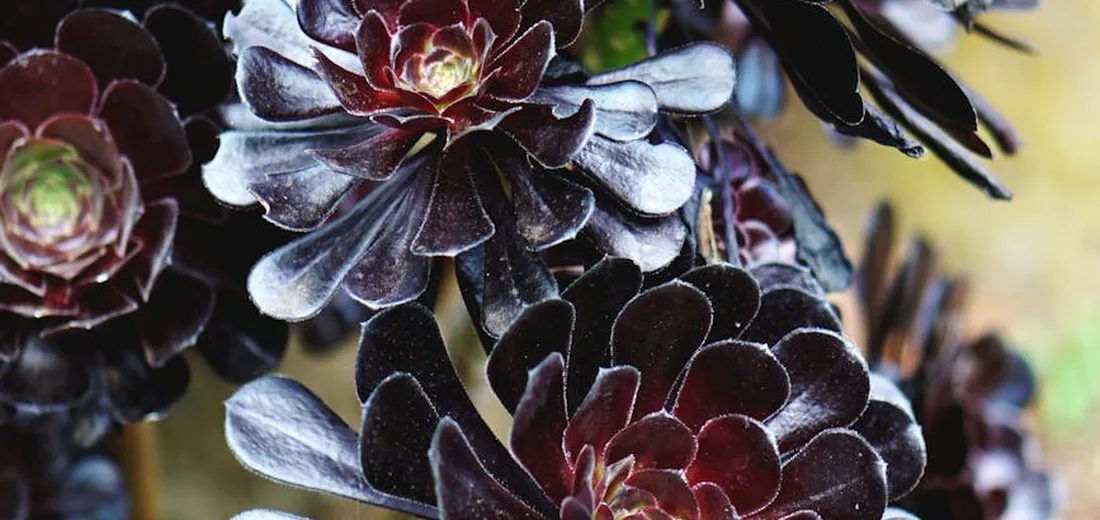
Not every flower is a “death bloom.” The key is knowing your plant’s type. Monocarpic succulents, like many Sempervivum (Hens and Chicks) and some Agaves, are genetically programmed to flower, seed, and die as their natural conclusion. I had a beautiful Aeonium ‘Zwartkop’ that gave me a stunning yellow pyramid of flowers before the main rosette faded-it was simply its time.
Other succulents might throw up a flower spike due to extreme stress. Think of it as a last-ditch effort to create offspring before the parent plant succumbs. Causes I’ve seen include: Recognize seasonal stress signs in succulents and respond promptly to prevent drastic responses like a flower spike. Adjusting light, water, and temperature with the seasons helps you head off stress before it shows.
- Severe, prolonged root rot that has gone unnoticed.
- Being severely root-bound for many years with depleted soil.
- A sudden, extreme environmental change, like a heatwave.
If a non-monocarpic succulent flowers and then declines rapidly, look for underlying stress factors instead of just accepting its fate. The plant is telling you something is very wrong.
Your Action Plan: Responding to a Death Bloom
When you confirm a death bloom, your focus shifts from saving the parent to honoring its life and securing its legacy. Here is the plan I follow in my own greenhouse.
Step 1: To Prune or Not to Prune the Flower Spike
This is the biggest question, and my advice depends on your goal. Pruning the flower spike will not save a monocarpic succulent; the die-off signal has already been sent. However, you have choices. Some varieties will send out succulent offsets after flowering. You can either let them develop into new plants or carefully detach and propagate them.
- Let it bloom: I usually do this. The pollinator show is incredible, and you can collect seeds to grow a whole new generation.
- Prune it early: If the plant is already weak, removing the spike can redirect a tiny bit of energy to producing more offsets (pups) before it goes.
For a stress-induced bloom on a polycarpic plant, I immediately prune the flower stalk. This forces the plant to use its energy for survival and root repair instead of reproduction.
Step 2: Assess and Address Immediate Care Issues
While the main plant is still with you, give it a full health check. This is especially critical for stress-induced flowering. Check the soil moisture with your finger-if it’s soggy, hold off on water and consider if root rot is the culprit.
Look at the plant’s color and shape. Is it getting enough light? Stretching or fading can be a sign. I once had an Echeveria send up a frantic flower after a cloudy month left it light-starved. Ensure your succulent gets several hours of direct sunlight daily to maintain its strength. To fix stretched growth and prevent etiolation, move the plant to brighter light or add a grow light. Trim any leggy growth to encourage compact, healthy shape.
Step 3: Repotting and Soil Rehabilitation
This step is all about the future-the future of the offsets (pups) that your plant will hopefully leave behind. Gently remove the entire plant from its pot and brush away the old soil to inspect the root system and look for baby plants.
You’ll likely find small rosettes growing at the base or along the stem. Here’s what I do next:
- Carefully separate the healthy pups from the mother plant using a clean, sharp knife.
- Let the pups dry for a day or two until the cut end calluses over.
- Plant them in a fresh, fast-draining succulent mix. I make my own with two parts potting soil, one part perlite, and one part coarse sand.
By repotting the pups, you’re not just saving a plant; you’re continuing a story. That new little succulent is a direct descendant of the one that just gave you its final, beautiful gift. For beginners, here’s a simple step-by-step guide to repotting succulents. It covers pot selection, soil mix, and gentle transplanting for a healthy start.
When to Let Go: Disposing of a Plant After Bloom
Watching a beloved succulent complete its final, spectacular performance is bittersweet. Once the entire flower stalk has completely faded and dried out, and the main rosette starts to look shriveled and brown, it’s time to say goodbye. The plant has used all its energy reserves and is effectively shutting down.
I’ve had to do this with several of my Sempervivum (Hens and Chicks), and it always feels a little solemn. Here’s my simple, respectful process for disposal:
- Gently wiggle the entire plant out of its pot. You’ll likely find the roots have already begun to deteriorate.
- Shake off as much of the old soil as possible back into your compost bin or garden.
- Check carefully for any offsets (baby plants) around the base! These are your plant’s legacy. Gently twist them off to propagate.
- Compost the remains of the mother plant. It’s a wonderful, eco-friendly way to return its nutrients to the cycle of life in your garden.
Quick Tip: Don’t pull the plant out too early. Wait until the main rosette is clearly dead and crispy to ensure it’s truly finished its life cycle.
Life After Bloom: Propagation and Recovery
This is where the magic happens! The end of one plant is the beginning of many new ones. The single most important thing to do after a death bloom is to search for offsets, also called “pups.” Monocarpic succulents are clever; they almost always produce these little clones to carry on their genetic line before they flower. From there, you can transplant and propagate succulents successfully. With the right soil and care, each pup will root and become a thriving plant.
I once had a large Agave that bloomed, and before it died, it produced over two dozen tiny plantlets on its flower stalk. It was incredible! Here are your main propagation paths:
Propagating from Offsets
This is the easiest and fastest way to get a new, mature-looking plant.
- Locate the small rosettes growing at the base of the mother plant or along the flower stalk.
- Using clean, sharp scissors or your fingers, gently twist or snip the offset away. Try to get a little bit of stem if you can.
- Let the cut end dry and form a callus for a day or two. This prevents rot when you plant it.
- Plant the callused offset in a small pot with fresh, well-draining succulent soil. Water lightly.
Propagating from Leaves
If your plant didn’t produce offsets, all hope is not lost. You can try leaf propagation.
- Gently twist a few healthy, plump leaves from the stem of the mother plant before it completely dies. Get the entire leaf base.
- Lay the leaves on top of dry soil in a bright, indirect light spot. Do not bury them.
- Forget about them! Seriously, ignore them for a few weeks. Eventually, tiny roots and a new baby plant will emerge from the base of the leaf.
- Once the mother leaf has withered and the new plant is established, you can pot it up.
Your plant’s final act is one of incredible generosity, offering you the gift of new life. It’s a beautiful, natural process that I’ve come to appreciate rather than dread. By propagating the pups, you get to keep a living piece of your original plant, and the cycle begins again.
Quick Tip: When propagating offsets, use a gritty succulent mix. I make my own with two parts potting soil to one part perlite and one part coarse sand for perfect drainage.
Preventing Future Problems: Long-Term Succulent Care
Seeing a death bloom can feel like a final chapter, but it’s also a powerful reminder to focus on the long-term health of your other succulents. My goal is always to create an environment where my plants thrive for years, not just survive a single season. In the long run, factors that affect how long succulents live—like light, watering, and soil—shape their lifespan. This involves a few key, consistent practices.
Master the Art of the Soak and Dry Method
Overwatering is the number one killer of succulents, but underwatering stresses them, too. I’ve found the “soak and dry” method to be the most reliable technique. To avoid common succulent watering mistakes, check that the soil is completely dry before the next watering. Also, never let pots sit in standing water and ensure good drainage.
- Wait until the soil is completely dry all the way to the bottom of the pot. I stick a wooden chopstick in the soil; if it comes out clean, it’s time.
- Take your plant to the sink and water it thoroughly until water runs freely out of the drainage hole. You want to mimic a good, soaking rain.
- Let all the excess water drain away completely before putting it back in its decorative pot or saucer. Never let your succulent sit in a puddle.
This cycle encourages strong, deep root growth and prevents the dreaded root rot. The frequency changes with the seasons-more in summer, much less in winter.
Provide Generous, Bright Light
Succulents are sun-worshippers. In my experience, a lack of light is a silent stressor that can lead to weak, leggy growth and a general decline in health.
- A south-facing window is the prime real estate for most succulents.
- If your light is limited, consider a simple grow light. I use a basic LED strip for my collection during our gloomy winters, and it makes a world of difference.
- Watch for signs: if your plant is stretching out and the leaves are spaced far apart (a condition called etiolation), it’s begging for more sun.
Think of light as their main source of energy; without enough, they simply can’t stay strong.
Use the Right Soil Mix
Regular potting soil holds too much moisture for these desert-adapted plants. I always make my own mix, and it’s incredibly simple.
- Start with a bag of cactus and succulent potting mix.
- Mix in a generous amount of perlite or pumice (I aim for a 50/50 ratio). This creates a gritty, fast-draining environment that their roots love.
- You can tell it’s right when you squeeze a handful and it falls apart easily instead of clumping.
This one change dramatically improved the health of my entire collection and stopped my early overwatering mistakes in their tracks.
Monitor for Stress and Propagate
Keep a gentle, watchful eye on your plants. Notice changes in leaf color, firmness, or growth patterns. Regularly check the undersides of leaves for pests like mealybugs, which look like tiny bits of cotton. A quick swipe with a cotton swab dipped in rubbing alcohol takes care of them.
And finally, propagate! When a plant is healthy, take a leaf or stem cutting to grow a new one. This gives you a “backup” plant and is a wonderful way to share with friends. It turns the cycle of a death bloom from an end into a continuation of life in your own home.
FAQs
What soil is best for growing succulent seeds from a death bloom?
Use a well-draining mix of succulent soil and perlite to prevent rot and support seed germination.
How long does a succulent death bloom typically last?
The flower stalk can remain vibrant for several weeks to a few months before it fades.
How soon after flowering does a succulent die from a death bloom?
The main plant usually dies within a few weeks to months after the flowers have completely wilted.
Can I use regular garden soil for succulents after a death bloom?
No, always use a fast-draining succulent or cactus mix to avoid water retention and root issues.
What are common Reddit tips for identifying a death bloom?
Reddit users often highlight a central bloom stalk and the plant’s overall decline as clear signs.
How long do Reddit users say it takes for a succulent to die after a death bloom?
Many report the plant succumbing within a month or two post-flowering, depending on the species.
Embracing Your Succulent’s Life Cycle
When a death bloom appears, the best approach is to appreciate this natural finale while providing supportive care for the plant. Your main job is to ensure the plant is comfortable and that you capture its legacy. Focus on these three things: continue normal watering without overdoing it, enjoy the spectacular final flower show, and collect seeds or take offsets to propagate new plants.
You now have the knowledge to face a death bloom with confidence, not worry. Go check on your succulents and admire their unique journey, knowing you’re fully prepared to support them through every stage of their beautiful life. If you’re unsure whether a succulent is dying or simply dormant, look for persistent mushiness or blackened spots. Dormant plants slow their growth but can rebound with the right light.
Further Reading & Sources
- What is a Succulent Death Bloom | THE NEXT GARDENER – Thenextgardener
- What is a Succulent Death Bloom: Understanding This Natural Life Cycle – News & Events | Ottershaw Cacti
- What Is Death Bloom & Will Succulent Plants Die with It
- Monocarpic Succulent Death Bloom: The Ultimate Guide (2024 Update) – SUCCULENTdotCARE
Lena Greenfield is a passionate horticulturist and plant care expert with over 10 years of experience cultivating and nurturing hardy house plants. With a deep understanding of both indoor and outdoor gardening, Lena shares practical advice on choosing, caring for, and maintaining resilient plants that flourish year-round. Through her knowledge and hands-on approach, Lena helps plant lovers transform their spaces into vibrant, green sanctuaries, no matter their gardening experience.
Stress Symptoms