How to Cut Snake Plant Leaves for Propagation
Published on: March 25, 2026 | Last Updated: March 25, 2026
Written By: Lena Greenfield
Thinking about cutting your snake plant to make more, but worried you’ll hurt it? You can safely propagate snake plants by cutting their leaves, and I’ve done it dozens of times in my own home.
I’ll walk you through my exact process, covering selecting the best leaf, making the perfect cut, rooting in water versus soil, and caring for your new plant.
Gathering Your Propagation Toolkit
You don’t need a fancy gardening shed to get started. I keep my propagation supplies in a simple kitchen drawer, and you can too. Having everything ready before you make the first cut makes the whole process smooth and stress-free. Here’s what you’ll need:
- A Sharp, Clean Knife or Scissors: I strongly prefer a sharp knife, like a utility knife or a clean chef’s knife. A clean, precise cut is so much better for the plant than the crushing action of dull scissors.
- Rubbing Alcohol and a Cotton Ball: This is non-negotiable in my book. Wiping your blade with alcohol prevents you from transferring any nasty bacteria or fungi to your fresh cutting.
- A Container for Water or Potting Mix: For water propagation, a clear glass jar or vase lets you watch the magic happen. For soil, a small pot with a drainage hole is perfect.
- Fresh Potting Mix (Optional for Soil): If you’re going straight to soil, use a well-draining cactus or succulent mix. I often add a handful of perlite to my regular potting soil for extra drainage.
- A Clean Workspace: A quick wipe-down of your counter with a little soapy water is all it takes. A clean start prevents problems later.
Choosing and Preparing the Perfect Leaf
This step is where your success truly begins. Picking the right leaf and treating it with care sets the stage for strong, healthy roots. I’ve learned through trial and error that a little patience here pays off tremendously.
Identifying Healthy Snake Plant Leaves
Walk over to your snake plant and give it a good look. You’re searching for a leaf that looks vibrant and strong. If you notice yellowing leaves, brown tips, or drooping growth, you can tell if your snake plant is dying. We’ll cover simple steps to revive it.
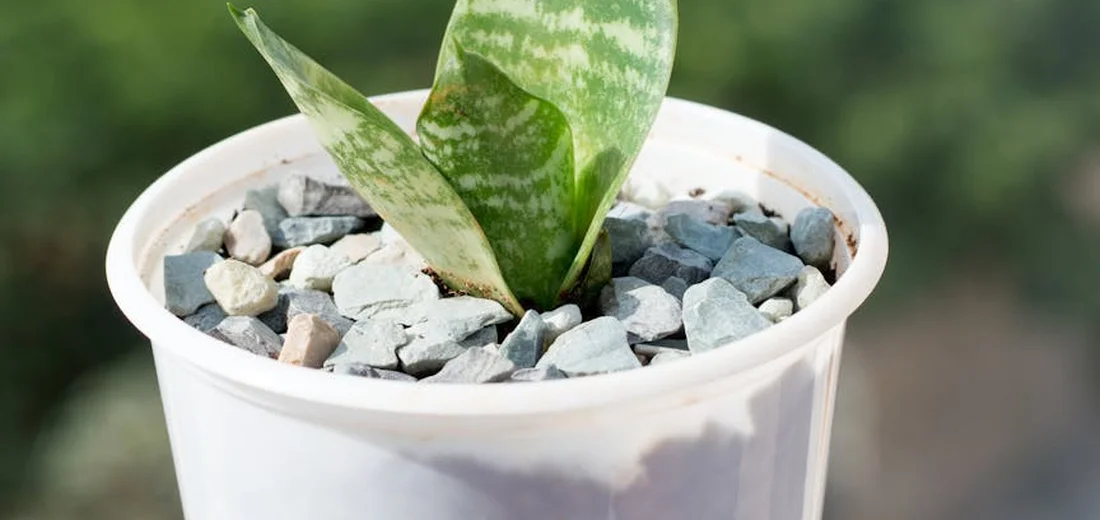
- Look for Firm, Upright Leaves: Gently press a leaf between your fingers. A healthy leaf for propagation will feel firm and rigid, not soft or floppy.
- Check for Rich, Even Color: Choose a leaf with the classic, deep green color (or the variegated pattern of your specific variety) without any yellowing or brown spots.
- Avoid Any Signs of Damage: Steer clear of leaves with brown tips, pest marks, or any scars. You want the healthiest candidate from the bunch.
- Go for Mature, Outer Leaves: I typically select one of the taller, outer leaves. These mature leaves have more stored energy to push out new roots.
Making the Initial Cut Correctly
Now for the main event! Take a deep breath; your plant can handle this.
- Sanitize Your Blade: First, soak a cotton ball with rubbing alcohol and thoroughly wipe the blade of your knife or scissors. Let it air dry for a minute.
- Select Your Cutting Point: Decide how tall you want your new plant to be. You can cut a leaf into multiple sections, but for your first time, I recommend propagating one full, healthy leaf.
- Make a Clean, Angled Cut: I always cut my snake plant leaves at a 45-degree angle near the soil line. This angled cut increases the surface area for rooting and helps you remember which end is the bottom! Make a confident, swift cut.
- Handle with Care: The sap from snake plants can be slightly irritating to skin for some people, so it’s a good habit to handle the cut leaf gently and wash your hands afterward.
Quick Tip: Let your fresh cutting sit out for a day or two in a shady spot to allow the cut end to form a callus. This dry, sealed end is crucial-it prevents the cutting from rotting when you place it in water or soil. I usually set mine on a paper towel on the windowsill and forget about it for 48 hours. Patience is your best friend in propagation!
The Crucial Callusing Stage
Before you even think about water or soil, your freshly cut leaf needs to form a callus. This is the single most important step to prevent your cutting from rotting into a mushy mess. I’ve learned this the hard way after losing a few precious cuttings to impatience.
A callus is a dry, hardened layer that forms over the cut wound. Think of it like a natural bandage. You must let the cut end dry out completely. Just place your leaf cuttings in a spot with good air circulation, out of direct sun. I usually lay mine on a paper towel on the kitchen counter.
This process isn’t a quick one. Let the cuttings sit for at least 2-3 days, and up to a week if your home is humid. You’ll know it’s ready when you touch the cut end and it feels dry, rough, and completely sealed over. Rushing this stage is the fastest way to fail.
Two Paths to New Roots: Water vs. Soil Propagation
Once your cuttings are properly callused, you get to choose your adventure! Both water and soil propagation work well for snake plants, but they offer different experiences. I use both methods regularly, and each has its own pros and cons that I’ll break down for you. We’ll also explore propagating snake plant pups and cuttings, with a focus on water propagation methods. Water propagation can be especially forgiving and lets you watch roots as they form for both pups and cuttings.
Rooting Your Cuttings in Water
Water propagation is fantastic because you get a front-row seat to the action. Watching those first tiny white roots emerge is incredibly rewarding and removes the guesswork. It’s the method I always recommend for beginner plant propagators. For succulents, soil propagation can also be effective once roots have formed. So which method is better—water vs soil propagation—depends on the plant and your goals.
Here’s my simple process:
- Select a narrow vase or jar-this helps keep your leaf upright.
- Fill it with enough water to submerge just the bottom inch of the callused cutting.
- Place it in a spot with bright, indirect light. A north or east-facing windowsill is perfect.
- Change the water every 5-7 days to keep it fresh and oxygenated.
You should see small, nubby roots beginning to form within 3 to 5 weeks. A quick tip: if your water gets slimy, that’s a sign of bacteria; rinse the cutting and the jar and refresh the water immediately. Wait until the roots are at least an inch or two long before even thinking about moving them to soil.
Planting Your Cuttings Directly in Soil
If you’re the “set it and forget it” type, soil propagation might be your jam. This method skips the transplant shock later, as the roots develop directly in their permanent home. I find this method requires a bit more faith, but it’s very low-maintenance.
Follow these steps for success:
- Grab a small pot with excellent drainage holes and fill it with a succulent or cactus mix. I often add a handful of perlite to my mix for extra drainage.
- Make a small hole in the center of the soil with your finger or a pencil.
- Insert the callused end of your cutting about an inch deep into the soil.
- Gently firm the soil around the base so it can stand upright.
The key here is to resist overwatering. Give the soil a light watering to settle it, then wait until the soil is almost completely dry before watering again. It can take a couple of months to see new growth, so your job is to be patient and trust the process. A gentle tug that meets resistance is your first clue that roots have formed underground.
Caring for Your New Snake Plant Babies
Once you see those first little roots and shoots, the real fun begins. Your main job now is to resist the urge to fuss over them too much; snake plants thrive on a little benign neglect. I’ve learned this through years of propagating different varieties, and giving them space is the kindest thing you can do.
Watering Your Propagating Cuttings
This is the step where most new plant parents get a bit overeager. The goal is damp, not drenched.
- For Water Propagation: Keep the water level consistent, just covering the base of the cutting. I change the water completely once a week to prevent bacterial growth and give the roots a fresh drink of oxygen.
- For Soil Propagation: This requires a lighter touch. Water the soil just enough to make it lightly moist, like a wrung-out sponge. Let the top inch of soil dry out before you even think about watering again.
Quick Tip: A clear glass jar for water propagation lets you monitor root growth without disturbing the plant, which is wonderfully reassuring.
The Perfect First Home: Potting Up
When your water-propagated cuttings have a healthy cluster of roots about 1-2 inches long, they’re ready for soil. Don’t wait too long, as water roots are different from soil roots and need to adapt.
- Choose a small pot with a drainage hole. A pot that’s just an inch or two wider than the root ball is perfect.
- Fill it with a fast-draining succulent or cactus mix. I often mix in a handful of perlite to my standard potting soil for extra drainage.
- Make a small hole in the center, place the cutting in, and gently firm the soil around it.
- Give it one good, initial watering to settle the roots, then place it in bright, indirect light and return to your sparse watering routine.
Troubleshooting Common Propagation Problems

Not every cutting will be a winner, and that’s okay. Propagation is a learning process, and every failed attempt teaches you more about what your plants need. Here are the issues I’ve encountered most often and how I fixed them.
Why is My Cutting Rotting?
Rot is public enemy number one for snake plant cuttings. It usually shows up as a mushy, brown, or black base.
- The Cause: Almost always too much moisture. This could be from overwatering in soil, a dirty water vessel, or a cutting that wasn’t calloused properly.
- The Fix: If you catch it early, you can sometimes save the cutting. Cut away all the soft, rotten tissue until you reach clean, firm flesh. Let it callous over again for a few days and start fresh with clean water or soil.
Always ensure your cutting tool is clean and sharp to make a smooth cut that heals quickly, preventing rot from getting a foothold.
Why Are There No Roots?
Patience is the hardest part of propagation. But if it’s been months with no sign of life, a few things could be happening.
- Not Enough Light: While snake plants don’t need blazing sun to root, they do need decent bright, indirect light to fuel the process.
- Temperature is Too Cool: Propagation happens faster in warmer conditions. A spot that’s consistently below 65°F (18°C) can really slow things down.
- It’s the Wrong Time of Year: Cuttings taken in the middle of winter, when the plant is dormant, will take much, much longer to root than those taken in the spring or summer.
Dealing with Pests on New Growth
Your tender new plants can be a magnet for pests like fungus gnats or mealybugs.
- Fungus Gnats: These tiny flies love moist soil. The best cure is prevention-let your soil dry out more between waterings. Sticky yellow traps can help catch the adults.
- Mealybugs: Look for little white, cottony masses. I dab them directly with a cotton swab dipped in rubbing alcohol. It’s a simple, effective, and targeted treatment.
A quick weekly check of your new plant babies, looking under leaves and along the soil line, can help you catch any pest problems before they get out of hand. This is especially important for new plants, as they might be more susceptible to infestations.
Leaf Cuttings vs. Plant Division: Which is Better?
You have two main roads to new snake plants, and I’ve traveled both many times. Choosing between leaf cuttings and plant division really depends on your goal: do you want a few perfect clones or a bunch of unique babies? One method is fast and reliable, while the other is a slower, more creative adventure. To help you grow faster, here are proven tips and techniques you can try. Focusing on the right light, watering cadence, and proper potting can speed up growth while keeping the plant healthy.
What is Plant Division?
Division means separating the actual plant, including its roots, into two or more complete sections. I think of it as giving a mature plant its own apartment. This is my go-to method when a snake plant has become so crowded in its pot that it’s practically pushing itself out. You’re not creating new growth from scratch; you’re untangling what’s already there.
When to Choose Division:
- Your snake plant is severely root-bound.
- You want a mature, full-looking new plant immediately.
- You need to guarantee the new plant will have the exact same leaf pattern (like a variegated Laurentii).
- You’re in a hurry for established growth.
What Are Leaf Cuttings?
Leaf cuttings involve taking a single leaf and persuading it to grow its own全新的 root system. It’s a test of patience, but deeply rewarding. I love this method for rescuing a damaged leaf or creating an entire army of new plants from just one “mother” leaf. You snip a healthy leaf into several pieces, and each one can become a new plant.
When to Choose Leaf Cuttings:
- You want to create many new plants from one source.
- A healthy leaf has broken off accidentally (don’t waste it!).
- You’re experimenting and want to see the magic of root development.
- The specific leaf pattern (variegation) isn’t a priority.
The Quick Comparison Table
| Factor | Plant Division | Leaf Cuttings |
|---|---|---|
| Speed of Growth | Fast (established plant from day one) | Slow (can take months for significant growth) |
| Genetic Result | Exact clone of the parent | New plant may lose variegation |
| Skill Level | Beginner to Intermediate | Patient Beginner |
| Number of New Plants | Limited (usually 2-4) | High (one leaf can make 3-5 cuttings) |
From my experience, division is the safe bet. If you divide a variegated snake plant, you know you’ll get another one with those beautiful yellow edges. It’s predictable and feels like an instant win. I always recommend this for beginners who might get discouraged by the long wait of leaf propagation. For ZZ plants, propagation is also easy by division: you can gently separate the rhizomes with roots into new pots. This divide-and-replant method is a quick way to multiply ZZ plants without waiting for new leaves.
Leaf cuttings, however, are where the real fun begins. The first time you see a tiny white root nub emerge from a piece of leaf you cut yourself is a genuinely thrilling moment. Just be aware of the big catch: a cutting from a variegated ‘Laurentii’ will likely grow into a solid green snake plant. The new pups won’t carry the yellow margin.
My final piece of advice? Try both! Use division to manage an overgrown plant and get quick results, and use leaf cuttings on any spare leaves to practice patience and multiply your collection for free. This dual approach has served my own indoor jungle perfectly for years.
Common Questions
What is the best method for snake plant propagation?
Both water and soil propagation are effective, with water allowing you to observe root growth and soil providing a more direct transition to a permanent home. In succulent cuttings propagations, starting the cuttings in water can help you monitor rooting. Once roots are established, transplant to a well-draining soil mix to continue growth.
Why is my snake plant cutting rotting in water?
Rotting is typically caused by the cut end not being properly callused before being placed in water or by infrequent water changes.
How long does snake plant propagation take?
Roots typically begin to form in 3 to 5 weeks, but it can take several months for a new pup to emerge from the soil.
Can I propagate a snake plant from a single leaf?
Yes, a single healthy leaf can be cut into multiple sections, and each section has the potential to develop its own root system.
What are the stages of snake plant propagation in water?
The stages involve callusing the cut end, placing it in water to develop root nubs, and waiting for those roots to grow to 1-2 inches before potting.
Is perlite a good medium for snake plant propagation?
Yes, perlite is an excellent medium as it provides great aeration and moisture balance, reducing the risk of rot while encouraging root development. For succulents, use perlite in soil mixes to improve drainage. This helps keep roots oxygenated and reduces overwatering risk.
You’re Ready to Propagate!
From my many seasons of nurturing snake plants, I’ve found that a clean, angled cut and proper callusing are the foundation for thriving new plants. Stick to these core steps, and you’ll set your cuttings up for success every time. This is just one part of a complete indoor snake plant care guide that covers placement, maintenance, and long-term care. Keep reading for tips on lighting, watering, and routine upkeep to keep your plants thriving.
- Use sterilized, sharp scissors for a smooth cut.
- Allow the cutting to dry and form a callus before planting.
- Place in well-draining soil and water sparingly until roots develop.
Now, grab those scissors and make that first snip-you’ve got all the tips to grow your plant family with ease. Happy propagating, and enjoy watching your green space flourish!
Further Reading & Sources
- How to propagate snake plants – gardenstead
- r/proplifting on Reddit: Foolproof method for snake plant cuttings?
- How to Propagate Snake Plants in Water With 100% Success
- How To Propagate Snake Plant: 4 Sure-Fire Methods (Steps + FAQs) – Rosy Soil
Lena Greenfield is a passionate horticulturist and plant care expert with over 10 years of experience cultivating and nurturing hardy house plants. With a deep understanding of both indoor and outdoor gardening, Lena shares practical advice on choosing, caring for, and maintaining resilient plants that flourish year-round. Through her knowledge and hands-on approach, Lena helps plant lovers transform their spaces into vibrant, green sanctuaries, no matter their gardening experience.
Propagation Methods