How to Plant Multiple Succulents Together in One Pot
Are you wondering if you can safely combine several succulents in a single container without them getting crowded or sick? I’ve arranged dozens of these pots over the years, and I can assure you it’s not only possible but a fantastic way to design a lush, miniature garden.
In this guide, I’ll share my hands-on tips for selecting succulents that grow well together, choosing the ideal pot and soil mix, and mastering the planting process step-by-step.
Finding the Perfect Pot for Your Succulent Arrangement
Why Drainage Holes Are Non-Negotiable
I’ve learned this lesson the hard way after losing a beautiful arrangement to root rot. Drainage holes are your number one defense against overwatering, the single biggest killer of potted succulents. They allow excess water to escape freely, so your plants’ roots aren’t sitting in a soggy, oxygen-deprived environment.
If you fall in love with a pot that has no hole, you have two options. You can use it as a decorative cache pot, placing your plastic nursery pot with drainage inside it. Or, you can carefully drill a hole yourself with a masonry or diamond-tip drill bit. I always choose a pot with a hole-it’s one less thing to worry about.
Selecting the Right Pot Size and Shape
The ideal pot is like a cozy apartment, not a sprawling mansion. A pot that is too large will hold onto excess moisture for too long, encouraging root rot before your plants can drink it all. A good rule of thumb is to choose a pot that gives the root balls of all your plants about an inch of space to grow into on all sides.
Shallow, wide bowls are often perfect for succulent arrangements. Their shape mimics the shallow root systems of most succulents and provides a fantastic canvas for creating a “living painting.” Deeper pots can work for taller, tree-like succulents like Jade Plants, but you must fill the extra depth with a layer of lava rock or perlite to improve drainage.
Quick Tip: When in doubt, always opt for a slightly smaller, shallower pot over a deep one. Your succulents will thank you for the better drainage.
Picking Succulent Companions That Thrive Together
Grouping by Watering Needs
Think of this as matching roommates by their drinking habits. You wouldn’t pair a cactus that sips water once a month with a String of Pearls that likes a bit more frequent hydration. Grouping succulents with similar thirst levels is the secret to a low-maintenance, harmonious arrangement.
In my own pots, I create two main groups:
- The Drought-Tolerant Crew: This includes Echeveria, Sempervivum (Hens and Chicks), and most cacti. They prefer their soil to go completely dry between thorough waterings.
- The Slightly Thirstier Friends: Aloes, Haworthias, and Gasterias can handle a drink a little more often, once the top inch of soil is dry.
Mixing these groups often leads to one plant being underwatered or another being overwatered.
Matching Sunlight Requirements
Sunlight is another critical compatibility factor. Pale green, blue, or white succulents often crave and can handle more direct, intense sunlight. Dark green or red-toned varieties might prefer a bit of protection from the harsh afternoon sun to prevent sunburn.
For a sunny south-facing window, combine sun-worshippers like most Echeveria, Sedum, and Graptopetalum. For an east-facing window with bright but indirect light, group softer-light lovers like many Haworthias, Gasteria, and Sansevieria (Snake Plants).
Quick Tip: Feel the leaves! Succulents with thicker, fatter leaves generally store more water and need less frequent watering than those with thinner, more delicate leaves. For bigger, plumper growth, give them bright light and a light, regular feeding. This helps create fuller, healthier leaves.
Gathering Your Supplies for Planting

The Best Well-Draining Soil Mix for Pots
I’ve learned the hard way that regular potting soil is a death sentence for grouped succulents. It holds onto moisture for far too long, leading to mushy, rotten roots. You need a gritty, airy mix that mimics the dry, rocky ground these plants naturally call home. A pre-made cactus and succulent mix is a great starting point, but I always doctor mine for even better results.
My personal go-to recipe is two parts succulent soil to one part perlite. The perlite creates essential air pockets and dramatically improves drainage. For an extra boost, I sometimes add a handful of coarse sand or small pumice. Your ultimate goal is a mix that feels light and crumbly, not dense or clay-like, when you squeeze a handful. Proper perlite usage is key to achieving this.
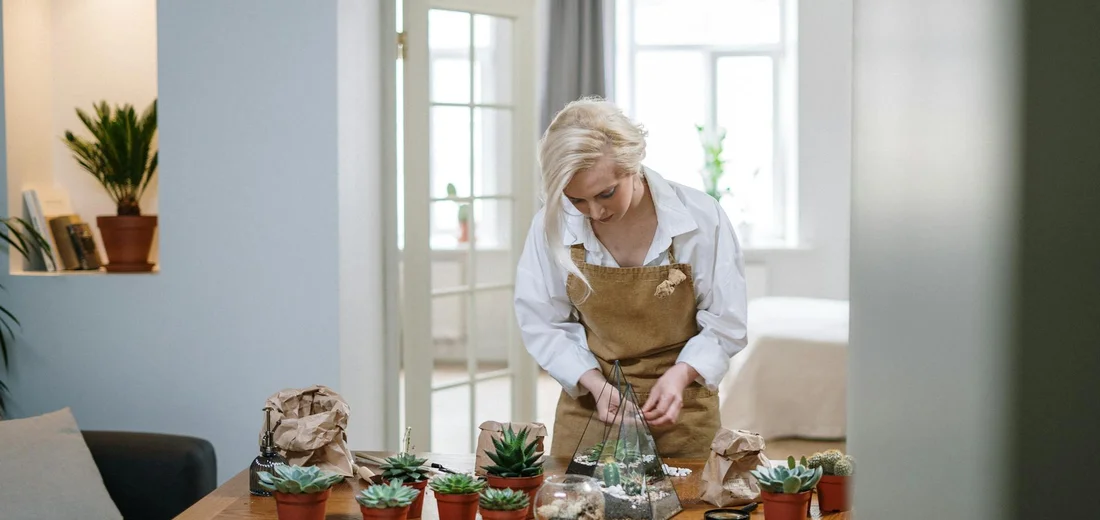
The Step-by-Step Planting Process
Step 1: Prepare Your Container and Soil
First, give your pot a good rinse and make sure that drainage hole is clear. I like to place a small piece of mesh or a broken pottery shard over the hole to keep the soil from washing out. This simple trick prevents a huge mess during your first watering. Now, fill the pot about one-third full with your well-draining soil mix.
Do not pack it down. You want it to stay loose and fluffy to let those roots breathe and spread easily. I gently tap the side of the pot to help the soil settle into place without compressing it.
Step 2: Arrange Your Succulents Before Planting
This is my favorite part—it’s like designing a tiny living sculpture. Take all your succulents out of their nursery pots and gently loosen their root balls. Arrange them on top of the soil in the empty pot while they are still bare-root. Play with the layout until you find a composition that pleases your eye, considering height, color, and texture. For beginners following a step-by-step repot guide, this is the planning stage. Once you’re happy with the layout, you’ll move on to potting with fresh soil.
I always place taller, statement plants like an echeveria rosette slightly off-center, then fill in around it with trailing varieties and smaller accents. Leave a little space between each plant; they need room to grow and for air to circulate. This dry-run arrangement saves you from having to reposition them once their roots are buried.
Step 3: Planting and Securing the Roots
Once you’re happy with the arrangement, it’s time to plant. Hold the first succulent in place with one hand and use your other hand to scoop soil around its roots. Gently firm the soil around the base of the plant to provide support, but avoid packing it down tightly. You are just tucking them in, not smothering them. This is how you transplant and propagate succulents successfully. With careful handling, proper soil, and the right light, they’ll root and establish well.
Work your way around the pot, planting one succulent at a time. Check that each plant is sitting at the same depth it was in its original pot. Burying the stem or leaves can lead to rot. The base of the lowest leaves should be just above the soil line for almost every succulent type.
Step 4: Adding the Finishing Touches
After all the plants are securely in the soil, you can add a top dressing. This is optional, but I highly recommend it. A layer of small pebbles, crushed granite, or decorative sand gives your arrangement a polished, professional look. Top dressing does more than just look pretty; it helps keep the soil in place, prevents the lower leaves from touching damp soil, and reduces moisture evaporation.
Sprinkle your chosen material evenly across the soil surface. Do not water your new arrangement right away. Wait at least five to seven days before giving them their first drink. This waiting period allows any tiny root breaks from handling to callous over, which prevents rot when water is introduced.
Caring for Your New Succulent Arrangement
The First Watering: When and How
I’ve learned the hard way that the most common mistake with new succulent pots is watering them immediately. You must resist the urge to water your newly potted succulents for at least a week. This waiting period gives any tiny root abrasions time to callous over, which dramatically reduces the risk of rot.
When it’s finally time for that first drink, I use the bottom-watering method. I place the entire pot in a shallow dish of water and let the soil soak it up from the bottom for about 30 minutes. Bottom watering encourages strong, deep root growth and prevents water from pooling on the leaves, which can cause sunburn.
After soaking, lift the pot and feel its weight; a heavy pot means it’s fully hydrated. Let it drain completely before returning it to its decorative saucer.
Finding the Ideal Light Spot
Your new arrangement needs bright, indirect light for the first week to help it settle in without stress. A spot near an east or south-facing window with a sheer curtain is perfect. Think of this as a “recovery week” for your plants to adjust to their new home before facing stronger light.
After that initial period, most succulents crave several hours of direct morning sun. I keep my favorite pots on a south-facing windowsill where they get gentle morning rays and bright, indirect light for the rest of the day.
Watch your plants for clues. If they start stretching out and reaching for the light, they need more sun. If you see any bleached, white, or crispy brown spots on the leaves, that’s a sure sign of too much intense, direct afternoon sun. If growth slows or leaves look pale, that can signal too little light. Simply move the pot back a few feet from the window.
Designing a Visually Stunning Succulent Pot
Playing with Color and Texture
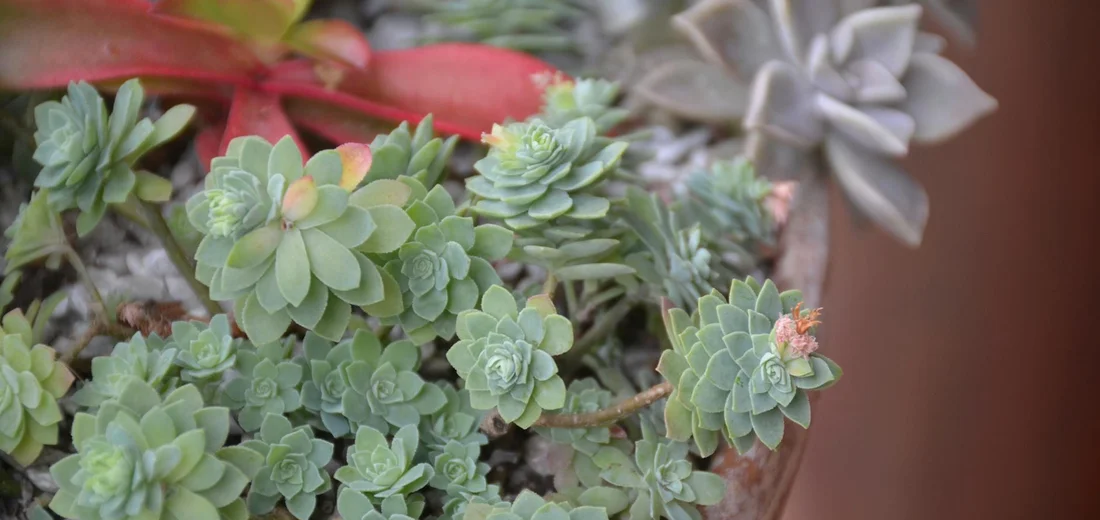
This is my favorite part-it’s like painting with living plants! I love creating pots that look good year-round by mixing different leaf textures and colors. Pairing a smooth, powdery Echeveria with the bumpy, bead-like leaves of a String of Pearls creates instant visual interest you can feel.
For a cohesive look, choose a color theme. Here are some combinations I use in my own home:
- Cool Tones: Blue Chalk Sticks, a lavender-tinted Echeveria ‘Perle von Nurnberg’, and a dark, almost black Echeveria ‘Black Prince’.
- Warm Tones: A golden Sedum ‘Angelina’, a red-tipped Graptopetalum, and a green Jade plant that blushes red in the sun.
- Monochromatic Green: Mix a spiky Aloe, the round leaves of a Pilea, and the trailing stems of a Burro’s Tail for a textural masterpiece.
Creating Height and Focal Points
Every great arrangement has a “thriller”-a taller plant that acts as the centerpiece. Choose one standout succulent to be the star of your pot and build the rest of the design around it. A tall, architectural Snake Plant or a rosette-forming Agave work beautifully.
Place your thriller slightly off-center for a more dynamic, natural look. Then, fill in the mid-level space with your “filler” plants, like Haworthias or clustered Echeverias. Finally, let a “spiller” cascade over the edge of the pot to soften the lines and add movement. I’m particularly fond of String of Bananas or Sedum morganianum for this role.
Don’t be afraid to use small pieces of decorative rock or a piece of driftwood to add another layer of height and structure. I often tuck a smooth, grey stone next to my main plant to make its colors pop even more.
Troubleshooting Common Issues After Planting
Even with the best setup, your succulent arrangement might hit a few bumps. I’ve learned to spot these issues early, which has saved many of my own container gardens from disaster. Let’s look at the two most common problems you’re likely to face.
Signs of Overwatering and How to Fix It
Overwatering is the number one killer of succulent arrangements. Your plants will send you clear distress signals long before it’s too late. Watch for leaves that feel soft, mushy, and translucent, almost like a water balloon. The lower leaves are usually the first to show these signs. You might also notice the stem turning black or brown and feeling soft. To fix it, identify whether it’s overwatered or underwatered, then adjust watering and soil accordingly. Knowing which issue you’re dealing with helps you apply the right fix.
If you see this, stop watering immediately. Gently remove the entire plant from the pot to let the roots and soil dry out completely. I place mine on a stack of old newspapers in a spot with good air circulation. If any parts of the plant are black and rotten, you must cut them away with a sterile knife. Let the cuts callous over for a few days before you even think about repotting.
- Leaves become soft, mushy, and translucent.
- Stems turn dark and feel soft to the touch.
- The plant looks generally unwell and may drop leaves easily.
I learned this the hard way with my first haworthia arrangement. I was so eager to care for it that I loved it a little too much with my watering can. Now, I always stick my finger deep into the soil to check for moisture before giving any water.
What to Do When Plants Become Crowded
Your succulents are happy and growing-that’s great news! But success can lead to a crowded pot. A little snugness is fine, but when plants start fighting for light and air, it’s time for a change. You’ll know it’s time when you see new growth that is pale, stretched out, and reaching desperately for the sun. The plant’s natural, compact shape will be lost.
When this happens, it’s repotting day. I find the best time to do this is in the morning, when the plants are hydrated and less prone to stress. Here is my simple process.
- Water the arrangement lightly a day or two before you plan to repot. This makes the roots more flexible and easier to work with.
- Gently tip the pot on its side and carefully ease the entire root ball out. Don’t just pull on the plants!
- Lay the root ball on a towel and slowly tease the individual plants apart. You may need to gently shake off old soil or even rinse the roots to separate them without breaking too many.
- Inspect the roots and trim any that are dead or excessively long.
- Let the plants rest for a day out of direct sun so any broken roots can heal.
- Repot them into fresh, dry succulent mix, either in a new, larger communal pot or in their own individual homes.
Quick tip: The ideal time to divide and repot is at the start of their main growing season, which is usually spring or early summer. This gives them the whole season to settle into their new space and recover from the move.
FAQs
How many succulents can I put in one pot?
You can plant multiple succulents together, but ensure there is about an inch of space between each plant’s root ball for future growth. This also applies when pairing cacti with other succulents. For a detailed look at which species mix well, consult our cacti succulents together compatibility guide.
Can I mix succulents and cacti in the same arrangement?
It is generally not recommended because most cacti require even less frequent watering than many common succulents. To identify them, note the key differences between cacti and succulents. Cacti have areoles with spines, while many succulents have leaves.
What should I do if one succulent in the pot dies?
You should carefully remove the dead plant to prevent potential rot or disease from spreading to the healthy ones.
How do I handle different growth rates in a shared pot?
You may need to prune faster-growing varieties to maintain the arrangement’s balance and prevent them from overshadowing others.
Do the watering needs change for a pot with multiple plants?
Yes, a densely planted pot will dry out slower than a pot with a single plant, so you should extend the time between waterings.
When is the best time to create a new succulent arrangement?
The ideal time is during the plants’ active growing season, typically in the spring or early summer.
Your Succulent Arrangement Awaits
Successful succulent pot combinations come down to pairing plants with similar light and water needs, using a gritty, fast-draining soil mix, and giving them enough space to breathe and grow. Focus on these three core principles for a thriving, long-lasting display. You’ll have a better understanding of their requirements once you know what succulents need to thrive.
You now have the knowledge to create a beautiful, healthy succulent garden. Design and craft a stunning layout that fits your space. Trust your instincts, get your hands dirty, and enjoy the process – your plants will reward you with their unique charm and resilience for years to come.
Further Reading & Sources
- r/succulents on Reddit: Planting multiple different kinds in one big pot
- How To Combine More Succulents In One Pot – UnusualSeeds
- Multiple succulents in one pot?
- How to Plant Succulents in a Pot – the Right Way – Among the Lilacs
Lena Greenfield is a passionate horticulturist and plant care expert with over 10 years of experience cultivating and nurturing hardy house plants. With a deep understanding of both indoor and outdoor gardening, Lena shares practical advice on choosing, caring for, and maintaining resilient plants that flourish year-round. Through her knowledge and hands-on approach, Lena helps plant lovers transform their spaces into vibrant, green sanctuaries, no matter their gardening experience.
DIY Projects