Where to Keep and Store Succulent Plants
Published on: February 13, 2026 | Last Updated: February 13, 2026
Written By: Lena Greenfield
You’ve brought home a beautiful new succulent, but now you’re staring at your windowsills wondering, “Where is the absolute best place to put this?” It’s a common worry, because getting the location wrong is the fastest way to see your plant struggle.
I’ve learned through years of trial and error (and a few unfortunate, mushy casualties) that placement is everything for these hardy plants. I’ll walk you through finding the perfect spot based on light, temperature, and your home’s unique layout.
We’ll cover ideal light conditions, indoor vs. outdoor placement, temperature considerations, and seasonal storage tips to keep your collection thriving year-round.
Finding the Perfect Light for Your Succulents
Bright Light Champions: South and West-Facing Windows
I keep the majority of my sun-loving succulents, like Echeverias and most Sedums, on south-facing windowsills. This orientation provides the most consistent, direct sunlight throughout the day, which is exactly what these plants crave to maintain their compact, colorful forms. A west-facing window is a fantastic runner-up, offering a powerful blast of afternoon sun that can produce stunning stress colors.
Just be watchful during heatwaves. I’ve had a few Haworthias get a slight sunburn when a summer heatwave amplified the sun’s intensity through the glass. If you notice bleaching or brown, crispy patches on the leaves, simply pull the plant back a foot or two from the window or use a sheer curtain as a sunscreen.
Gentle Glow Spots: East-Facing Windows and Bright Indirect Light
Not all succulents need a desert-like environment to thrive. An east-facing window, which provides gentle morning sun, is my go-to spot for more sensitive varieties. This is the perfect home for succulents like the String of Pearls, Christmas Cactus, and certain Aloes that can scorch in harsh afternoon light. The soft rays are enough to keep them happy without the risk of damage.
Bright, indirect light-the kind you get in a very bright room but a few feet away from the actual window-also works well. I’ve successfully grown Gasteria and Sansevieria (Snake Plants) in these conditions for years, and they’ve grown steadily without any signs of stress. If your room is bright enough to read a book comfortably without a lamp during the day, it’s probably a good candidate.
When to Use Grow Lights
Grow lights are a game-changer, especially if you live in a home with poor natural light or want to keep your collection thriving through a dark winter. I rely on them from October to March. If your succulents are starting to stretch out and become leggy (a process called etiolation), that’s your biggest clue they desperately need more light. Using grow lights correctly can help prevent this.
You don’t need a complicated setup. Here’s what I do:
- Choose full-spectrum LED bulbs; they’re energy-efficient and don’t get too hot.
- Position the lights 6 to 12 inches above the plants.
- Set them on a timer for 12-14 hours a day to mimic a natural sun cycle.
This simple system prevents your plants from getting “confused” by irregular light and ensures they get a consistent daily dose of energy.
Ideal Indoor Spots for Your Succulent Collection
Sun-Drenched Windowsills
The windowsill is the classic spot for a reason-it’s prime real estate. I reserve my sunniest sills for the rotund, colorful succulents like Pachyphytums and Graptopetalums that need maximum light to stay plump. Just remember to rotate your pots a quarter turn every time you water. This prevents the plant from leaning dramatically toward the light source and growing lopsided.
One pro tip from my own mishaps: check the sill temperature with your hand during extreme weather. A cold windowsill in winter can damage leaves touching the glass, and a hot one in summer can literally cook the roots in the pot. A small trivet or piece of wood under the pot provides a simple insulating buffer.
Bright Shelves and Desks Near Windows
Open shelving or a desk positioned directly across from a large window is an excellent way to display a larger collection. This setup creates a beautiful, layered look and ensures every plant gets its share of ambient brightness. I have a floating shelf about four feet from a south-facing window that houses a mix of succulents and they all do wonderfully.
This is also the perfect solution for trailing varieties. Let a String of Bananas or Burro’s Tail cascade down from a high shelf; it adds wonderful movement and texture to your plant display. Just be sure to dust the leaves occasionally, as buildup can block that precious light.
Places to Avoid Indoors
Location is everything, and some spots will doom your succulent no matter how perfect your watering schedule is. Based on my experience, here are the places I always avoid:
- Dark Corners and Hallways: Without sufficient light, your plant will become weak, pale, and stretched out as it desperately searches for a sunbeam.
- Right Next to Heat Vents or Air Conditioners: The blast of hot, dry air in winter or cold air in summer creates extreme temperature stress and dries out the soil far too quickly.
- Closed Terrariums or Containers Without Drainage: These create a humid, stagnant environment that is the opposite of the dry, airy conditions succulents need, leading almost certainly to rot.
- Bathrooms Without Windows: While some tropical plants love a humid bathroom, most succulents will suffer without the accompanying bright light.
Temperature and humidity matter just as much as light. Healthy succulents prefer stable temperatures and relatively dry air, with soil that dries out between waterings. Sticking to bright, temperature-stable areas of your home is the single biggest factor for long-term succulent success.
Outdoor Placement for Happy, Hardy Succulents
Moving your succulents outside feels like sending them to a summer wellness retreat. The fresh air and abundant light can supercharge their growth and bring out incredible, vibrant colors you don’t see indoors. I’ve watched my own echeverias blush deep pinks and my sedums become lush ground covers once they experienced a season outdoors.
Acclimating Succulents to Outdoor Sun
This is the single most important step for outdoor success. Think of it like applying sunscreen. A succulent that’s been living on your windowsill will get a nasty sunburn if you put it in direct, all-day sun immediately.
I learned this the hard way with a beautiful jade plant that developed permanent brown, crispy spots. To avoid this, start your plants in a spot that gets only morning sun, which is gentler than the intense afternoon rays. Leave them there for about a week.
- Week 1: Place in full shade or dappled light.
- Week 2: Move to a location with 2-3 hours of morning sun.
- Week 3: Gradually increase to 4-6 hours of direct sun.
- Week 4: Most can handle their final, full-sun spot.
Watch the leaves for signs of stress. A little red tinge is often a “suntan” and is fine, but white or brown patches mean it’s getting too much light too fast.
Perfect Patio and Balcony Setups
Containers are your best friend for patio gardening. You have complete control over the soil, and you can move plants if the weather turns nasty.
My favorite setup on my own balcony uses a simple, three-tiered metal plant stand. Elevating your pots improves air circulation dramatically, which is key to preventing rot and pest issues. It also creates a beautiful, cascading display.
- Pot Material: Terracotta and ceramic are ideal. They are porous and allow the soil to dry out faster than plastic.
- Arrangement: Place taller, sun-loving plants like aloes and agaves at the back. Let trailing varieties like String of Pearls spill over the edges of shelves.
- Quick Tip: If your balcony gets intense afternoon sun, a sheer curtain can provide the perfect filter to prevent scorching.
Garden Bed Considerations
Planting succulents directly in the ground gives them room to spread and form stunning, natural colonies. The main rule here is drainage, drainage, drainage. These tips tie into our outdoor growing guide for planting succulents in the ground, where we cover site selection, soil prep, and ongoing care to help them thrive in your landscape.
I once planted a hen-and-chicks in heavy clay soil, and it turned to mush after one heavy rain. If your native soil doesn’t drain well, you must create a raised mound or amend the planting area heavily.
- Soil Amendment: Mix your native soil with a large amount of coarse sand, perlite, and small gravel. Aim for at least a 50/50 mix.
- Elevation is Key: Plant on a slight mound so water runs away from the crown of the plant.
- Spacing: Give them room to grow! Crowding plants traps moisture and can lead to fungal problems.
Seasonal Storage: Bringing Succulents Indoors for Winter
For those of us in colder climates, fall means it’s time to move the plant party back inside. It can feel like a chore, but it’s a lifesaver for your sun-loving friends.
When to Move Succulents Inside
Timing is everything. Don’t wait for the first frost; that’s often too late. A good rule of thumb is to bring them in when nighttime temperatures consistently dip below 50°F (10°C).
Some hardy sempervivums can handle a light frost, but most common succulents like echeveria and crassula cannot. I keep a close eye on the nighttime forecast in early autumn and start planning my move.
Preparing Your Plants for Indoor Life
You don’t just want to bring your plants inside; you want to bring them in clean and healthy. The last thing you need is to introduce pests to your entire indoor collection. That’s where integrated pest management for indoor plants comes in. IPM combines sanitation, monitoring, and targeted treatments to keep your indoor garden healthy and pest-free.
- Inspect Thoroughly: Look under leaves and in the soil for bugs like mealybugs, aphids, or spider mites.
- Spray & Quarantine: I give all my plants a good spray with a diluted neem oil solution. Then, I keep them in a separate room away from other houseplants for about two weeks to ensure no pests hatch.
- Prune & Tidy: Remove any dead or dying leaves. This not only looks better but also eliminates hiding spots for pests.
A two-week quarantine might seem excessive, but it has saved me from multiple full-blown pest infestations over the years.
Finding the Right Indoor Winter Spot
Your plants will be getting much less light indoors, so you need to find the brightest spot possible. A south-facing window is the gold standard.
I group all my succulents together on a long shelf in my sunniest window. If you don’t have a bright enough window, don’t despair—affordable grow lights can work wonders. I use simple LED strip lights on a timer for 12-14 hours a day to keep my plants from stretching. This setup is a practical intro to the complete guide on growing outdoor succulents indoors. It covers lighting, soil, watering, and seasonal care for indoor success.
- Water Less: With lower light levels, your succulents will use water much more slowly. Let the soil dry out completely between waterings.
- Watch for Etiolation: If your plant starts stretching out and getting “leggy,” it’s a cry for more light. Move it to a brighter spot or introduce a grow light.
- Humidity: Most homes are dry in winter, which succulents love. Just keep them away from humidifiers or steamy bathrooms.
Caring for Succulents While You’re on Vacation
Leaving your plant babies behind can be nerve-wracking, but with a little prep, your succulents will be just fine. I’ve returned from many trips to find my collection happier than some of my house-sitting attempts!
Prepping for a Week-Long Trip
For a week away, your main goal is to prevent any last-minute thirst. Give your succulents a deep, thorough watering about three days before you leave. This timing allows excess water to drain fully, preventing root rot, while ensuring the plants are fully hydrated. For a full breakdown of how often you should water succulents, see our complete guide. It covers factors like light, temperature, and soil that affect watering frequency.
Here’s my simple pre-vacation checklist:
- Move all plants away from direct, hot south or west-facing windows. A spot with bright, indirect light is perfect.
- Do a quick health check. Remove any dead or yellowing leaves to conserve the plant’s energy.
- Group smaller potted plants together. They create a slightly more humid microclimate, slowing down moisture loss.
Solutions for Extended Absences (A Month or More)
If you’re planning a longer getaway, you’ll need a more hands-off watering system. Over the years, I’ve found a few methods that work wonders without fancy equipment.
My top solution is the wicking system. Place a large jar of water in the center of a group of pots and run cotton strings from the water, burying the other end an inch into each plant’s soil. The soil will draw moisture as it dries, providing a slow, steady drink.
- Clay Pot Irrigation: Bury an unglazed terracotta pot filled with water next to your succulent. The porous clay releases water slowly into the surrounding soil.
- The Humid Tray: Fill a tray with a layer of pebbles and water, then set your potted succulents on top (ensure the pots aren’t sitting directly in the water). The evaporating water provides ambient moisture.
- The Greenhouse Bag: For smaller plants, a clear plastic bag placed loosely over the pot can trap humidity. Just make sure it’s not sealed tight and the plant isn’t in direct sun, or it will cook!
Understanding How Succulents Store Water
Knowing how these clever plants work is the key to keeping them alive. Their entire structure is designed for survival in harsh, dry climates.
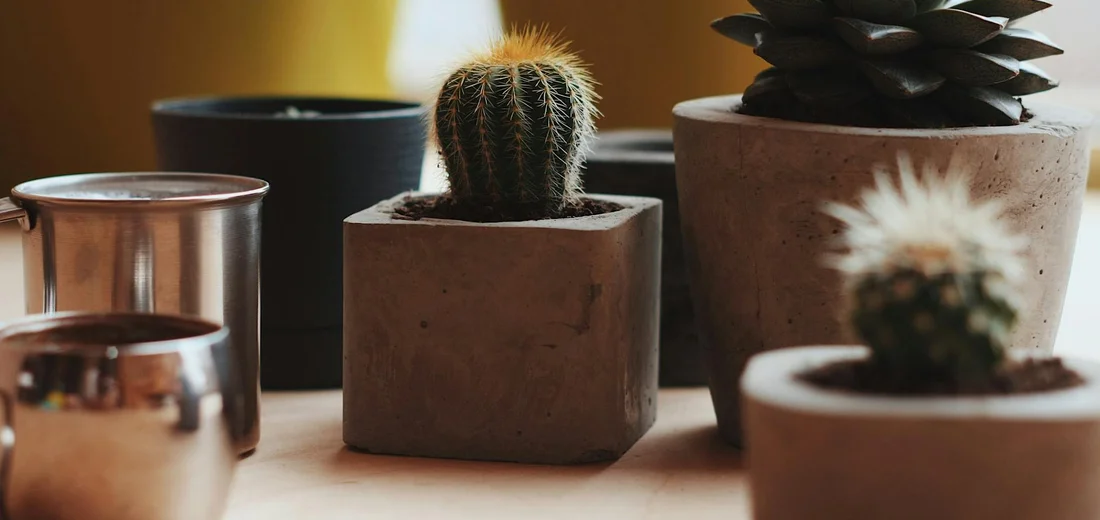
Leaves: The Primary Water Reservoir
When you gently squeeze a plump succulent leaf, you’re feeling its personal water tank. The thick, fleshy leaves are where the majority of a succulent’s water is stored in specialized tissues. This is why a dehydrated succulent’s leaves look thin, wrinkled, and feel soft.
I always tell new plant parents to think of the leaves like a battery gauge. Plump and firm means fully charged. Wrinkled and flexible means it’s time for a recharge (water!).
Stems and Roots: Secondary Storage
While the leaves do the heavy lifting, the stems and roots provide backup. Some succulents, like many cacti, have thick, ribbed stems that expand to hold significant water. The roots are the first responders, quickly absorbing any available moisture from the soil after a rain or watering. Learn more about how succulents store water in their leaves and stems.
They don’t store much long-term, but they form a vast, shallow network designed to drink up every last drop before it evaporates. This is why a well-draining soil mix is non-negotiable-soggy soil drowns these efficient little roots.
What This Means for Your Watering Schedule
Forget watering on a strict calendar schedule. Your plant’s built-in storage system is your best guide. Water deeply only when the soil is completely dry and the leaves show the earliest signs of thirst.
Here’s my simple method:
- Stick your finger in the soil. Is it dry all the way to the bottom of the pot?
- Look at the leaves. Do the lower, older leaves have a slight give when you gently press them?
- If yes to both, it’s time for a long, slow drink until water runs out the drainage hole.
This “soak and dry” method mimics the natural desert downpours these plants are built for, filling their reserves completely before a long dry spell. Your succulent would rather be a little thirsty than have wet feet for days on end.
Troubleshooting Common Storage and Placement Problems
Even with the best intentions, your succulents can sometimes tell you they’re not happy with their spot. I’ve learned to spot these common issues quickly, which saves the plant and a lot of my own frustration. Let’s diagnose the most frequent problems you might encounter.
Leggy, Stretched Growth
When your succulent starts looking tall, thin, and stretched out with large gaps between the leaves, it’s pleading for more light. This is called etiolation. The plant is literally reaching for any light source it can find, sacrificing its compact shape in the process.
In my own home, I made this mistake with an echeveria I kept on a bookshelf far from the window. It grew so tall it eventually toppled over!
Here is how to fix and prevent it:
- Move it to a brighter location immediately. An east or south-facing window is ideal.
- You can behead the stretched plant. Cut the top rosette off, let the cut end callous for a few days, and then plant it to start a new, compact succulent.
- The original stem will often grow new baby plants, called pups, from the leftover nodes.
- Rotate your pots a quarter-turn every time you water to ensure all sides get even light exposure.
Quick Tip: If a succulent is stretching, it needs more direct sun, not just brighter indirect light.
Sunburn and Leaf Scorch
This is the opposite problem, and it happens when a plant that isn’t used to intense light is suddenly exposed to it. Sunburn shows up as pale, bleached, or brown crispy patches on the leaves, and the damage is permanent.
I learned this the hard way after moving my haworthias directly outside in spring; their delicate leaves scorched in a single afternoon.
To protect your plants:
- Always acclimate succulents to brighter light gradually. Start with just an hour of morning sun and increase exposure over 1-2 weeks.
- Use a sheer curtain as a filter if your only option is an intensely sunny south or west window.
- If a leaf is scorched, the mark won’t go away, but you can leave it. The plant will eventually absorb the damaged leaf, or you can gently pluck it off once new growth appears.
Rot and Mushy Leaves
This is the most common killer of succulents, and it almost always starts at the roots. Overwatering is the main culprit, but the real issue is often a combination of too much water and not enough light or airflow. To avoid these common succulent watering mistakes, follow a conservative watering schedule and ensure the pot drains well. Adequate light and airflow also help prevent problems.
If the lower leaves are turning yellow, translucent, and feel mushy like a soggy grape, you likely have rot.
Here is my emergency action plan:
- Stop watering immediately and remove the plant from its pot.
- Gently brush away the soil and inspect the roots and stem. Healthy roots are firm and white or tan.
- Using clean, sharp scissors, cut away any dark, mushy, or stringy roots and any soft, discolored parts of the stem.
- Let the plant sit out of soil in a dry, airy spot for a few days until all the cuts have completely calloused over.
- Replant in fresh, dry succulent mix and do not water for at least a week to encourage new root growth.
Using a terracotta pot was a game-changer for me, as its porous nature helps soil dry out much faster than plastic or ceramic.
Common Questions
How do succulents store water?
Succulents store water in their thick, fleshy leaves and sometimes in their stems and roots.
Do succulents store water in their leaves?
Yes, the leaves are the primary water reservoir for most succulent plants.
Is it different for succulents storing water in leaves indoors?
No, the water storage mechanism in the leaves remains the same for succulents kept indoors.
What are “stone succulents”?
“Stone succulents” typically refer to Lithops, which are small, rock-like plants that mimic stones for camouflage.
Can stone succulents be kept indoors?
Yes, stone succulents like Lithops can be kept indoors but require a very bright, sunny windowsill and extremely infrequent watering.
Where is the best place to store succulents?
The best place to store your succulent collection is in a bright location with plenty of indirect or direct sunlight, such as a south or east-facing windowsill.
Your Succulent Storage Success
After years of tending to my own collection, I’ve found that ideal succulent storage boils down to mimicking their natural habitat—prioritize light exposure, watering habits, and pot selection. Do succulents need to thrive? They do—when you provide bright light, mindful watering, and a well‑draining potting mix. Stick to these core principles, and your plants will stay healthy and vibrant with minimal fuss.
- Choose spots with plenty of bright, indirect sunlight daily.
- Water only when the soil is completely dry to the touch.
- Select containers with drainage holes to avoid soggy roots.
Don’t stress if your first attempts aren’t perfect—succulents are forgiving and adapt well. Explore creative ways to decorate display succulents in your home—think unique planters, vertical shelves, terrariums, or glass bowls. From pops of color with stones and moss to sculptural arrangements, your space will feel refreshed. For ongoing support and fresh ideas, browse the helpful guides on Hardy House Plants; you’ve got this, and your green thumb will only get better with practice!
Further Reading & Sources
- Complete guide to succulent care | Patch
- How to Care for Succulents (And Not Kill Them): 9 Plant Care Tips | Architectural Digest
- How to Care for Succulents: 10 Tips | HGTV
- r/succulents on Reddit: Bringing indoors for winter…but how to safely?
Lena Greenfield is a passionate horticulturist and plant care expert with over 10 years of experience cultivating and nurturing hardy house plants. With a deep understanding of both indoor and outdoor gardening, Lena shares practical advice on choosing, caring for, and maintaining resilient plants that flourish year-round. Through her knowledge and hands-on approach, Lena helps plant lovers transform their spaces into vibrant, green sanctuaries, no matter their gardening experience.
Light and Temperature