
Troubleshooting Failed Succulent Propagation: Common Issues
Published on: September 29, 2026 | Last Updated: September 29, 2026
Written By: Lena Greenfield
Have your succulent cuttings stubbornly refused to root, leaving you puzzled and a bit disheartened? I’ve been there many times in my own gardening journey, and I can assure you that pinpointing the issue is often simpler than it seems.
Drawing from my years of nurturing and propagating succulents, I’ll walk you through the typical pitfalls I’ve encountered and how to overcome them, focusing on overwatering, inadequate light, poor soil conditions, and pest problems.
Spotting the Signs of a Failing Propagation
When a succulent propagation starts to fail, it sends clear signals if you know what to look for. I’ve learned to spot these red flags early, which has saved countless baby plants on my windowsill. Catching a problem quickly is the best way to turn things around.
- Mushy or Translucent Leaves: The leaf or cutting feels soft, looks water-soaked, and may be turning a darker color. This is often the first sign of rot.
- Shriveled to a Crisp: The parent leaf or cutting is completely dried out, brittle, and paper-thin. It has used all its stored water with no roots to replenish it.
- Mold or Fuzzy Growth: You see white, grey, or green fuzzy patches on the soil or the base of the cutting. This indicates too much moisture and not enough air circulation.
- No Root Development: After several weeks, there are zero tiny pink or white roots emerging. The cutting just sits there, unchanged.
- Pups That Never Grow: A tiny new plant (a pup) appears but then stalls, refusing to get any larger.
Use this quick guide to match the symptom with the most likely cause:
- Symptom: Mushy/Translucent → Likely Cause: Overwatering/Rot
- Symptom: Shriveled/Crispy → Likely Cause: Underwatering
- Symptom: Mold/Fuzz → Likely Cause: Excessive Humidity/Poor Airflow
- Symptom: No Roots/Stalled Pup → Likely Cause: Incorrect Light or Watering Technique
The Biggest Mistake: Water Woes
Getting the water right is the trickiest part of propagation, and it’s where almost everyone, including me when I started, stumbles. You’re trying to encourage tiny roots to seek out moisture without drowning the very plant you’re trying to grow. It’s a delicate dance.
The goal is to keep the very top layer of the soil or the area around the potential roots slightly moist, not wet. I test this by gently touching the soil with my fingertip.
Watering Leaf Cuttings vs. Stem Cuttings
I treat these two types of propagations quite differently based on my experience.
- For Leaf Cuttings: I never water the leaf directly. I lay the leaves on dry soil and ignore them for a full 1-2 weeks until I see tiny roots. Only then do I start using a spray bottle to lightly mist the soil around the new roots every few days. The parent leaf provides all the water the baby plant needs initially.
- For Stem Cuttings: Since these have no water-storing leaf, they need a bit more help. After the cut end has calloused over for a few days, I place it in dry soil. I wait another 4-5 days before giving the soil a thorough soak around the stem (not on it). Then, I let the soil dry out completely before watering again.
Rescuing a Waterlogged Propagation
If you see a leaf turning to mush, don’t panic! I’ve salvaged many propagations by acting fast. The moment you see translucency or mushiness, it’s surgery time.
- Remove the Victim: Gently pick up the mushy leaf or cutting. If it’s part of a group, move it away from the others to prevent the rot from spreading.
- Assess the Damage: Feel the leaf. If the entire thing is soft and squishy, it’s often a lost cause. Toss it. If only the end that was touching the soil is rotten, you might be able to save it.
- Perform a Clean Cut: Using a clean, sharp knife or scissors, cut away all the mushy, discolored tissue. You want to see only healthy, firm flesh.
- Let it Callous Again: Place the salvaged cutting in a dry, airy spot out of direct sun. Let the fresh cut dry out and form a new callous. This can take 2-4 days.
- Restart the Process: Once calloused, place it back on fresh, dry succulent mix. This time, do not water at all until you see definite signs of new root growth.
Quick Tip: Always use a well-draining succulent mix and a pot with a drainage hole. This simple step prevents most overwatering issues before they even start. Ensure your soil is properly draining to avoid any water retention problems.
Getting the Foundation Right: Soil and Setup
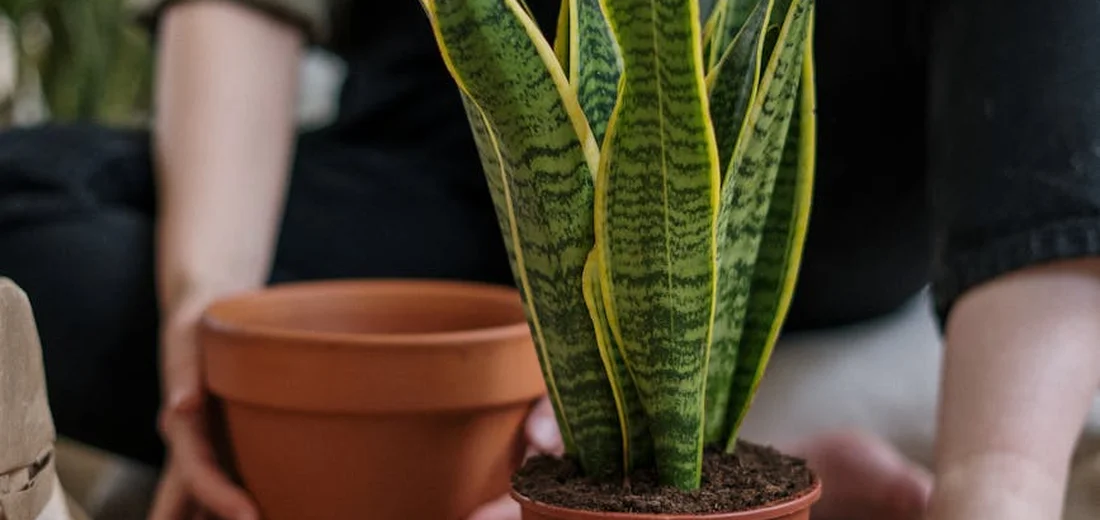
I’ve learned the hard way that the wrong foundation is the fastest way to kill a succulent before it even gets started. The single most important factor for successful propagation is using a gritty, well-draining soil mix that stays mostly dry. This is one of the most common mistakes in succulent propagation.
Regular potting soil holds far too much moisture and will cause your precious leaf or cutting to rot into a mushy mess. Over the years, I’ve perfected a simple DIY mix that gives my propagations the perfect home.
My Go-To DIY Propagation Soil Mix
You can mix this up in minutes with just two ingredients:
- Two parts potting soil
- One part perlite or coarse sand
This combination provides just enough organic matter for the future roots to grab onto while the perlite creates the airy, fast-draining environment succulents crave.
The Non-Negotiable Callusing Step
If you skip this, you’re almost guaranteeing failure. Callusing is the process where the cut end of a leaf or stem dries out and forms a protective scab. This seal prevents moisture from wicking up into the plant tissue and causing rot.
I simply lay my leaves or stem cuttings on a dry paper towel out of direct sun for 2-4 days. You’ll know it’s ready when the end is no longer shiny or moist to the touch. Planting before this happens is like putting a fresh wound into damp soil-it’s an invitation for trouble.
To Use Rooting Hormone or Not?
This is a common question, and my answer is: it depends on what you’re propagating. I rarely use rooting hormone on individual leaves because they root so readily on their own. For stem cuttings or tougher succulents, a light dab of rooting hormone can help speed up rooting. Still, leaves often root cleanly without it.
Where I find it incredibly useful is with stem cuttings, especially from older, woodier succulents or varieties that are known to be slow rooters. A quick dip in the powder can speed up the process by a week or two and give the cutting a stronger start.
For a beginner, I’d suggest skipping it at first. Master the basics of soil and callusing, as those will have a much bigger impact on your success rate than any powder can. Once you’re comfortable, you can experiment with it on more challenging specimens.
Creating the Perfect Propagation Environment
Think of your propagation tray as a tiny, specialized nursery. It needs the right balance of light, warmth, and air to coax out those first delicate roots.
Bright, indirect light is your absolute best friend here. A spot a few feet back from a south or east-facing window is perfect. Direct sun will quickly scorch and dehydrate your vulnerable propagations, while too little light will cause them to stretch out weakly.
Warmth encourages root growth. I aim for a cozy room temperature, between 65-75°F (18-24°C). Avoid drafty windowsills in winter or hot surfaces.
Good air circulation is the silent guardian against mold. A gentle breeze from an oscillating fan on a low setting, or just a well-ventilated room, can prevent a host of fungal issues. Stagnant, stuffy air is a breeding ground for problems.
Fighting Off Fungus and Pests
Even in the best setups, tiny invaders can appear. Catching them early is the key to saving your propagations.
Powdery mildew looks like a dusting of white flour on your leaves and thrives in humid, still air. For succulents, look for powdery patches on new growth and undersides of leaves to identify it early. My first line of defense is to improve air flow. If it persists, a spray made from one part milk to two parts water can be surprisingly effective.
Fungus gnats are those tiny black flies that love damp soil. Letting the soil surface dry out completely between any waterings is the best way to break their life cycle. This rule is especially helpful for getting rid of fungus gnats around indoor plants and succulents. You can also make a sticky trap by putting yellow sticky notes near the soil.
Mealybugs look like tiny bits of white cotton. If I spot them, I dip a cotton swab in rubbing alcohol and dab them directly. This kills them on contact without harming the succulent. For indoor succulents, the best way to eliminate mealybugs in succulents is to repeat the alcohol treatment weekly for a few cycles. Quarantine new plants and inspect regularly to prevent reinfestation.
A light dusting of cinnamon on the soil surface is a great household antifungal that I use preventatively. It smells nice and helps keep mold at bay.
How to Salvage a Propagation That’s Going Wrong
Don’t toss that sad-looking leaf or stem just yet! I’ve rescued more propagations than I can count by taking a deep breath and starting over with a clean slate. Seeing a cutting turn to mush can be disheartening, but it’s often a simple fix.
Your Step-by-Step Rescue Plan
Follow these steps to give your plant a second chance at life.
- Diagnose the Problem
Gently pick up the cutting. Is it soft, translucent, and smelly? That’s rot. Is it shriveled, crispy, and brittle? That’s severe dehydration. Identifying the issue tells you what to fix.
- Perform “Surgery”
Using a clean, sharp knife or scissors, cut away any rotten or completely dead tissue. I always cut back to a point where the stem or leaf base looks perfectly healthy and firm. For a dehydrated leaf, you can sometimes just leave it be, but a stem cutting needs a fresh cut.
- Re-Callus the Wound
This is the most critical step people rush. Place your freshly cut propagation in a dry, shaded spot with good air circulation. Leave it completely alone for 3-5 days, or until the cut end has formed a hard, dry, scab-like layer. Do not skip this!
- Try Again with Improved Conditions
Once callused, place it on top of fresh, dry succulent soil. Do not water. Keep it in bright, indirect light and wait for roots to appear before you even think about giving it a drink. This patience is what separates successful propagators from the rest. For rare succulents, that careful approach is even more important to preserve their unique traits. With consistent conditions, you can propagate them successfully.
Proactive Steps for Propagation Success
An ounce of prevention is worth a pound of cure, especially with succulents. Setting up your propagations correctly from day one is the single biggest factor in your success rate. After years of trial and error, this is the simple checklist I follow every single time.
Your Propagation Success Checklist
- Always use a clean, sharp tool to take your cuttings. I wipe my pruning shears with rubbing alcohol to prevent introducing bacteria.
- Let every single cut end form a firm callus before it touches any soil. No exceptions.
- Start your leaves and cuttings in a shallow tray filled with a fast-draining mix. I make my own with half potting soil and half perlite for maximum drainage.
- Place your propagation station in a spot with plenty of bright, indirect light. A windowsill that gets morning sun is my favorite.
- Resist the urge to water until you see tiny pink or white roots searching for moisture. When you do water, just mist the soil around the new roots, don’t soak the entire tray.
- Be patient and let nature do its work. Some varieties root in weeks, others take months. Trust the process.
FAQs
How much humidity do succulent cuttings need?
Succulent cuttings need low humidity to prevent rot and encourage healthy rooting.
How to prevent etiolation during propagation?
Provide bright, indirect light to avoid stretching and ensure compact growth.
Which succulents are hardest to propagate from leaf cuttings?
Succulents with very small or thin leaves, like some Crassula species, are often more challenging to propagate from leaf cuttings. When learning how to propagate succulents from leaves and cuttings, it’s important to choose the right species.
Can you propagate succulents from offsets and stem cuttings?
Yes, offsets and stem cuttings are reliable methods for propagating many succulent varieties.
Why do roots fail to form in succulent cuttings?
Roots may fail to develop due to overwatering, lack of callusing, or inadequate light conditions.
How to treat fungal infections in propagating succulents?
Treat fungal infections by increasing air flow and applying antifungal treatments like diluted milk or cinnamon.
Your Propagation Journey
Remember, the secret to successful succulent propagation boils down to three simple things: giving them the right amount of water, plenty of bright light, and a whole lot of patience. Stick to these fundamentals, and you’ll see far more success, especially when you transplant and propagate succulents.
- Water only when the soil is bone dry.
- Provide bright, indirect light for several hours a day.
- Resist the urge to fuss over them constantly.
Don’t be discouraged by a few failed leaves; every gardener has a propagation graveyard! I’ve learned more from my failures than my successes. Trust the process, apply what you’ve learned here, and go give your plant babies another try-you’ve got this.
Further Reading & Sources
- Common Problems with Succulent Propagation – Succulents Box
- How to Propagate Succulents from Leaves and Cuttings | Succulents and Sunshine
- How to Grow Succulents from Leaves and Stem Cuttings
- 8 Common Mistakes to Avoid When Propagating Succulent Leaves | THE NEXT GARDENER – Thenextgardener
Lena Greenfield is a passionate horticulturist and plant care expert with over 10 years of experience cultivating and nurturing hardy house plants. With a deep understanding of both indoor and outdoor gardening, Lena shares practical advice on choosing, caring for, and maintaining resilient plants that flourish year-round. Through her knowledge and hands-on approach, Lena helps plant lovers transform their spaces into vibrant, green sanctuaries, no matter their gardening experience.
Propagation Methods