Create a Succulent Bonsai: Simple Step-by-Step Guide
Published on: March 13, 2026 | Last Updated: March 13, 2026
Written By: Lena Greenfield
Thinking about making a succulent bonsai but worried it’s too tricky? I’ve been growing these miniature wonders for years, and I can assure you it’s a joyful project that anyone can tackle.
In this guide, I’ll walk you through picking the right succulent, gathering essential supplies, step-by-step planting, shaping techniques, and long-term care to help your creation thrive.
Picking the Perfect Succulent for Your Bonsai
Choosing the right succulent is the most exciting part, and I’ve learned through trial and error that not all succulents are created equal for this art form. You want a plant with a natural tendency to develop a thick, woody stem that mimics a miniature tree. This is the foundation of your bonsai’s character.
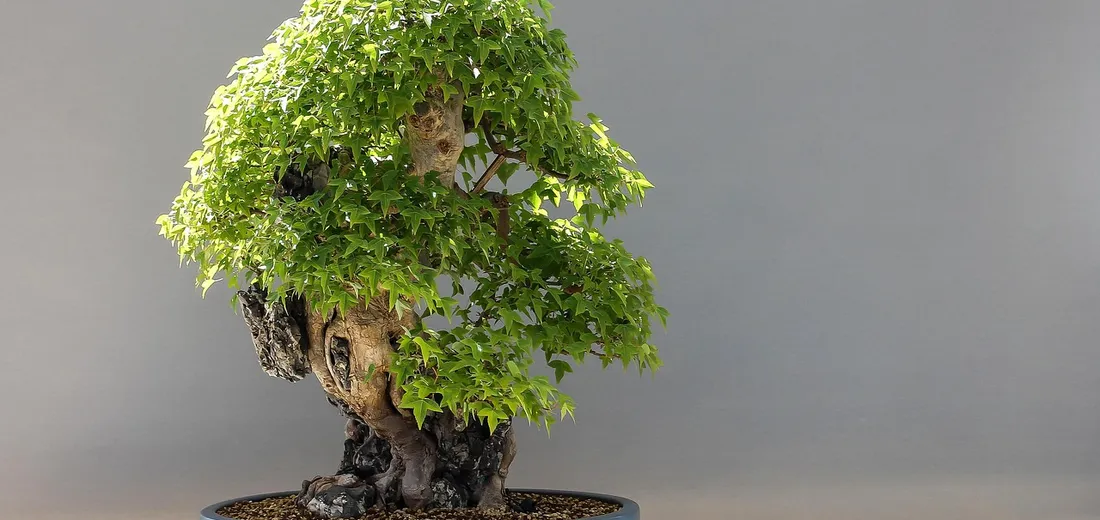
My absolute favorite, and the one I recommend for beginners, is the trusty Jade Plant (Crassula ovata). I’ve had my main jade bonsai for over eight years, and its trunk is now wonderfully gnarled. It’s incredibly forgiving and thrives with the pruning and shaping that bonsai requires.
Top Succulent Choices for Bonsai
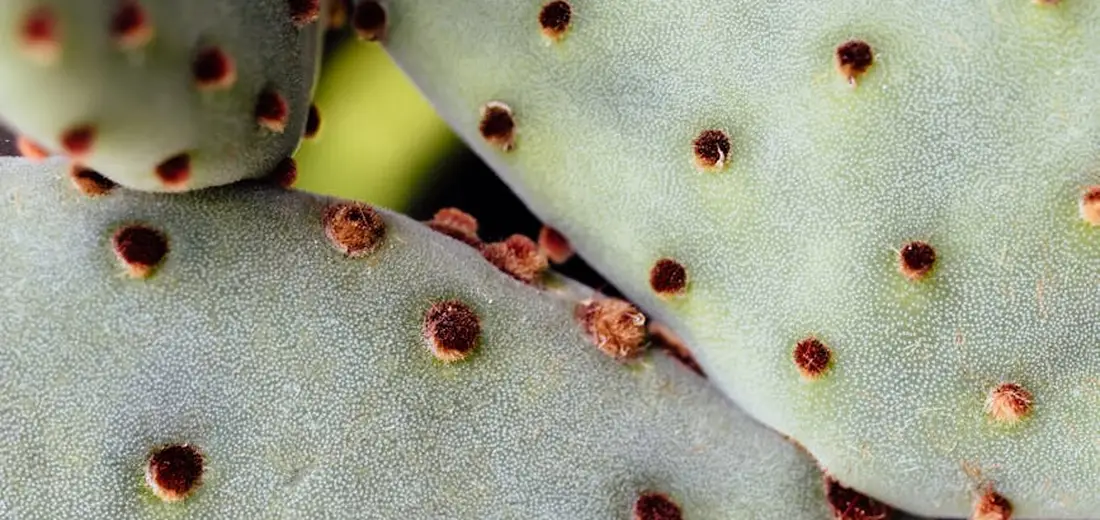
- Jade Plant (Crassula ovata): The classic choice. It has a thick trunk, responds well to pruning, and its green leaves take on a red tinge with enough sunlight.
- Elephant Bush (Portulacaria afra): Often called the “Miniature Jade,” this is another superstar. Its smaller leaves create a more refined, tree-like appearance quickly.
- Adenium (Desert Rose): For a more dramatic look, the Desert Rose has a spectacular, swollen caudex (trunk). Be aware it needs more warmth and is slightly less forgiving than jade.
- Some Senecios: Plants like the Blue Chalk Sticks can be trained into a beautiful, cascading bonsai style.
When you’re at the nursery, look for a plant that already has a main stem you can imagine as a trunk. Avoid tall, spindly plants and instead hunt for one with a lower, sturdier center. A little character from the start goes a long way!
Gathering Your Bonsai Creation Toolkit
You don’t need a professional bonsai shop to get started. I assembled my first kit from items I had around the house and a quick trip to the garden center. Having the right tools on hand makes the process smooth and enjoyable, not frustrating.
The most important investment is your soil. Regular potting soil holds too much moisture and will cause your succulent’s roots to rot. You need a mix that drains incredibly fast. So, do succulents really need special soil? Here’s the truth.
Essential Items for Your Project
- Bonsai Pot with Drainage: Shallow and wide is the classic look. Ensure it has at least one large drainage hole.
- Sharp, Clean Scissors or Bonsai Shears: Clean cuts heal faster and prevent disease. I disinfect mine with rubbing alcohol before each use.
- Well-Draining Soil Mix: I make my own with two parts potting soil, one part perlite, and one part coarse sand. A pre-made cactus & succulent mix also works well.
- Chopstick or Skewer: This is my secret weapon for gently loosening root balls and poking soil into tight spaces around the roots.
- Small Gravel or Lava Rock: Used for the top-dressing. It looks beautiful, keeps the soil in place, and helps prevent moisture from sitting at the base of the plant.
Quick Tip: If you don’t have bonsai shears, a pair of sharp, clean kitchen scissors will work just fine for your first project. The goal is to get started and learn, not to have a perfect professional setup right away.
Once you have your plant and your toolkit assembled, you’re ready for the real fun to begin. The next steps are where you’ll get your hands dirty and start to see your miniature tree take shape.
The Step-by-Step Tutorial: Creating Your Succulent Bonsai

Step 1: Preparing the Plant and Root Ball
Start with a healthy, well-established succulent like a Jade plant or a small Portulacaria afra. I always choose a plant that has a thicker, more woody stem, as this gives you a better foundation for that classic bonsai look. Gently tip the nursery pot and coax the plant out, being careful not to snap any leaves.
Your first real task is to work on the root ball. Use your fingers or a small tool, like a chopstick, to gently tease apart the roots. You’re aiming to loosen the tight, circular pattern they’ve grown into the pot without causing major damage. I trim away about one-third of the root mass, focusing on any long, straggly roots. This feels scary, but it encourages a compact root system that fits perfectly in your shallow bonsai pot.
Step 2: Potting in Your Bonsai Container
Select a pot with excellent drainage holes—this is non-negotiable for succulents. Cover the holes with a mesh screen to keep the soil from washing out while still allowing water to flow freely. Add a shallow layer of your fast-draining bonsai soil mix to the bottom of the pot. To ensure proper drainage, test the soil by watering lightly and watching that water exits quickly without pooling. If it lingers, adjust the mix or pot size before planting.
Position your succulent in the pot, spreading the trimmed roots out evenly. Hold the plant at the height you want it and slowly add more soil around the roots, gently tamping it down to remove large air pockets. The final soil level should be just below the pot’s rim. I don’t water it right away; I let the plant and any disturbed roots settle for about wait a week before watering its first drink. After that settling period, give it a light watering to rehydrate the roots. Then water sparingly, allowing the soil to dry between waterings.
Step 3: The Art of Pruning and Shaping
This is where your vision comes to life. Look at your plant and decide on a basic shape. Using clean, sharp scissors or bonsai shears, I start by removing any dead or discolored leaves and branches. This clears the clutter and lets you see the plant’s structure.
To encourage a tree-like form, prune branches that are growing straight up or down. Make your cuts just above a leaf node, as this is where new growth will emerge, helping you build a fuller canopy. Don’t be afraid to step back and look at your plant from all angles as you go. It’s a living sculpture, not a race.
Step 4: Applying Wire for Training
Wiring is the secret to creating those graceful, windswept bonsai shapes. Use annealed copper or aluminum wire specifically made for bonsai. The wire should be about one-third the thickness of the branch you want to train. Anchor the end of the wire securely in the soil at the base of the trunk.
Wrap the wire around the branch at a 45-degree angle. The coils should be snug enough to hold the branch but not so tight that they bite into the bark or restrict growth. Once the wire is on, you can gently bend the branch into your desired position. Move slowly and listen to the plant-if you hear a slight crack, you’ve gone too far. The wire usually stays on for a few months until the branch “sets” in its new shape.
Styling Your Miniature Masterpiece
Now for the truly creative part. Bonsai styling is about creating a miniature illusion of an ancient, weathered tree growing in nature. You have several classic styles to draw inspiration from.
- Formal Upright (Chokkan): The trunk grows perfectly straight and tapered, with symmetrical branches. This is a classic, powerful look.
- Informal Upright (Moyogi): The trunk has gentle, flowing curves, but the apex remains directly over the base. This is one of the most popular and naturalistic styles.
- Slanting (Shakan): The entire trunk leans to one side, as if shaped by a constant wind. The roots on the opposite side should appear strong to anchor it.
- Cascade (Kengai): The trunk and foliage grow downward, cascading over the side of the pot. This style requires a tall pot to balance the dramatic look.
Look at pictures of old trees in nature for inspiration. Your goal is to tell a story with your plant, creating a sense of age, resilience, and beauty in a tiny, potted form. Don’t worry about getting it perfect on the first try. The best part about succulent bonsai is that they grow, giving you endless opportunities to refine your design over time. For a home display get creative with how you present them—terrariums, geometric planters, or moss bowls can showcase their character. Mix heights and textures on a shelf or table to decorate succulents in your living space.
Caring for Your New Succulent Bonsai

This is where the real magic happens, turning your creation into a long-term companion. I’ve found that the key to a thriving succulent bonsai is mimicking the brief, heavy rains and long dry spells of their natural habitat.
Watering: The Soak and Dry Method
Forget watering on a schedule. I always check the soil first. Stick your finger about an inch into the soil; if it’s completely dry, it’s time for a deep drink.
- Take your bonsai to the sink.
- Water slowly and evenly until water runs freely out of the drainage holes.
- Let it drain completely before returning it to its saucer or display spot.
In my sunny window, this often means watering every 10-14 days, but it will change with the seasons.
Lighting: Finding the Sweet Spot
Your succulent bonsai craves bright, indirect light. A south or east-facing window is perfect. Watch the leaves for clues; if they start stretching out or looking pale, they’re begging for more light. If you see brown, scorched spots, it’s getting a bit too much direct, harsh sun. A simple sheer curtain can work wonders to diffuse intense afternoon light.
Soil and Fertilizing: Less is More
That fast-draining soil mix we used is non-negotiable for health. I only fertilize my succulent bonsais during their active growing season, which is typically spring and summer. It’s important to know when and how to fertilize succulents for maximum growth.
- Use a balanced, water-soluble fertilizer diluted to half-strength.
- Apply it once a month at most.
- Stop fertilizing entirely in fall and winter when growth slows.
Over-fertilizing can cause weak, leggy growth and even burn the delicate roots.
Troubleshooting Common Bonsai Problems
Even with the best care, you might hit a small snag. Don’t panic! I’ve dealt with all of these issues myself.
Leaves are Mushy and Yellowing (Overwatering)
This is the most common issue I see. If the leaves feel soft and squishy and the soil is damp, you’ve likely overwatered. Act quickly to save your plant.
- Stop watering immediately.
- Gently remove the plant from its pot and brush away the wet soil.
- Inspect the roots and trim away any that are black, slimy, or rotten with sterile scissors.
- Let the root ball air dry for a day or two before repotting in fresh, dry soil.
- Wait at least a week before watering again.
Pests: Mealybugs and Fungus Gnats
Succulents can attract tiny, uninvited guests.
- Mealybugs: Look for tiny, white, cotton-like fluffs in the leaf crevices. I dab them directly with a cotton swab dipped in isopropyl alcohol. It’s a simple, effective fix I’ve used for years.
- Fungus Gnats: These small, flying bugs love damp soil. Letting the soil dry out completely between waterings is the best prevention. For an active infestation, sticky yellow traps work well for the adults.
Leggy, Stretched-Out Growth (Etiolation)
If your bonsai starts looking sparse and stretched, it’s not getting enough light. The stems are literally reaching for more sun. The stretched growth won’t reverse, but you can fix the plant’s shape. Simply prune back the leggy stems, and move the bonsai to a brighter location. The new growth will be compact and healthy.
Propagating Your Success: Growing More Bonsai
One of my favorite parts of this hobby is creating new little plants from the one I’ve already nurtured. Propagating your succulent bonsai is incredibly rewarding and lets you share your creations with friends. I’ve filled my windowsills with baby plants from my original jade tree, and it never gets old.
Your Three Best Methods for Propagation
Not all propagation techniques are created equal, especially when you’re working with a plant you’ve carefully trained. Here are the methods I use most often, from easiest to most advanced. If you’re propagating pothos plants, this complete step-by-step guide will walk you through every stage.
Method 1: The Easiest Route – Propagating from Offsets
Some succulents, like many Haworthias or Aloes, will happily produce their own baby plants, called “pups” or offsets. This is the simplest method because the plant does most of the work for you. Once the pups are formed, gently separate and transplant them into small pots with a well-draining mix. With proper light and sparse watering, you can propagate succulents successfully using this method.
- Wait until the offset is about one-third the size of the mother plant.
- Gently remove the entire plant from its pot to get a clear view of the roots.
- Using a clean, sharp knife, carefully cut the offset away, making sure it has some roots of its own.
- Let the cut end dry and callous over for a day or two, then pot it in a fresh, well-draining mix.
This is the most foolproof method and gives you a head-start on a new, well-proportioned plant.
Method 2: The Classic Approach – Stem Cuttings
This is my go-to method for plants like Jade or Portulacaria afra. You’re essentially taking a clipping to grow a whole new tree. I find this method gives me the most control over the new plant’s shape from the very beginning.
- Using sterile pruners, snip a healthy stem that’s at least a few inches long.
- Remove the leaves from the bottom inch or two of the stem. This is where your new roots will form.
- Set the cutting aside in a shady spot and let the cut end dry out completely. This can take anywhere from a couple of days to a week. A hardened callus is your best defense against rot.
- Once calloused, stick the bare stem into slightly moist succulent soil. Do not water it for the first week to encourage root growth.
I keep a small spray bottle to lightly mist the soil around my cuttings once a week until I see new growth.
Method 3: The Patient Gardener’s Project – Leaf Cuttings
This method requires the most patience but is magical to watch. You can grow an entire new plant from a single leaf! It works beautifully with Echeveria, Sedum, and Graptopetalum.
- Gently twist a healthy, plump leaf from the main stem. You want a clean break with no part of the leaf left on the stem.
- Place the leaves on top of dry soil, in a spot with bright, indirect light. Do not bury them.
- Forget about them. Seriously. Ignore the urge to water. In a few weeks, you’ll see tiny pink roots and a miniature rosette emerging from the base of the leaf.
- Once the mother leaf has withered and the new plant is established, you can treat it like a mature succulent.
Quick Tip: Leaf propagation teaches you the art of patience, a vital skill for any bonsai artist.
My Top Tips for Propagation Success
- Timing is Everything: Spring and early summer are the best times to propagate, as plants are in their active growth phase.
- Always use clean tools to prevent spreading disease. I wipe my pruners with rubbing alcohol between cuts.
- Resist the temptation to overwater your baby plants. Their tiny roots are very susceptible to rot. Slightly dry is always better than soggy.
- Don’t be discouraged by failure. Not every leaf or cutting will make it. I’ve had my share of casualties, and it’s all part of the learning process.
FAQs
How often should I water my succulent bonsai?
Water only when the soil is completely dry, using the soak and dry method.
Can I use a regular deep pot for my succulent bonsai?
A shallow pot is recommended to achieve the classic bonsai aesthetic and prevent excess moisture.
When is the best time to prune my succulent bonsai?
Prune during the plant’s active growing season, typically in the spring and summer.
Why are the leaves on my bonsai falling off?
Leaf drop is often a sign of overwatering or a sudden change in the plant’s environment.
Can I keep my succulent bonsai indoors?
Yes, it can thrive indoors in a spot that receives plenty of bright, indirect light.
How long does it take to shape a succulent bonsai?
Shaping is a gradual process that can take several months to years as the plant grows and matures.
Your Miniature Masterpiece Awaits
Crafting a succulent bonsai comes down to selecting a suitable plant, using gritty soil, and patiently shaping it over time. The core process is simple: choose a woody-stemmed succulent like a jade plant, plant it in a shallow pot with fast-draining soil, and use gentle wiring to guide its growth. For beginners, a step-by-step repot succulents guide can help you translate this into action. It breaks the process into easy-to-follow stages you can practice at home.
Now you have the knowledge—go get your hands dirty! I started my first succulent bonsai with a single jade plant clipping, and watching it develop into a tiny tree has been one of my most rewarding plant journeys. That same curiosity translates beautifully to creating a mini succulent garden in small spaces. A few compact pots or a shallow tray can turn any windowsill into a living, green feature. Trust your instincts, enjoy the creative process, and give your new miniature garden the love it needs to thrive.
Further Reading & Sources
- DIY Succulent Bonsai – Debra Lee Baldwin
- Succulent Bonsai trees – Bonsai Empire
- How to Grow and Care for Succulents as Bonsais | Succulents Box
- Succulent Bonsai: Capturing the Spirit of the Desert – Brooklyn Botanic Garden
Lena Greenfield is a passionate horticulturist and plant care expert with over 10 years of experience cultivating and nurturing hardy house plants. With a deep understanding of both indoor and outdoor gardening, Lena shares practical advice on choosing, caring for, and maintaining resilient plants that flourish year-round. Through her knowledge and hands-on approach, Lena helps plant lovers transform their spaces into vibrant, green sanctuaries, no matter their gardening experience.
Pruning Techniques