Why Is My Succulent Turning Yellow or Drooping? Let’s Fix It
You’ve noticed your succulent’s leaves turning yellow or drooping sadly, and you’re worried you’re doing something wrong. I’ve been there too, and after years of growing dozens of succulents, I can tell you these problems are almost always fixable.
In this guide, I’ll walk you through the most common issues, based on my own trial and error, so you can get your plant back to perfect health. We’ll cover yellowing leaves, drooping stems, squishy or wrinkled leaves, stretching plants, and pesky pests.
Decoding Yellowing Leaves on Your Succulent
Seeing a yellow leaf on your plump little succulent can send any plant parent into a panic. I’ve been there many times. The good news is that yellow is just your plant’s way of talking, and with a little detective work, you can figure out exactly what it needs. The key is to look at which leaves are yellowing and what they feel like.
When Yellow Means Too Much Water
This is the most common culprit, especially for beginners. Succulents store water in their leaves, so overwatering makes them literally burst at the seams. To avoid this common watering mistake, let the soil dry out completely between waterings.
- The leaves will feel soft, mushy, and translucent, almost like a water balloon. They might fall off with the gentlest touch.
- Yellowing usually starts on the lower, older leaves first and works its way up the plant.
- The stem may also feel soft or look blackened.
From my own over-enthusiastic watering can, I learned this the hard way. If you suspect overwatering, stop watering immediately and check the roots. Gently remove the plant from its pot. Healthy roots are white and firm. If they are brown, black, and slimy, you’ve got root rot.
When Yellow Means Thirst or Hunger
It’s less common, but succulents can also yellow from being too dry or lacking nutrients. The signs are very different from overwatering.
- The yellow leaves will feel thin, papery, and crispy, not mushy. They might start to curl inward.
- You’ll often see this paired with lots of aerial roots (little pinkish roots growing from the stem above the soil).
- The entire plant may look shriveled and deflated.
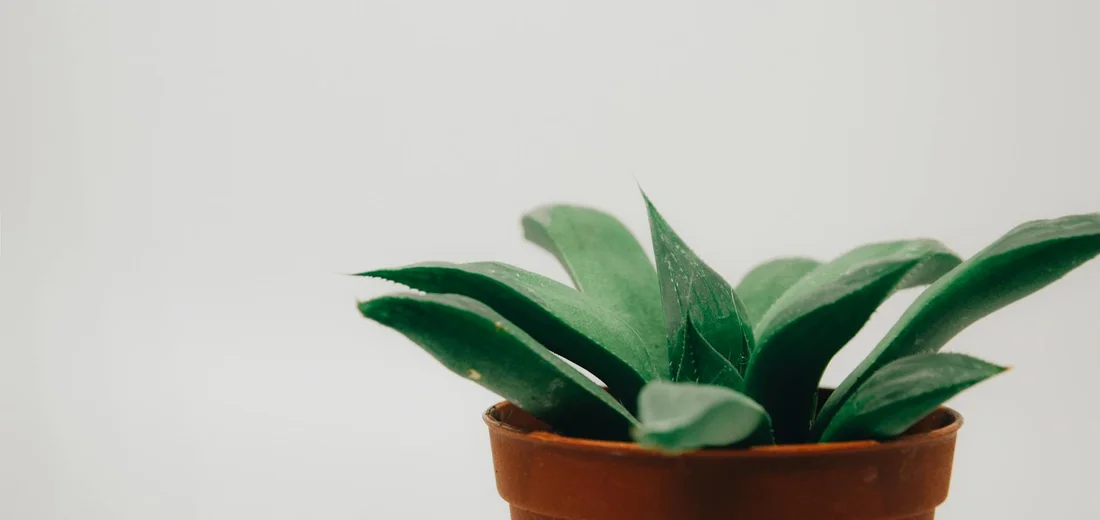
I had a Haworthia that turned a pale, sickly yellow from sheer thirst after I forgot about it for a month during a busy work period. The fix is a good, deep soak. Submerge the entire pot in a bowl of water for about 30 minutes, then let it drain completely. You should see it plump back up in a few days. If the problem persists over multiple watering cycles, it might need a light feeding with a succulent-specific fertilizer.
Understanding Why Succulent Leaves Droop or Fall Off
A droopy succulent that’s losing leaves is crying out for help. It’s not a lost cause! I’ve nursed many back to health by identifying these two main issues. Understanding why succulents lose leaves helps you prevent it. We’ll break down prevention steps so you can act early.
Is Your Succulent Reaching for the Sun?
Succulents are sun worshippers. When they don’t get enough light, they start to stretch out in a process called etiolation, which causes them to become leggy.
- The stem grows tall and leggy, with large spaces between the leaves.
- The leaves themselves will droop downwards, pointing toward the floor instead of reaching for the sky.
- The plant’s color may fade, becoming pale green or even white.
I see this all the time with succulents kept on office desks or in north-facing windows. Gradually move your plant to a brighter spot, like a south or east-facing window, to prevent further stretching. The existing growth won’t fix itself, but the new growth on top will be compact and happy.
The Droop of Despair: Root Rot
If your succulent is drooping and the leaves are falling off en masse, you are likely dealing with advanced root rot. This is an emergency situation. Understanding the root rot causes and treatment is essential to saving your succulent. We’ll cover the main causes and how to treat them to stop the rot and help recovery.
The plant will feel unstable in the soil, and the stem at the base will be soft, mushy, and discolored. The leaves might detach with just a slight wiggle. I had to perform “surgery” on a beloved Echeveria that showed these exact symptoms.
- Remove the plant from its pot and gently wash all the soil from the roots.
- Using sterile scissors, cut away any dark, mushy roots and any soft, blackened parts of the stem. Keep cutting until you see only healthy, firm, white or green tissue.
- Let the plant dry out and callous over for a few days in a shady spot.
- Replant it in fresh, dry succulent soil and do not water for at least a week.
Quick Tip: Always use a pot with a drainage hole. It’s the single best thing you can do to prevent overwatering and root rot.
Common Succulent Pests and How to Evict Them
My Battle with Mealybugs
I first spotted mealybugs as tiny, white, cotton-like fluffs nestled in the leaf joints of my favorite echeveria. These pests suck the sap right out of your plant, leaving it weak and stunted. My go-to solution is a simple cotton swab dipped in isopropyl alcohol—just dab it directly on the bug. It dissolves their waxy coating on contact. For a larger infestation, I mix one part 70% isopropyl alcohol with three parts water in a spray bottle and thoroughly mist the plant, getting into every nook. It’s one of the best ways to eliminate mealybugs from succulents and indoor plants.
Always check your plant again a week later, as these pests are masters of hide-and-seek.
Stopping an Aphid Invasion
Aphids love fresh, tender growth and can appear in clusters of green, black, or even red. A strong blast of water from your sink or hose can knock a surprising number of aphids right off the plant. For a more stubborn crowd, I use the same insecticidal soap spray I keep for other pests. You can make your own by mixing a teaspoon of mild liquid soap (like Castile) with a liter of water. Spray it directly on the aphids, making sure to coat the undersides of leaves.
I’ve found that catching them early is the key to an easy victory.
The Right Foundation: Soil and Potting Mix
I learned the importance of soil the hard way after nearly losing a jade plant to root rot. Regular potting soil holds far too much moisture and will suffocate succulent roots, leading to a quick demise. You need a gritty, fast-draining mix that mimics their natural, arid habitats. I now make my own blend using two parts potting soil, one part coarse sand, and one part perlite or pumice. This creates air pockets and allows water to flow through almost instantly.
A store-bought cactus and succulent mix is a great, convenient alternative if you don’t want to mix your own.
Choosing the Perfect Pot and Drainage
The pot you choose is just as critical as the soil you put in it. My number one, non-negotiable rule is this: always, always use a pot with a drainage hole. I’ve tried the “layer of rocks at the bottom” trick, and it simply does not work; it actually raises the water table inside the pot, making root rot more likely. Terracotta pots are my personal favorite because the porous clay allows the soil to dry out evenly and quickly.
When repotting, choose a new home that’s only an inch or two wider than the root ball-succulents like being a little snug.
Finding the Sweet Spot for Light and Temperature
Reading the Leaves: Signs of Light Stress
Your succulent’s leaves are its personal diary, and they’ll tell you exactly how they feel about their current spot. If your plant is stretching out, with large gaps between the leaves, it’s literally reaching for more light. I call this the “succulent lean,” and I’ve had to move many an Echeveria because of it. They aren’t getting enough energy to grow compactly. To fix this and prevent future etiolation, give the plant brighter light (ideally 6–8+ hours daily) or supplement with a grow light. Rotate the plant regularly so new growth stays compact.
On the flip side, leaves that look bleached, washed-out, or have crispy brown or red patches are shouting that they’re getting too much direct, harsh sun. Think of it like a sunburn; it damages the plant’s ability to photosynthesize effectively. I learned this the hard way with a beautiful Sedum that I placed on a south-facing windowsill in July-it never fully recovered its vibrant color.
The goal is that lovely, even coloration and tight rosette form. A quick tip: Rotate your succulents a quarter turn every time you water to ensure every side gets its fair share of light.
Other Common Succulent Troubles
Dealing with Brown, Scorched Leaves
Seeing crispy, brown spots on your plant’s leaves can be alarming, but it’s usually a simple fix. This is almost always a classic case of sunburn, and the damaged parts of the leaf will not turn green again. The plant has essentially sacrificed that tissue.
Your first step is to move the plant to a location with bright, but indirect, light. A spot a few feet back from a sunny window is perfect. You can gently snap off the fully scorched leaves to improve the plant’s appearance and prevent any potential rot from setting in on the damaged tissue. Don’t worry, as long as the core of the plant is healthy, it will push out new, perfectly adapted growth.
What White Fuzz or Mold on the Soil Means
Spotting a white, fuzzy substance on your soil surface can be startling. Take a close look. If it’s a thin, web-like layer, it’s likely harmless mycelium from the soil’s organic matter breaking down. I see this often in bagged potting mixes, and it’s not a direct threat to your plant.
However, if the fuzz is thicker, puffier, and especially if you see tiny insects, you might be dealing with a mold issue spurred on by too much moisture. This is a clear signal that your watering habits or soil drainage need adjusting. Scoop off the top layer of affected soil and replace it with fresh, dry mix. Increase air circulation around the plant, and let the soil dry out completely before you even think about watering again.
Addressing Fertilizer Burn and Salt Buildup
Succulents are light feeders, and over-enthusiastic fertilizing can do more harm than good. Fertilizer burn shows up as brown, crispy leaf tips or edges, almost mimicking sunburn but often concentrated on the newer growth. I’ve done this myself by using a standard houseplant fertilizer at full strength—a big mistake. For a quick, practical overview, check our best fertilizer for succulents complete guide. It explains how to choose a sparse feeding schedule and which formulas work best for different varieties.
The salts in fertilizer can also build up as a white or crusty layer on the soil surface or the outside of a terracotta pot. This salt buildup can prevent your plant from absorbing water properly, essentially leaving it thirsty in damp soil. The solution is to flush the soil thoroughly. Take your plant to the sink and run lukewarm water through the soil for a few minutes, letting it drain freely out the bottom. Do this every few months as part of your regular care routine.
FAQs
How often should I water my succulent?
Water only when the soil is completely dry, typically every 1-2 weeks depending on the environment.
Can I use tap water for my succulents?
Yes, but it’s best to use filtered or rainwater to avoid mineral buildup that can harm the plant.
What is the ideal temperature range for succulents?
Most succulents thrive in temperatures between 60-80°F (15-27°C) and can tolerate slight drops at night.
How do I propagate succulents from leaves?
Gently twist a healthy leaf off, let it callous for a few days, then place it on well-draining soil until roots form.
Why is my succulent growing aerial roots?
Aerial roots often indicate the plant is seeking more moisture or support, usually due to underwatering or instability. In succulents, this can mean the plant is trying to access moisture from the air or secure itself in loose potting mix.
Are there any succulents that can tolerate low light?
Yes, varieties like snake plant or zebra haworthia can handle lower light but may grow slower and lose color.
Keep Your Succulents Thriving
In my years of nurturing succulents, I’ve found that consistent attention to watering habits, light exposure, and soil quality solves most common issues. Stick to these core practices, and your plants will show their gratitude with vibrant growth.
- Check soil dryness before watering-wait until it’s completely dry.
- Ensure your succulents get several hours of bright, indirect sunlight daily.
- Use a well-draining potting mix to prevent root rot and other moisture-related problems.
You’re now equipped to tackle any succulent challenge that comes your way. Trust your instincts, apply these tips, and enjoy the rewarding journey of plant care—your green companions are counting on you! For newly propagated succulents, follow this aftercare guide to help them root, settle in, and thrive. We’ll cover watering, light, and acclimation to set them up for long-term health.
Further Reading & Sources
- Succulent Leaf Symptoms And Treatments – Succulents Box
- 11 Reasons Your Succulents Are Turning Yellow, Brown, or Black
- Succulent troubleshooting – Succ It Up Buttercup
- Why is my succulent turning yellow and mushy? – Bloomscape
Lena Greenfield is a passionate horticulturist and plant care expert with over 10 years of experience cultivating and nurturing hardy house plants. With a deep understanding of both indoor and outdoor gardening, Lena shares practical advice on choosing, caring for, and maintaining resilient plants that flourish year-round. Through her knowledge and hands-on approach, Lena helps plant lovers transform their spaces into vibrant, green sanctuaries, no matter their gardening experience.
Stress Symptoms