How to Build a Stunning Succulent Rock Garden
Are you dreaming of a low-maintenance, eye-catching succulent rock garden but feeling unsure about where to begin? I’ve been there myself, and after creating dozens of these beautiful setups, I can tell you it’s a rewarding project that anyone can tackle.
In this article, I’ll guide you through choosing the right succulents, picking and placing rocks, preparing your soil, step-by-step planting, and easy care tips to keep your garden thriving.
Why a Succulent Rock Garden is a Perfect Project
In my years of filling my home with greenery, a succulent rock garden has become one of my favorite ways to create a living sculpture. This setup combines beautiful, drought-tolerant plants with stones to create a miniature landscape that thrives on neglect.
You get a trifecta of benefits: it uses very little water, requires minimal upkeep, and lets you play artist with nature. I love that I can go on vacation and not worry about my rock garden wilting.
- Low Water Use: Succulents store water in their leaves, and the rocky environment prevents soggy soil, mimicking their natural desert habitats.
- Low Maintenance: Once established, this garden needs very little from you beyond the occasional admiring glance and a deep drink every few weeks.
- Artistic Expression: Arranging the stones and choosing different succulent shapes and colors is like painting with living things. It’s incredibly satisfying.
The partnership between rocks and succulents is a match made in gardening heaven. The rocks provide critical drainage and anchor the plants, while the succulents soften the hardscape with their unique textures and forms. They simply look like they belong together.
You are not limited to your backyard! I’ve built stunning tabletop versions for my sunny kitchen windowsill and larger, statement pieces for my patio. Whether you have a sprawling balcony or just a bright corner indoors, you can create your own little rock and plant oasis.
Gathering Your Essential Supplies
Getting your materials together first makes the whole process smooth and fun. Here’s the exact checklist I use for every rock garden I build.
Materials Checklist
- A shallow, wide container with a drainage hole (a ceramic bowl, a terra cotta pot, or even a repurposed colander works).
- A variety of succulents (I like to mix textures-try a spiky haworthia, a rosette-forming echeveria, and a trailing string of pearls).
- Well-draining succulent & cactus potting mix.
- Coarse sand or poultry grit.
- Perlite or pumice.
- An assortment of rocks, pebbles, and gravel in different sizes.
- Horticultural charcoal (optional, but great for keeping the soil fresh in closed containers).
Crafting the Perfect Soil Mix
This is the most important step for long-term success. Regular potting soil holds too much moisture and will cause your succulents to rot. I always mix two parts succulent soil with one part perlite and one part coarse sand. This creates an airy, gritty environment that lets water flow through quickly, giving the roots the “dry feet” they crave. Fix common succulent soil problems like poor drainage and compacted soil are resolved by this gritty blend.
Choosing Your Rocks and Gravel
Rocks are not just for looks; they are functional. A layer of large pebbles or lava rock at the bottom of the container aids drainage. Smaller, decorative top-dressing gravel helps keep the soil in place, prevents moisture from pooling around the plant’s base, and deters pests. I love using a mix of white quartz pebbles and reddish lava rock for a beautiful color contrast.
Simple Tool List
- A small trowel or spoon for scooping soil.
- Chopsticks are perfect for making planting holes and gently positioning tiny plants.
- A soft-bristled brush to dust soil off your succulents’ leaves after planting.
- A watering can with a narrow spout for precise watering.
Choosing the Best Succulents for Your Rock Garden
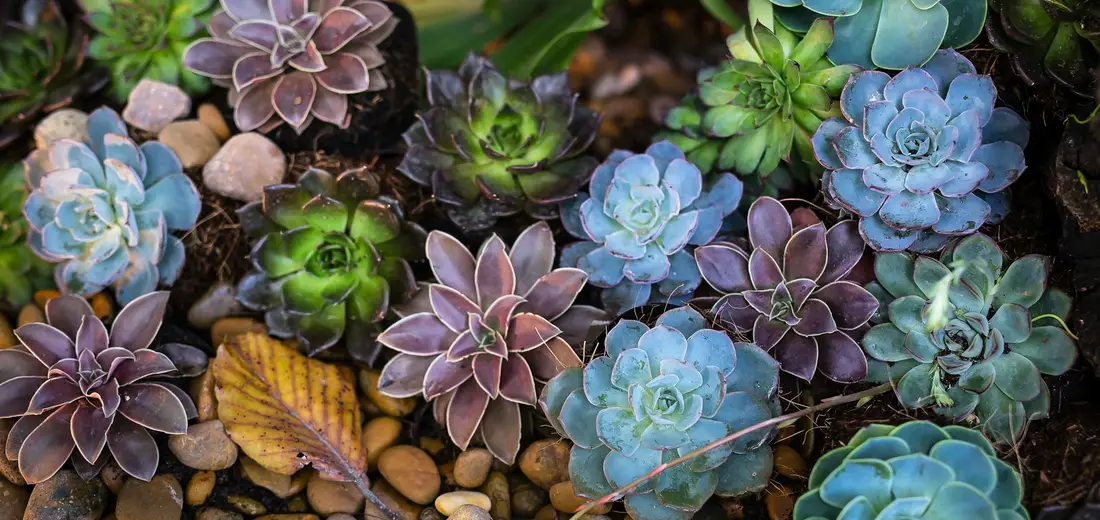
Picking the right plants is the most fun part of the process, and from my years of gardening, I’ve found some varieties are absolute rock stars in this setting. Focus on sun-loving, drought-tolerant succulents that naturally thrive in gritty, well-draining soil.
Top Performing Sun-Lovers
- Sedum (Stonecrop): These are my go-to for filling space. They spread beautifully, come in colors from blue-green to burgundy, and are incredibly tough.
- Sempervivum (Hens-and-Chicks): Perfect for cold climates, they form tight rosettes and multiply by producing adorable “chicks” around the mother plant.
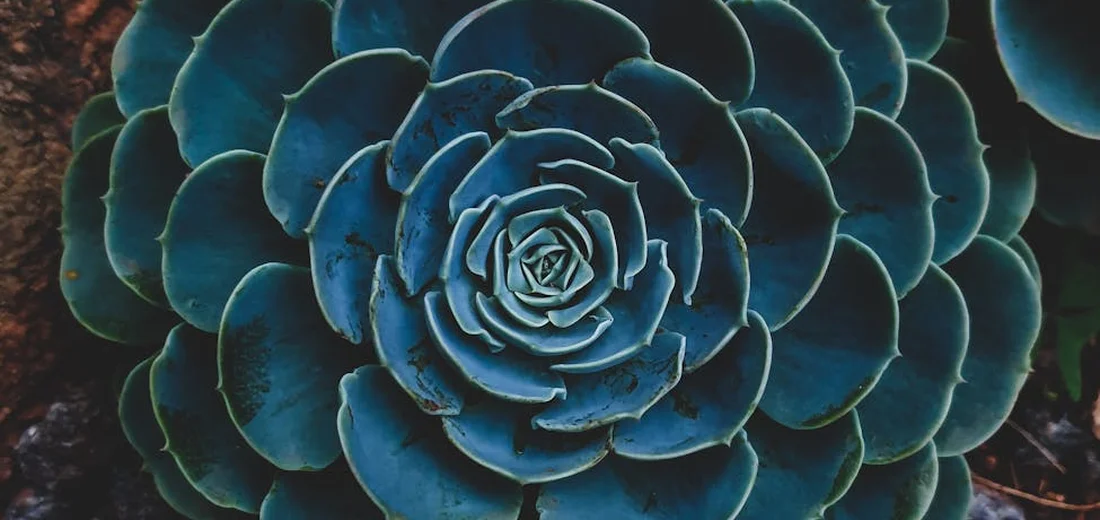
- Echeveria: If you want a classic, sculptural look, echeverias are it. Their rose-like shapes add fantastic form and come in pale blues, pinks, and purples.
- Agave: For a bold, architectural statement, a small agave variety is unbeatable. They provide a strong focal point that anchors the entire garden.
Mixing Textures, Colors, and Sizes
Think of your garden like a textural painting. I love combining the fine, carpet-like foliage of some sedums with the bold, chunky leaves of an echeveria for a dynamic contrast. Play with colors, too-silver-blue succulents pop against reddish lava rock, while purple-toned varieties add depth. For more ideas, check out best outdoor succulents for your garden.
- Use taller plants like some agaves or aloes as “thrillers” in the back or center.
- Let medium-sized echeverias and sempervivum act as “fillers.”
- Allow low-growing sedums to spill over rocks as “spillers.”
Frost Hardy Options for Cooler Climates
If you live where winters get chilly, you need plants that can handle it. Many Sempervivum and Sedum species are remarkably cold-hardy, surviving temperatures well below freezing. I’ve had sempervivum completely buried in snow only to emerge perfectly green in the spring. Always check the plant tag for its specific hardiness zone.
Unique Options for the Adventurous
For a truly unique look, consider Lithops, also called “living stones.” These fascinating plants mimic the pebbles they grow amongst. Fair warning, they require even less water than most succulents and are best for growers who enjoy a hands-off approach.
Designing Your Garden Layout
A great rock garden feels natural, not just like plants plopped between stones. Good design creates a miniature landscape that draws the eye and feels cohesive.
Principles of Rock Arrangement
When I arrange rocks, I pretend I’m building a tiny mountain range. Bury at least one-third of each rock’s height into the soil to make it look like it’s been there for ages, not just placed on top. Create height and visual flow by grouping a few larger rocks together, then letting smaller stones trail away from them. This mimics how rocks naturally settle in the wild.
Designing for Different Locations
- On a Slope: A slope is ideal because it provides natural drainage. Arrange rocks horizontally across the slope to slow water runoff and prevent soil erosion. Plant your succulents in the pockets of soil behind these rocks.
- In a Raised Bed: This gives you total control over the soil mix. Build your rock formations from the center outward, creating a peak. This looks fantastic from all viewing angles.
- In Front of a Dark House: Use light-colored rocks like limestone or white quartz to create a bright, striking contrast against a dark exterior. Pair them with silvery or brightly colored succulents that will stand out.
Using Edging to Define the Space
A simple edge can make your rock garden look polished and intentional. I often use larger, flat rocks laid end-to-end or even metal landscape edging sunk into the ground to create a clean border. This also helps keep aggressive lawn grass from creeping into your succulent haven.
Sketch a Simple Plan First
Before you move a single rock, grab a pencil and paper. Take five minutes to sketch a rough overhead view of your space, noting where you want your largest rocks, pathways, and plant groupings. I can’t tell you how many times this simple step has saved me from heavy lifting and rearranging later. It’s your roadmap to a stunning result.
A Step-by-Step Guide to Planting
-
Step 1: Prepare the site and ensure proper drainage.
I always start by clearing the area of any weeds or debris. For container gardens, drill extra drainage holes if there aren’t enough; I’ve learned the hard way that one small hole is a recipe for soggy, rotten roots. If you’re planting directly in the ground, you can mix some gritty sand or fine gravel into the native soil to improve drainage instantly.
-
Step 2: Add your soil mix and arrange the main stones.
Fill your container or bed with a pre-mixed succulent & cactus soil, or make your own with two parts potting soil to one part perlite and one part coarse sand. Next, place your largest, most interesting rocks first, burying them about a third of the way into the soil to make them look natural and anchored. I like to create a slight mound in the center, as this adds visual height and further improves water runoff.
-
Step 3: Unpack your succulents and plan their placement.
Gently remove your succulents from their nursery pots. Take a moment to arrange them on top of the soil while they’re still in their pots; this lets you play with different compositions without stressing the plants. I group plants with similar light and water needs together and always consider their mature size, leaving a few inches between each one for growth. This hands-on setup is a perfect starting point for a beginner’s step-by-step guide to repotting succulents. In the following steps, you’ll learn how to choose the right pot, prepare the soil, and transplant safely.
-
Step 4: Execute planting tips for minimal root disturbance.
Using a small trowel or even a large spoon, dig a hole just big enough for the root ball. Tease the roots apart gently if they’re tightly wound, but don’t worry about getting every bit of old soil off-the goal is a smooth transition, not a perfect root cleaning. Place the plant in the hole and firm the soil around the base to support it upright.
-
Step 5: Add final decorative gravel or pebbles.
This is my favorite finishing touch. A top dressing of small, colorful pebbles or crushed gravel not only makes your garden look professionally designed but also keeps soil in place, reduces weed growth, and prevents the lower leaves of your succulents from staying damp. Spread a layer about half an inch to an inch thick, carefully around each plant’s stem.
Caring for Your New Succulent Rock Garden
-
Establish a clear watering schedule for new and established plants.
Your watering can is your best friend and your worst enemy. For the first few weeks after planting, water lightly every 4-5 days to help the roots settle; after that, switch to the “soak and dry” method, where you drench the soil completely and then let it dry out fully before watering again. In the winter, my established gardens might only need a drink once a month.
-
Reiterate light needs (full sun for most) and how to monitor them.
Most succulents crave at least six hours of bright, indirect light or direct morning sun. Watch your plants for signs they’re getting too much sun (bleached, crispy leaves) or not enough (stretching out and leaning toward the light). I rotate my potted gardens every few weeks to ensure every side gets its moment in the sun.
-
Outline a simple annual maintenance routine (weeding, checking for pests).
A little upkeep goes a long way. Every spring, I do a full check-up: I pull any tiny weeds that have snuck in, look for common pests like mealybugs (a cotton swab dipped in rubbing alcohol takes care of them), and refresh the top layer of decorative gravel if it has thinned out. It’s a quick, satisfying weekend task.
-
Discuss seasonal considerations, especially for outdoor gardens.
If your garden lives outside, the seasons dictate your care. In the heat of summer, you might need to water a bit more frequently, but always check the soil first— it should be your guide, not the calendar. With succulents, you water by season—more in hot summers when the soil dries, and sparingly in cold winters. For winter, the biggest threat is frost; if a freeze is forecast, I throw an old bedsheet or frost cloth over my outdoor succulents to protect them from the cold.
Creating an Indoor Succulent Rock Garden
You can absolutely bring the serene beauty of a rock garden inside. The key is adapting the core principles of drainage and scale to work within the cozy confines of a container. I’ve built dozens of these over the years, and the ones that thrive the longest are always the ones that follow these simple, indoor-friendly rules.
Light and Drainage: Your Non-Negotiable Duo
Forget about water and fertilizer for a moment. Your indoor rock garden lives or dies by light and drainage. I learned this the hard way when my first attempt turned into a soggy, stretched-out mess. Let’s break down why these two factors are so critical.
Let There Be (Lots of) Light
Succulents are sun worshippers. A bright, sunny windowsill is their happy place. A south or west-facing window is your best bet. If your plants start stretching out and reaching for the light, that’s a sure sign they need more of it. Rotate your pot a quarter turn every week to ensure every side gets its time in the sun. This prevents lopsided growth and keeps your arrangement looking full.
Drainage is Everything
This is the most important rule for indoor succulent success. Your container must have a drainage hole. There are no exceptions. Succulents despise wet feet, and a pot without a drain is a guaranteed death sentence. I always add an extra layer of drainage at the bottom of my pots. A one-inch layer of coarse gravel or lava rocks underneath your soil mix works wonders to keep roots high and dry.
Perfect Plants for Your Pot
Choosing the right plants makes all the difference. You want small, slow-growing varieties that will play nicely together and won’t outgrow their home in a single season.
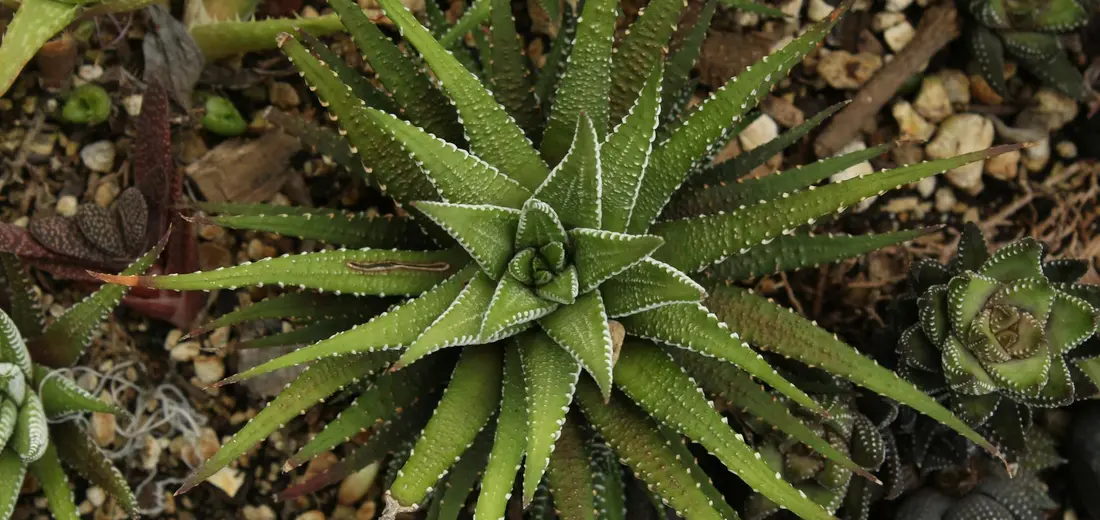
- Haworthia: These are my go-to for lower-light situations. Their striking, striped foliage adds incredible texture.
- Echeveria: The classic rosette shape provides a beautiful focal point. Look for smaller types like ‘Lola’ or ‘Perle von Nürnberg’.
- Sedum: ‘Little Missy’ or other miniature sedums are fantastic for spilling over the edge of the pot.
- Gasteria: Their tongue-shaped leaves are tough and add an interesting, architectural element.
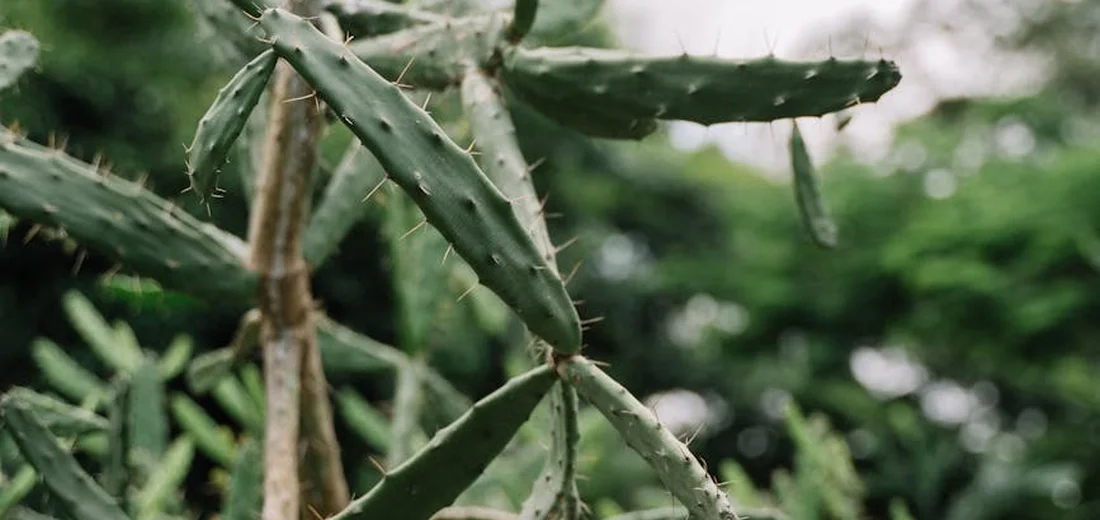
- Small Cacti: Bunny Ears cactus (Opuntia microdasys) or a cluster of Ball cactus (Parodia) introduce fantastic shape and personality.
Planting Your Miniature Masterpiece
Assembling your indoor garden is the fun part. Follow these steps for a setup that encourages healthy growth from the start.
- Start with a shallow, wide pot. This gives roots space to spread horizontally, just like they would in nature.
- Fill the bottom with your drainage layer of gravel or lava rock.
- Use a specialized succulent and cactus potting mix. I never use regular potting soil, as it holds too much moisture.
- Arrange your plants while they’re still in their nursery pots first. Play with the layout until you’re happy.
- Plant them, then gently fill in the gaps with your soil mix. A helpful trick is to use a chopstick to gently work soil around the tiny roots without damaging them.
- Top the soil with a thin layer of small, decorative pebbles or aquarium gravel. This finishes the look and helps prevent soil from splashing onto the plants when you water.
Wait about five to seven days before you give your new garden its first drink. This pause allows any tiny root injuries to callus over, preventing rot. From there, you can settle into a routine of watering only when the soil is completely dry. Stick your finger in the soil; if it feels dry an inch down, it’s time for a thorough soak.
FAQs
What is a succulent rock garden?
A succulent rock garden is a low-maintenance landscape that combines drought-tolerant succulents with stones to create a natural, artistic display. With thoughtful design, you can create a stunning succulent garden. Mix colors, textures, and heights for a cohesive, low-maintenance display.
What are succulent rock garden ideas?
Popular ideas include designing miniature landscapes on slopes, in raised beds, or using contrasting rocks and plants for visual interest.
How to have a succulent rock garden indoors?
Use a shallow container with drainage holes, place it in a sunny spot, and select small, slow-growing succulents suited for indoor conditions. Learn how to keep succulents small, compact, and healthy for indoor arrangements.
How do you design a succulent rock garden in front of a black house?
Incorporate light-colored rocks like limestone and brightly colored or silvery succulents to create a striking contrast against the dark exterior.
Where can I buy a succulent rock garden?
You can purchase pre-made kits online or at garden centers, but building your own with supplies from local nurseries is often more customizable and rewarding.
How can I create a succulent rock garden in California?
Focus on excellent drainage and select sun-loving, drought-resistant succulents that thrive in California’s warm, dry climate. In full sun conditions, prioritize heat-tolerant succulents in full sun like agave and yucca that perform well under prolonged sun and heat. These choices help ensure robust growth and color in hot summers.
Your Rock Garden Awaits
Building a stunning succulent rock garden boils down to three simple things: Start with a gritty, fast-draining soil mix, arrange your rocks to create natural-looking contours, and choose sun-loving succulents that thrive in your climate. This outdoor succulent care guide will help you grow thriving plants in your garden with practical tips on watering, sun, and seasonal care.
- Use a well-draining soil mix.
- Arrange rocks for natural contours.
- Select climate-appropriate succulents.
I’ve built dozens of these gardens, and the most rewarding part is watching them mature and fill in over time. Don’t be afraid to get your hands dirty and experiment-your plants are tougher than they look, and you have everything you need to create something beautiful.
Further Reading & Sources
- Rock Garden Succulents | Mountain Crest Gardens®
- Outdoor Succulent Garden with Cold Hardy Succulents | Succulents and Sunshine
- Succulents In A Rock Garden: Planting A Rock Garden With Succulents | Gardening Know How
- How to Design a Succulent Rock Garden – OC Succulents
Lena Greenfield is a passionate horticulturist and plant care expert with over 10 years of experience cultivating and nurturing hardy house plants. With a deep understanding of both indoor and outdoor gardening, Lena shares practical advice on choosing, caring for, and maintaining resilient plants that flourish year-round. Through her knowledge and hands-on approach, Lena helps plant lovers transform their spaces into vibrant, green sanctuaries, no matter their gardening experience.
DIY Projects