How to Paint Succulents: Techniques and Plant Safety
Thinking about adding a creative touch to your succulents with paint? I’ve painted dozens of succulents over the years and know it’s a wonderful way to express yourself, as long as you keep your plant’s health in mind.
In this guide, I’ll share my personal tips and cover safe paint choices, step-by-step application methods, plant protection strategies, and aftercare advice to ensure your project is both beautiful and harmless.
Understanding the Risks: Is Painting Succulents Safe?
I’ve seen painted succulents pop up in big-box stores, and I get the appeal-they look like something from a fantasy novel. But from my years of growing, I always advise caution. Painting a living plant is purely a cosmetic, temporary decoration that comes with real risks to its long-term health. The paint can block sunlight, preventing photosynthesis, and clog the plant’s pores, called stomata, which it uses to breathe.
Choosing Plant-Safe Art Supplies
If you decide to proceed for a special event or craft project, your choice of paint is the most critical factor for the plant’s survival. I’ve experimented with a few types on single leaves I was propagating.
- Water-Based Acrylic Paint: This is my top choice when diluted heavily with water. It’s the least toxic option and can be thinned to a near-transparent wash.
- Food Coloring or Liquid Watercolor: These are very plant-friendly and will naturally fade over time with watering. They give a subtle, tinted effect.
- Specialty Plant & Pet-Safe Paints: Some art supply stores carry paints specifically marketed as non-toxic for animals and plants-these are your safest bet.
Avoid oil-based paints, spray paints, and any product with harsh chemical solvents at all costs. These will almost certainly suffocate and kill your succulent. The fumes alone can be damaging. To avoid killing your succulents, follow essential care tips such as proper watering and avoiding harsh chemicals. Sticking to these practices helps them thrive.
Gathering Your Materials: A Safe and Effective Palette
Having everything ready before you start makes the process smoother and safer for your green friend. I always lay out a dedicated workspace, like an old baking sheet, to contain any mess.
Your Painting Toolkit
- Your chosen plant-safe paint (water-based acrylic, food coloring, etc.)
- Small paintbrushes with soft, fine tips for detail work
- A small cup of clean water for rinsing brushes and diluting paint
- Paper towels or a soft cloth for quick clean-ups
- A clear, matte sealant spray designed for plants or crafts (optional, for longevity)
Quick tip: Test your paint mixture on a single leaf or a piece of paper first to check the color and consistency before applying it to the whole plant.
Protecting Your Plant
Your succulent’s well-being is the priority. Before you dip a brush, take these simple steps to shield it.
- Gently cover the soil around the base of the plant with paper or plastic wrap. This prevents paint and chemicals from leaching into the dirt and reaching the roots.
- Work in a well-ventilated area to avoid the plant (and you) inhaling any fumes from the paint or sealant.
- Use the absolute minimum amount of paint needed. A thin, light coat is always better than a thick, gloopy one.
Remember that a painted succulent will need excellent, bright indirect light to compensate for any reduced photosynthesis, and you should adjust your watering habits since the leaves can’t transpire as effectively. Different succulents have varying light needs, from bright indirect to full sun. Understanding these nuances helps you plan placement and care for painted pieces as their colors age. I treat my painted projects as short-term art pieces, enjoying them for a season before the paint naturally wears off or the plant outgrows it.
Mastering Foundational Painting Techniques
Creating Depth with Light-and-Shadow
When I first started painting succulents, my work looked flat because I ignored the light source. Pick a direction for your imaginary sun and stick with it for the entire painting. This single decision instantly creates a believable, three-dimensional form.
I practice by placing a real succulent on my desk under a lamp. Notice how the top leaves facing the light are often pale green or even blushed with color. The underside of those same leaves, and the leaves in shadow, are a much deeper, richer green. Mixing three values of your main color-a light, a mid-tone, and a dark-is the simplest way to achieve instant depth. Start with your mid-tone as a base, add the lightest color where the light hits, and use the dark tone in the recesses. If you’re using grow lights, position them to provide even illumination and maintain a steady daily light cycle to help succulents grow compact and colorful. A bright, full-spectrum grow light works well for this purpose.
Don’t forget the surface they’re sitting on! A soft, blurred shadow anchoring the plant to the pot makes it look grounded. I use a very watered-down gray or brown and drag it away from the base of the plant to suggest a natural cast shadow.
Essential Brush Strokes for Leaf-Texture
Succulent leaves aren’t flat; they have a subtle, waxy texture called a farina. To mimic this, I use a technique called dry brushing. Dip your brush in paint, then wipe most of it off on a paper towel until the bristles feel almost dry. Lightly drag the brush over the surface of a painted, dry leaf to create a soft, powdery highlight that mimics the natural dusty farina on succulents.
For the plump, rounded edges of a jade plant leaf, I use a round brush and a single, confident C-shaped stroke. Trying to paint the outline and fill it in often looks clunky. One fluid stroke that starts thin, presses down in the middle, and lifts to a point captures that plumpness perfectly.
Here are my go-to brush moves for different textures:
- Stippling: Use the very tip of a round brush to create tiny dots for a bumpy texture, perfect for certain sedums.
- Side-loading: Drag one side of a flat brush through darker paint, then swipe it along a leaf’s edge to create a natural, shadowed ridge.
- Flicking: For the sharp tip on an aloe leaf, I load my brush and make a quick, sharp flicking motion off the canvas.
Painting Different Succulent Varieties
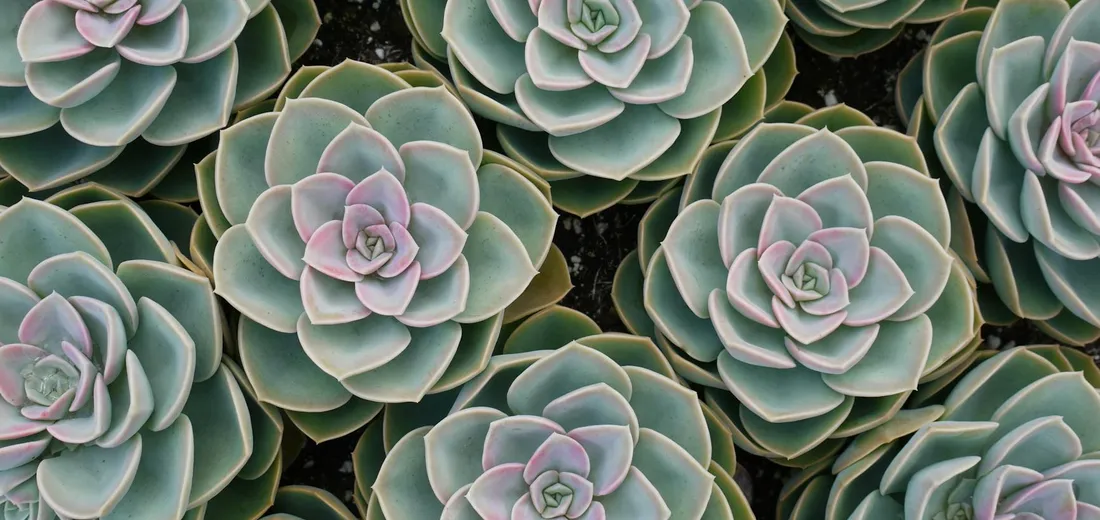
Capturing the Rosette of an Echeveria
Echeverias can seem complex, but I break them down into a simple spiral. Start by lightly sketching a spiral on your paper or canvas—this is the hidden engine of the rosette. Paint the innermost, newest leaves first, as they point almost straight up. As you work your way out along the spiral, the leaves gradually open up and flatten. That same spiral logic translates nicely to a succulent bonsai step-by-step tutorial. In the tutorial, you’ll learn pruning, wiring, and careful repotting to shape a tiny tree while preserving the rosette’s charm.
The key is to paint the leaves that are underneath first. This creates a natural overlap and makes the plant look layered and real, not like a sticker. Each leaf is like a little spoon, cupping slightly to hold water, so remember to add that gentle curve. I often mix a touch of pink, lavender, or blue into my greens for the leaf tips to capture how they blush in the sun.
Painting the Plump Leaves of a Jade Plant
Jade plants tell a story through their posture. Older, heavier stems will droop, while new growth reaches upward. Paint the main trunk and branches first to establish the plant’s gesture before you add a single leaf. This gives your jade plant a sense of weight and maturity.
Focus on the iconic red edges of the leaves. I don’t just outline them in red. Instead, I paint the leaf in a rich green, let it dry, and then use a very fine brush with a diluted red to paint a soft, slightly uneven line along the edge. This subtle red rim is the signature of a healthy, sun-kissed jade. Cluster the leaves in pairs opposite each other along the stem, and make the newer leaves at the tips a brighter, more vibrant green.
Rendering the Striped Patterns of a Haworthia
Those beautiful white stripes on a Haworthia are actually translucent “windows” that let light deep into the leaf. The trick is to paint the stripes as part of the leaf, not on top of it. Paint your entire leaf in a solid, dark green first and let it dry completely. This is your base layer.
Now, use a very fine, almost-dry brush with a creamy white or very pale green to paint the stripes. The magic happens next: take a clean, slightly damp brush and gently blur the edges of the white stripes. Blurring the stripes makes them look like they are inside the leaf, not just painted on the surface. For the raised, bumpy texture on some varieties, I use the dry brush technique again with a highlight color over the striped areas.
Quick Tip: If you mess up a stripe, don’t panic. Let it dry, then glaze over it with a thin layer of your base green to tone it down and try again. Watercolor and acrylic are very forgiving this way!
Advanced Tips for Realistic Results
Mixing a Living Succulent Color Palette
I used to make the mistake of painting succulents with a single tube of green, and my art always looked flat. The secret to a vibrant succulent is that it’s never just one color. Look closely at an Echeveria; you’ll see blues, pinks, purples, and even silvers all on one plant. Colorful succulent varieties come in pink, blue, and purple hues. Their vibrant tones—pink-edged leaves, blue-tinged bodies, and purple rosettes—can inspire your next piece.
Start with a blue-green base, like phthalo blue mixed with a little lemon yellow. For the sun-kissed edges, I dip my brush into a muted red or a touch of burnt sienna. Don’t be afraid to mix in a tiny bit of white or gray to create those soft, powdery farina effects on the leaves.
My favorite quick tip is to keep a real succulent next to your palette. Your best reference is the living plant right in front of you, not a photo on a screen. Observe how light changes the colors from the center of the rosette outwards. This mindset works well for echeveria care, helping you grow beautiful rosette varieties. Care for them by matching light, water, and soil to encourage those vibrant rosettes.
Layering for Lushness and Form
Creating that plump, three-dimensional feel is all about building layers. I begin with a light wash for the overall shape, letting it dry completely. This is your foundation.
Next, I mix a slightly darker, more saturated version of my base color. I apply this to the areas that would be in shadow, like the base of each leaf where it attaches to the stem and the spaces between tightly packed leaves. The magic happens when you let each translucent layer dry before adding the next. This creates depth instead of a muddy mess.
For the final touch, I use a nearly dry brush with a highlight color to gently skim the top edges and curves of the leaves. This technique, called dry brushing, makes the succulent look like it’s catching the light and truly pops off the page. When painting living succulent wreaths, that extra detail really makes a difference.
Avoiding Common Succulent Painting Mistakes
One of the biggest errors I see is using paint that is far too thick. Succulents have a delicate, almost watery quality to their leaves. Thin your paints with water to an ink-like consistency for the initial layers. This allows the light to pass through the paint, giving your succulent a luminous, lifelike glow instead of a heavy, opaque look. By capturing light through the layers, you reflect how succulents change with sun and season. This helps you maintain vibrant succulent colors in your artwork.
Avoid the temptation to over-blend. In my early days, I’d fuss with the paint until all my careful color variations disappeared into a uniform blob. Let your brushstrokes be visible and allow colors to sit next to each other on the paper. This creates the natural texture and variation you see in a real plant.
Quick tip: If you mess up a leaf, don’t panic! Let the paint dry completely. You can often lift off a small mistake with a clean, damp brush or gently layer a new color on top to correct it.
Finally, always remember plant safety if you’re painting a living succulent. Only use non-toxic, water-based acrylics or watercolors, and protect the soil and stem with a paper shield. I use a small piece of paper with a slit cut in it to slide around the base. Work in a well-ventilated area and clean the plant gently with a soft, damp cloth after the paint has fully dried to remove any residue. To keep succulents clean, dust them gently with a soft brush or wipe with a damp cloth to remove dust and dirt safely. This gentle cleaning approach complements careful painting and helps the plant stay healthy.
FAQs
How do you paint realistic succulent textures?
Use dry brushing and stippling to mimic the natural, waxy farina and bumpy surfaces of succulent leaves.
What are essential brush techniques for succulent leaves?
Employ C-shaped strokes for plump leaves and side-loading for shadowed edges to achieve dimensional forms.
Which color palettes work best for painting succulents?
Incorporate blues, pinks, and purples with greens to capture the vibrant, sun-kissed variations in live plants.
How do you mix greens and purples for succulents?
Start with a blue-green base and add muted reds or purples for subtle transitions on leaf edges and shadows.
How do you paint different succulent varieties (Echeveria, Sedum, Haworthia)?
Paint Echeveria in layered rosettes, use stippling for Sedum’s textured leaves, and blur stripes on Haworthia for translucency.
What common mistakes should you avoid when painting succulents?
Avoid thick paint applications and over-blending to prevent a flat, unrealistic appearance in your artwork.
Ready to Add Some Color to Your Succulent Collection?
Remember, the safest way to paint your succulents is by using a diluted, non-toxic acrylic paint applied sparingly to the leaves, ensuring you always prioritize the plant’s health by avoiding the stem and soil.
- Use only safe, water-based paints.
- Apply paint lightly and let the plant breathe.
- Keep up with your plant’s normal care routine.
From my own experience, a little creative flair can bring so much joy to your plant hobby. Give it a try with confidence, knowing you’re equipped to keep your green friends happy and healthy while you personalize your space.
Further Reading & Sources
- How to Paint Succulents in Watercolor: Step-by-Step Guide – Altenew
- How to Paint a Watercolor Succulent – CatCoq
- Tips to draw and paint easy and simple Succulent artwork
- Bright Succulents Painting Kit – Painting to Gogh
Lena Greenfield is a passionate horticulturist and plant care expert with over 10 years of experience cultivating and nurturing hardy house plants. With a deep understanding of both indoor and outdoor gardening, Lena shares practical advice on choosing, caring for, and maintaining resilient plants that flourish year-round. Through her knowledge and hands-on approach, Lena helps plant lovers transform their spaces into vibrant, green sanctuaries, no matter their gardening experience.
DIY Projects