Pruning Succulents: Your Easy Guide to Health and Beauty
Published on: March 23, 2026 | Last Updated: March 23, 2026
Written By: Lena Greenfield
Wondering how to prune your succulents without harming them? I’ve been growing succulents for over a decade, and I know that gentle trimming keeps them thriving and gorgeous. Proper pruning removes leggy or damaged parts, which actually stimulates fresh, compact growth and prevents disease.
In this article, I’ll share my hands-on methods to make pruning simple and effective. You’ll learn:
- when and why to prune for plant vitality
- the best tools to use from my own kit
- step-by-step trimming techniques
- shaping tips for visual appeal
- common mistakes and how I avoid them
Why Pruning Boosts Your Succulent’s Health and Appearance
I used to be nervous about cutting my plants, but pruning became a game-changer for my collection. Pruning isn’t just about looks; it’s a vital health check that redirects your plant’s energy to its strongest parts. Think of it like redirecting traffic away from a congested, crumbling road towards a new, smooth highway.
From a health perspective, removing dead or dying leaves is my number one priority. Following best practices for succulent care, I make a habit of removing dead leaves promptly. Regularly inspecting and removing dead leaves is a core step in keeping succulents healthy. Clearing away this decaying material eliminates hiding spots for pests like mealybugs and prevents fungal issues from taking hold. I’ve saved many an echeveria from rot by simply plucking off a soggy bottom leaf.
Pruning also encourages a fuller, more compact shape. When you snip off the top of a succulent that’s getting “leggy” (stretching for light), it signals the plant to grow new branches from the sides. This simple cut transforms a single, stretched stem into a beautiful, multi-headed specimen. I did this with a jade plant years ago, and it’s now the bushiest, most impressive plant on my shelf.
Key Health Benefits of Pruning
- Prevents disease by removing decaying matter
- Discourages pest infestations
- Stimulates new, vigorous growth
- Improves air circulation around the plant
Aesthetic Improvements You’ll See
- Creates a denser, more balanced shape
- Controls size and prevents overgrowth
- Encourages vibrant color development
- Allows you to guide the plant’s form
And here’s my favorite part: every piece you prune can become a new plant! Those leaves and stems you remove are potential baby succulents, so you’re not just maintaining one plant-you’re propagating an entire collection. It’s the most rewarding cycle in plant care.
When Is the Right Time to Prune Your Succulents?
Timing is everything with succulents. Get it right, and your plant will bounce back with incredible vigor. The absolute best time to prune is at the start of their active growing season, which is typically in the spring or early summer. This gives them the entire growing period to heal and push out new growth.
I always watch for seasonal cues. When the days get longer and I see the very tips of my succulents starting to show new, bright green growth, I know it’s time. Your plant is essentially telling you it’s ready and full of energy, making it the perfect patient for a little cosmetic surgery. Knowing their succulent dormancy periods helps me align care with seasonal growth cycles, so I prune or repot when they’re actively growing rather than resting. That rhythm keeps the plants healthier year-round.
That said, some pruning is an “anytime” task. You should always remove dead, dried-up, or mushy leaves as soon as you spot them, regardless of the season. This is basic plant hygiene, like brushing your teeth. Leaving them on invites trouble.
Signs Your Succulent is Ready for a Trim
- It’s spring or early summer (active growth period)
- The plant looks “leggy” or stretched out
- There are dead or dying leaves at the base
- It has finished flowering and the bloom stalk is drying
- The plant is overgrowing its pot or space
What about a succulent that’s etiolated (stretched) from low light? You can fix this! If your succulent has gotten tall and pale, you can “behead” it and re-plant the top, but wait to do this until you can provide it with more light, otherwise the new growth will just stretch again. I learned this the hard way with a haworthia that went from tall to taller.
For flowering succulents like some echeverias and kalanchoes, I prune the flower stalk after the blooms have faded and dried up. Cutting off the spent flower stalk encourages the plant to put its energy back into its lush leaves instead of producing seeds. Your plant will thank you with tighter, more colorful growth.
Choosing and Sterilizing Your Pruning Tools
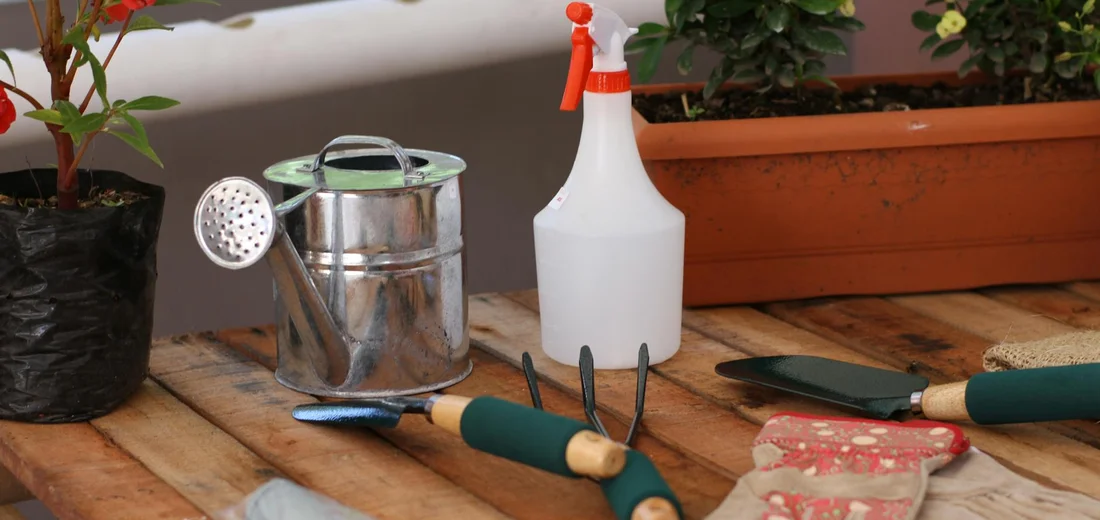
Essential Tools for the Job
You don’t need a fancy toolkit to prune your succulents, just a few key items that make the job clean and easy. I’ve found that sharp, precision tools are the single most important factor for a successful prune. Here’s what I always have on hand:
- Sharp Pruning Shears or Micro-tip Snips: These are my go-to for most stems. They give you control and make a clean cut without crushing the plant’s tissue.
- A Sharp Knife: A clean utility knife or X-Acto knife is perfect for harder-to-reach spots or for precisely removing individual leaves.
- Rubbing Alcohol & Cotton Balls: This is non-negotiable for sterilizing your tools before and after you prune.
- Gardening Gloves: Some succulents have sap that can irritate skin, and gloves just keep everything cleaner.
How to Sterilize Your Tools Properly
Sterilizing your tools is like washing your hands before cooking-it prevents spreading germs that can cause infections in your plants. I make it a habit to wipe down my tools with rubbing alcohol before I make the first cut and after I finish each plant. It only takes a moment and saves so much heartache later. Here’s my simple two-step process: How to sterilize pruning tools to prevent disease spread.
- Dip a cotton ball or pad in 70% isopropyl (rubbing) alcohol.
- Thoroughly wipe the blades of your shears, snips, or knife until they are completely wet. Let the air dry for a minute before you start cutting.
You can also soak the blades in a small container of alcohol for a few minutes for a deeper clean. This simple step is your best defense against introducing bacteria or fungus into a fresh wound on your succulent. Regular cleaning helps remove dust and dirt safely, keeping the leaves tidy between treatments. A gentle wipe with a damp cloth is often all that’s needed for routine dust removal.
A Step-by-Step Guide to Pruning Succulents
Identifying What to Trim
Knowing where to cut is just as important as knowing how to cut. I always take a good look at my plant from all angles before I start snipping. Your goal is to remove anything that detracts from the plant’s health or your desired shape. Look for these key things:
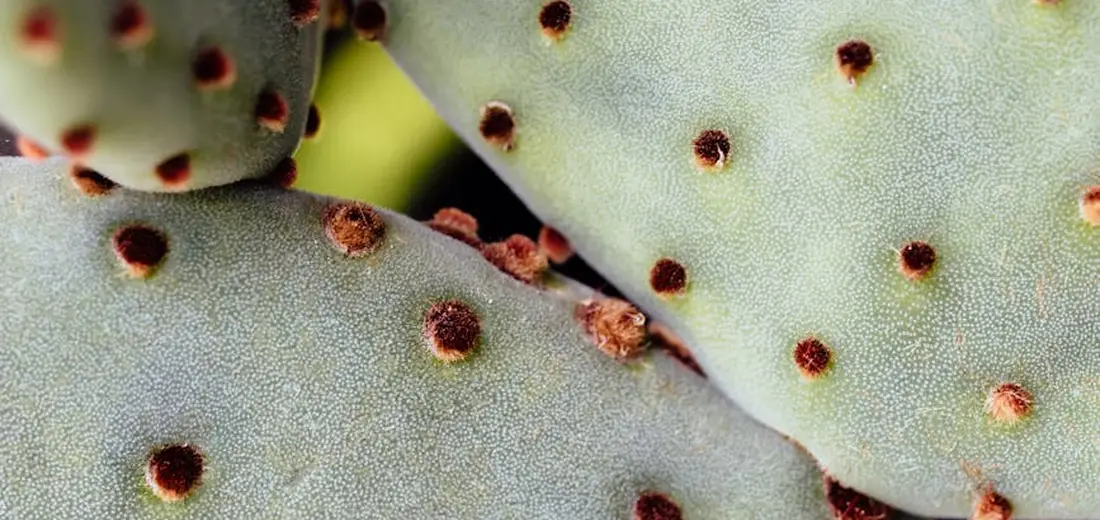
- Leggy or Etiolated Growth: These are the stretched-out stems with too much space between the leaves, usually from insufficient light.
- Dead or Dying Leaves: These are often at the bottom of the plant, dried up, discolored, or mushy.
- Damaged or Diseased Sections: Look for leaves or stems with spots, rot, or physical breaks.
- Overgrowth: Stems that are making the plant look unbalanced or are crowding its neighbors.
Quick Tip: When dealing with a leggy succulent, I plan my cuts to encourage a more compact, bushier shape going forward.
Making Clean Cuts for Healthy Healing
This is where your sterilized, sharp tools do all the work. A clean cut heals faster and is less likely to get infected. I always aim to make my cuts at a slight angle, which helps water run off the wound and prevents pooling. Follow these steps for perfect cuts every time:
- For a leggy stem, identify where you want the new growth to emerge (usually just above a leaf node).
- Position your shears or knife and make one confident, swift cut. Don’t saw back and forth.
- When removing individual leaves, gently twist them back and forth until they snap off cleanly at the base, or use your knife for a precise cut.
- For beheading a succulent (cutting off the top rosette), leave about an inch or two of stem on the base plant.
You should hear a crisp snap, not a crushing sound. A clean cut is the first step toward your plant quickly callousing over and putting out new roots or baby plants. After pruning, I leave all the cuttings in a dry, airy spot out of direct sun for a few days to let the wounds form a callus before I do anything else with them.
Special Pruning Techniques for Common Issues

Dealing with Leggy Growth and Etiolation
Leggy, stretched-out succulents are a classic sign they need more light, a condition called etiolation. I find the best fix is a simple “beheading” to give the plant a fresh, compact start. Use a clean, sharp knife or scissors to cut the stem a few inches below the last healthy, compact rosette of leaves. To help prevent this in the future, give the plant bright, consistent light and rotate it regularly. That keeps growth compact and minimizes the need for corrective beheadings.
Don’t toss that long, bare stem! You now have two plants to grow. Let the top rosette cutting callous over for a few days, then place it on dry soil to root. The original stem left in the pot will often sprout new baby plants, or “pups,” from the nodes along its length.
- Make your cut on the stem where the growth was last compact.
- Allow all cut ends to dry and form a callous before planting or watering.
- Move your repotted plants to a brighter location to prevent future stretching.
Removing Dead or Dying Leaves Safely
Those crispy, papery leaves at the base of your succulent are a normal part of its growth. Gently removing them not only makes your plant look tidier but also improves air flow and deters pests. I always check if a leaf is truly dead by giving it a soft tug; if it resists, it’s still providing energy to the plant and should be left alone.
If the leaf is ready, it will snap off cleanly with almost no pressure. For leaves that are soggy or rotting, I use tweezers to pluck them away without squeezing any mushy liquid onto the healthy plant. This is a common issue with overwatered echeverias, and quick removal can stop rot from spreading up the stem.
- Never force a leaf off-if it doesn’t come away easily, it’s not ready.
- Clean up any debris from the soil surface after leaf removal.
- Dispose of diseased or pest-ridden leaves in the trash, not the compost.
After-Pruning Care to Ensure Recovery
Watering and Fertilization After Pruning
After a major pruning, your succulent’s root system is supporting less plant mass, so its water needs drop significantly. I always wait at least a week after a heavy prune before even thinking about watering, giving any cuts plenty of time to seal up completely. When you do water, do so lightly and ensure the soil dries out thoroughly between sessions.
Hold off on fertilizer for a full month. Your plant is in recovery mode, focusing its energy on healing wounds and growing new roots, not processing a nutrient boost. I learned this the hard way after giving a freshly pruned jade plant a “treat” and watching it drop healthy leaves from the stress.
Promoting Air Circulation and Sun Exposure
Good air flow is your secret weapon for preventing fungal issues and encouraging strong new growth after pruning. I make a habit of placing my pruned plants in a spot with a gentle breeze, like near an oscillating fan on a low setting or in a well-ventilated room. This simple step dramatically speeds up the callousing process and keeps the plant’s environment fresh. Good air circulation also improves light penetration into the canopy. This helps new growth photosynthesize more evenly.
Provide bright, indirect light for the first week or two. Direct, harsh sun can scorch the plant while it’s vulnerable from its “surgery.” After that initial recovery period, you can gradually reintroduce it to its preferred sunny spot to encourage tight, colorful new growth.
Propagating from Your Prunings

One of my favorite parts of pruning is that you’re not just tidying up-you’re creating an entire new generation of plants from what you cut away. Every healthy leaf or stem you remove is a potential new succulent, turning one plant into many.
How to Propagate Leaf and Stem Cuttings
I’ve propagated hundreds of succulents over the years, and the process is pure magic. You need two different approaches for leaves versus stems. Specifically for leaves, you let the cut end callous, then lay the leaf on well-draining soil so new roots and a tiny plant can form. If you want to learn more about how to propagate succulents from leaf cuttings, keep it in bright, indirect light and mist lightly until roots appear.
Leaf Propagation: The Patient Gardener’s Method
This works beautifully for succulents like Echeveria, Sedum, and Graptopetalum.
- Gently twist a healthy, plump leaf from the stem. You want a clean break right at the base.
- Lay the leaves on a dry paper towel or tray in bright, indirect light. Do not water them.
- Wait for the wound to callous over completely. This takes a few days to a week and forms a protective scab.
- Once calloused, you can place them on top of dry succulent soil. Tiny pink roots and a miniature rosette will eventually emerge from the calloused end.
- Only begin lightly misting the soil around the new roots when the mother leaf starts to shrivel. The baby plant is feeding off the original leaf.
My top tip: Resist the urge to water too soon! The most common mistake is rotting the leaf before it even has a chance to grow. I keep my propagation tray on a sunny windowsill and ignore it for weeks.
Stem Cutting Propagation: The Fast-Track to a New Plant
This is my go-to method for leggy plants like String of Pearls or tall, stretched-out Echeverias.
- Take your pruned stem cutting, ensuring it’s a few inches long.
- Remove the lower leaves to expose a clean section of stem that you will plant.
- Let this cutting dry out for 2-5 days until the cut end is fully calloused and dry to the touch.
- Plant the calloused stem an inch deep into a small pot with fresh, dry succulent mix.
- Wait another week before giving it its first light watering. This encourages the stem to search for moisture and grow roots.
I always use terracotta pots for new cuttings because the porous clay helps prevent overwatering, which is the number one killer of baby succulents. You’ll know it’s worked when you see new, bright green growth at the top. They’re also a great choice for indoor plants. The breathable clay helps prevent root rot by letting excess moisture escape in indoor conditions.
FAQs
Can I prune my succulents if they are not growing?
It’s best to wait until the active growing season for major pruning, but you can safely remove dead or damaged leaves anytime to prevent issues.
What should I do if my succulent looks worse after pruning?
Ensure it has bright, indirect light and hold off on watering for at least a week to allow the plant to recover from the stress.
Is it possible to prune a succulent too much?
Yes, over-pruning can shock the plant, so avoid removing more than one-third of its total growth at a time to maintain its health.
How do I prune succulents with delicate stems without damaging them?
Use sterilized, sharp micro-tip snips to make precise, clean cuts that minimize tissue damage and promote faster healing.
Can I use the same tools for different types of succulents?
Yes, but always sterilize your tools with rubbing alcohol between plants to prevent cross-contamination of pests or diseases.
What is the most common mistake people make when pruning succulents?
Using dull or unsterilized tools often leads to crushed stems and infections, hindering the plant’s ability to heal properly.
Your Pruning Journey Starts Now
Remember, the golden rule of succulent pruning is to use sharp, clean tools and always make your cuts with the plant’s natural growth and health in mind. Your key takeaways are: prune for shape, remove unhealthy growth, and always let cuttings callous before propagating. Applied to rare succulents, these practices help ensure successful propagation of distinctive varieties. For rare varieties, choose healthy, disease-free cuttings and provide stable light and moisture conditions during rooting.
You now have the knowledge to give your succulents the trim they need to thrive. Go on, grab your shears with confidence—your plants are ready for their makeover, and you are more than ready to give it to them. Now you can transplant and propagate succulents successfully. Your garden will thank you.
Further Reading & Sources
- Pruning and Maintaining a Succulent Arrangement | Succulents and Sunshine
- How and When to Prune Your Succulents – Succulents Box
- How To Prune Succulents: A Guide to Pruning Succulents
- How to Prune Succulents | Plant Care Guide | Planet Desert
Lena Greenfield is a passionate horticulturist and plant care expert with over 10 years of experience cultivating and nurturing hardy house plants. With a deep understanding of both indoor and outdoor gardening, Lena shares practical advice on choosing, caring for, and maintaining resilient plants that flourish year-round. Through her knowledge and hands-on approach, Lena helps plant lovers transform their spaces into vibrant, green sanctuaries, no matter their gardening experience.
Pruning Techniques